

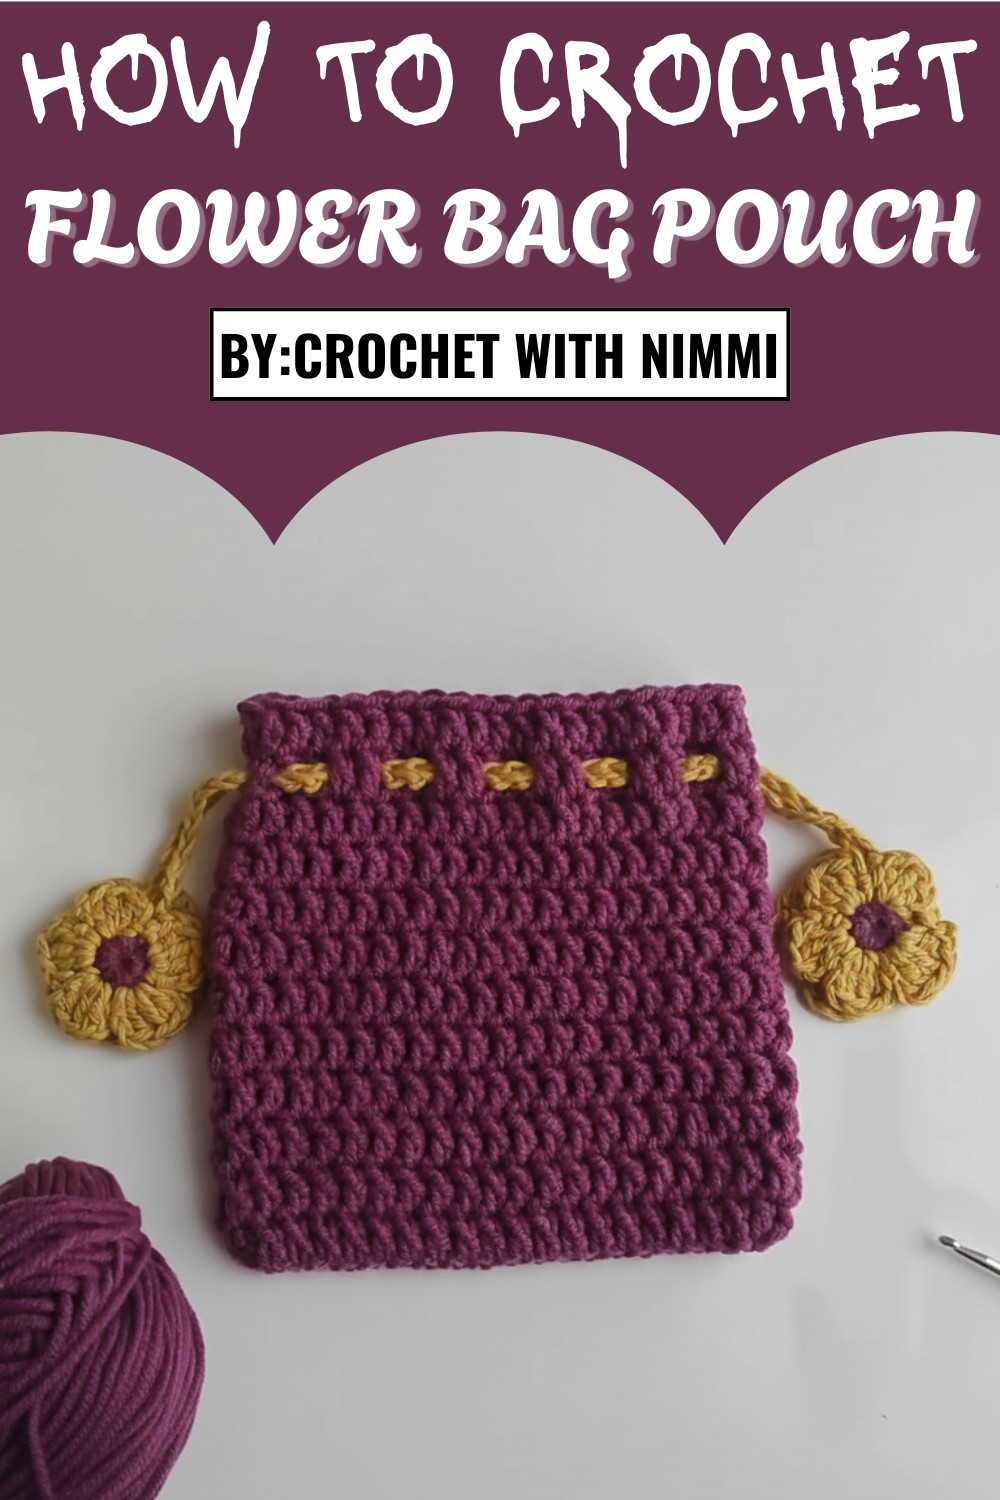
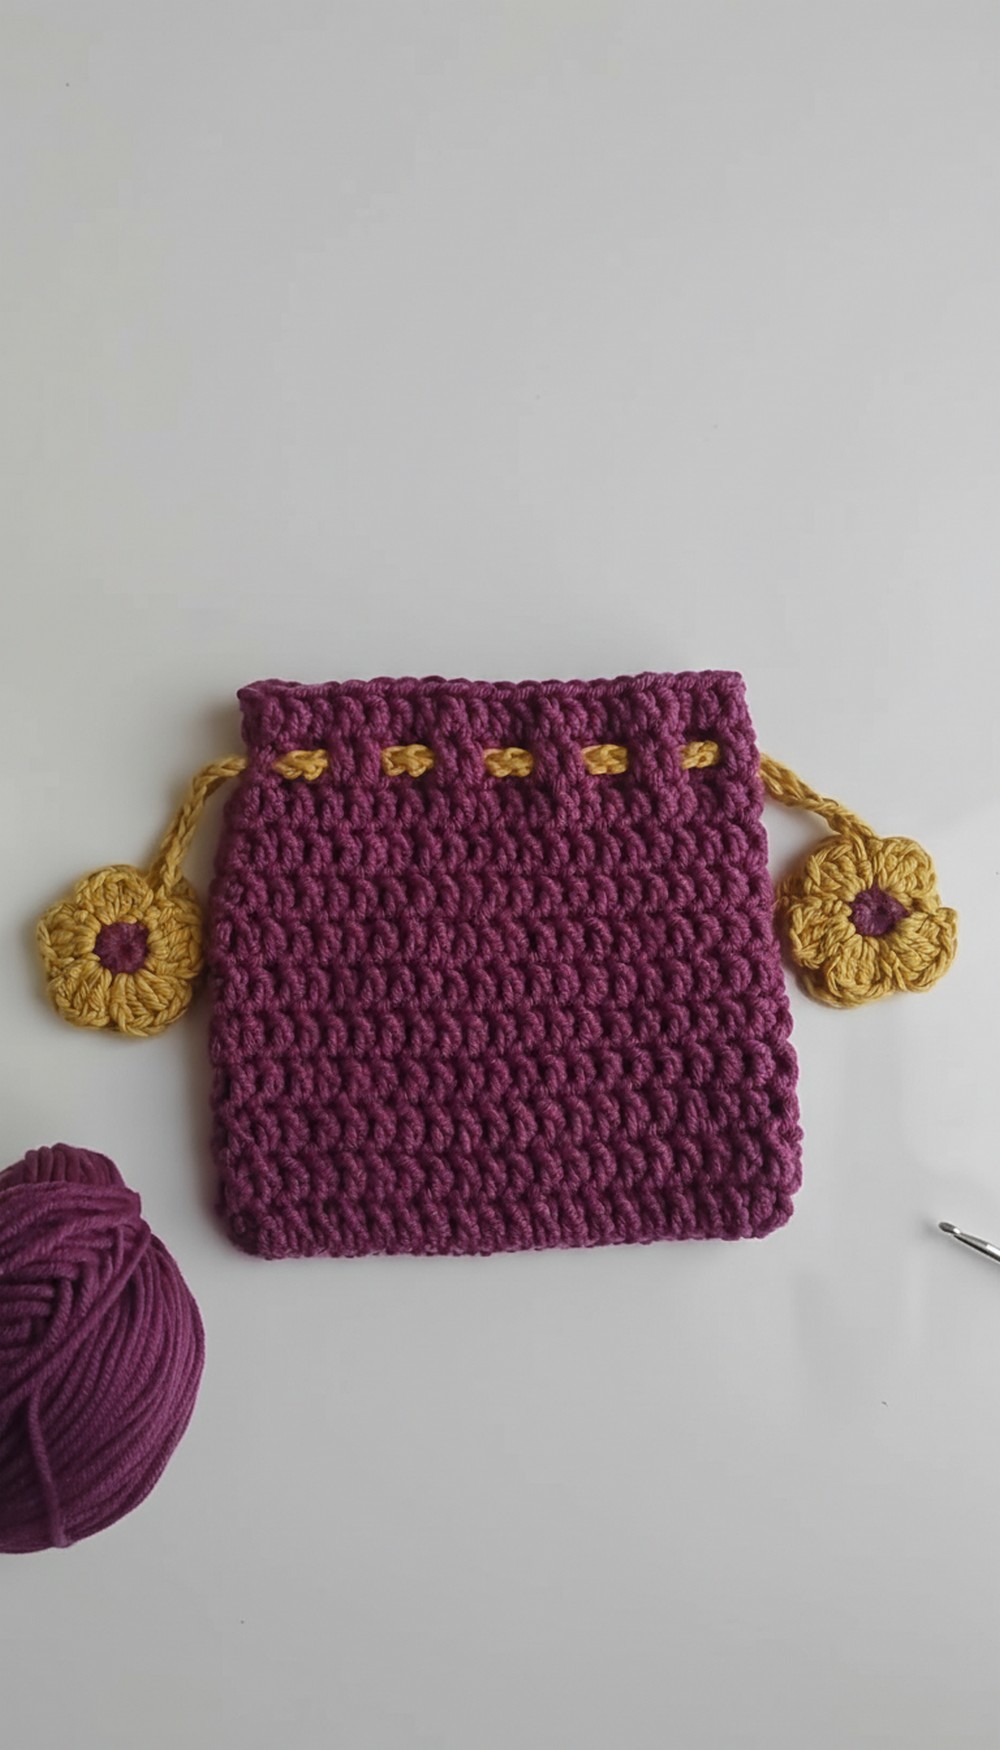
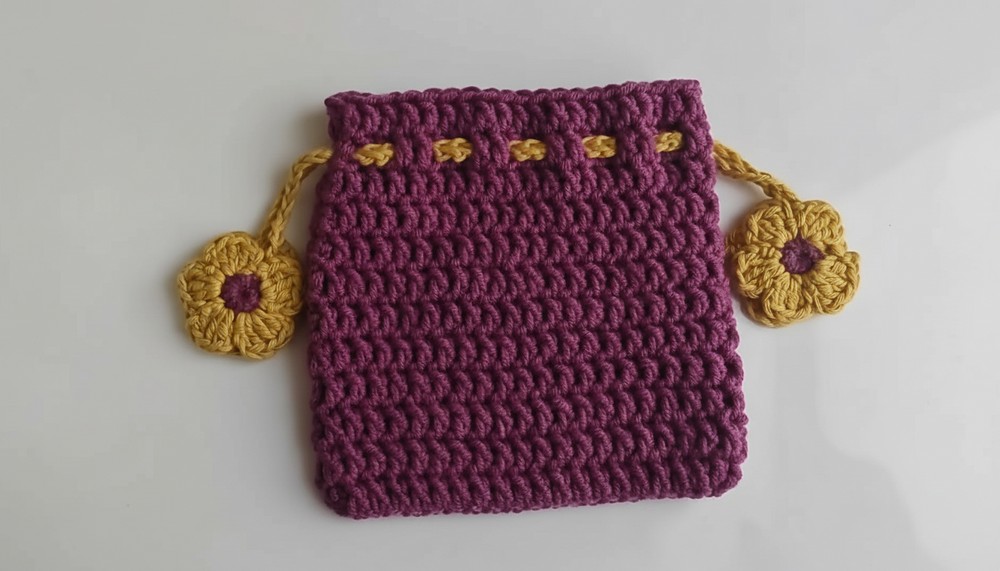
Beautiful Handmade Crochet Flower Bag Pouch Pattern
One of the standout benefits of this pattern is its versatility – it can be tailored in size and color to suit individual preferences. The charming floral accents add a pop of elegance, breathing fresh life into your accessory collection. Ideal for beginners, this easy pattern emphasizes step-by-step guidance, ensuring that even those who have just started crocheting can achieve beautiful results.
By spending time on this mindful activity, you embrace the opportunity to turn basic materials into something meaningful and practical. Additionally, gifting a handmade pouch to someone special crochetes that extra emotional value. With minimal cost and simple tools, you’ll cherish the joy of having a multi-purpose pouch that’s not only functional but also carries a touch of artistry and care.
Level of Difficulty
- Beginner-Friendly: Basic stitches and clear instructions make it easy for everyone to follow along.
Materials Needed
- Yarns: Purple (for bag and flowers) and yellow (for drawstring and flower details).
- Crochet Hook: 4.5 mm for the bag, 3.5 mm for smaller details like flowers and drawstring.
- Scissors
- Needle: For sewing and hiding tails.
- Stitch Marker: To mark rows and stitches.
Step-by-Step Pattern
1. Base of the Bag
Step 1: Slip Knot & Chain Base
- Start with a slip knot: Wrap the yarn around your fingers and pull through to create a secure loop.
- Make 21 chains (CH) for the base. Ensure the chains are even and snug.
2: First Row of Double Crochets (DC)
- Skip the first two chains, and insert the crochet hook into the 3rd chain from the hook.
- Yarn over, pull through, yarn over again, and pull through the first two loops, then yarn over and pull through the last two loops to create the double crochet (DC).
- Continue making double crochets in each stitch for a total of 18 stitches.
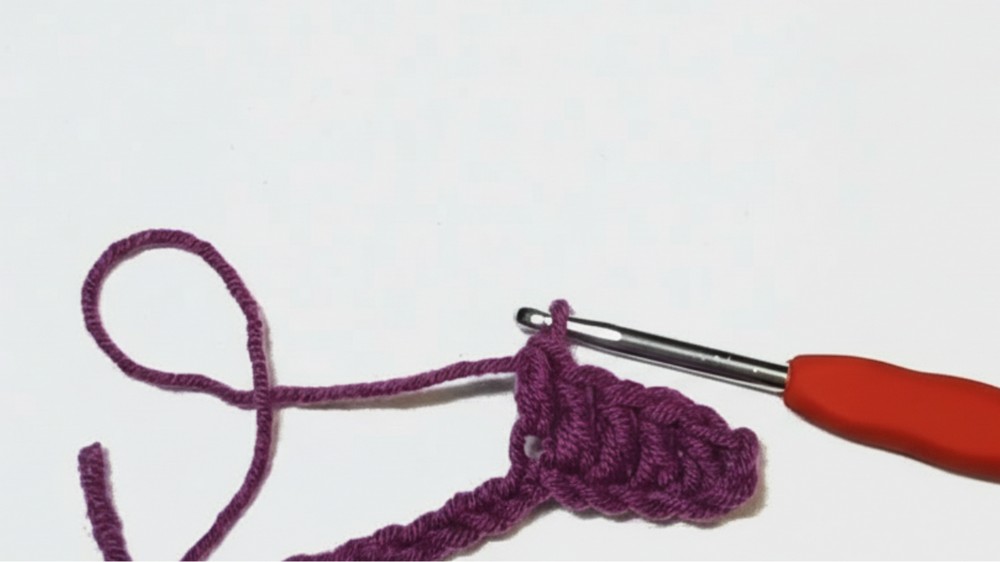
3: Corner Increase
- In the last chain, make 3 DC to turn the corner of the base.
- Now, work down the other side of the chain, adding 1 DC in each stitch into the opposite loops for a total of 17 stitches.
4: Last Corner Increase
- In the last stitch, make 2 DC, ensuring the edge turns smoothly.
- Slip stitch (SL ST) into the first DC to close the row.
5: Row Count
- At this point, you should have 40 DC stitches in total: 18 on one side, 17 on the opposite side, and 5 from corner increases.
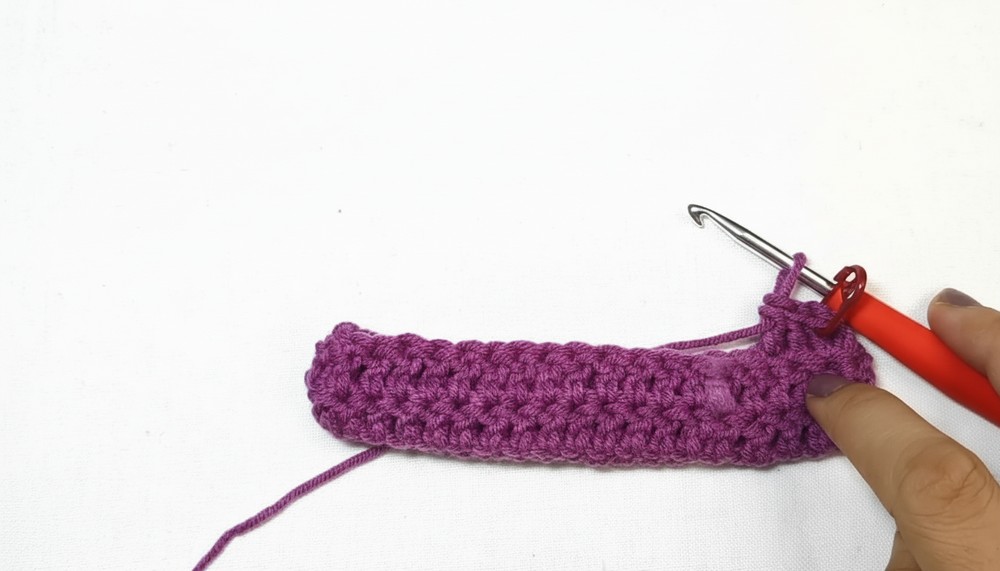
2. Building the Bag with Rows
Step 1: Second Row
- Begin with 2 CH (this counts as the turning point).
- Make 1 DC in each stitch, totaling 40 DC stitches.
- Close the row with SL ST in the first DC.
2: Repeat Rows
- Repeat the process of 2 CH for turning and crocheting 40 DC stitches in each row.
- Continue this pattern for a total of 12 rows, ensuring even and consistent stitches.
3. Drawstring Creation
Step 1: Chain the Strings
- Use yellow yarn with a 3.5 mm hook.
- Create 70 chains for the first string.
- Cut and tie the end securely.
- Repeat the process to make a second string of 70 chains.
2: Inserting the Strings
- Insert the crochet strings into the second row of the bag, skipping two stitches at a time.
- Stitch uniformly along one side and repeat on the opposite side with the second string.
- Knot the ends of both strings securely.
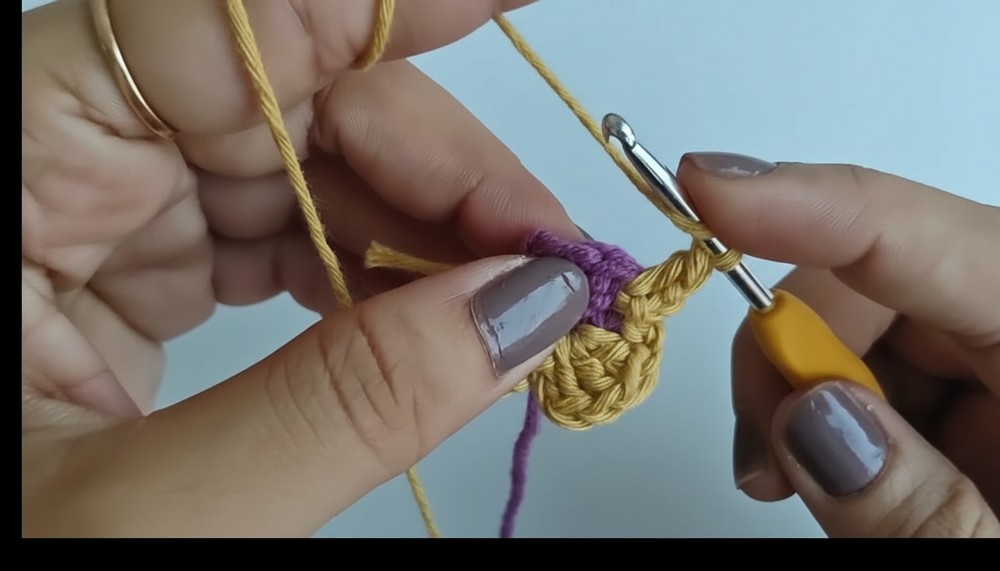
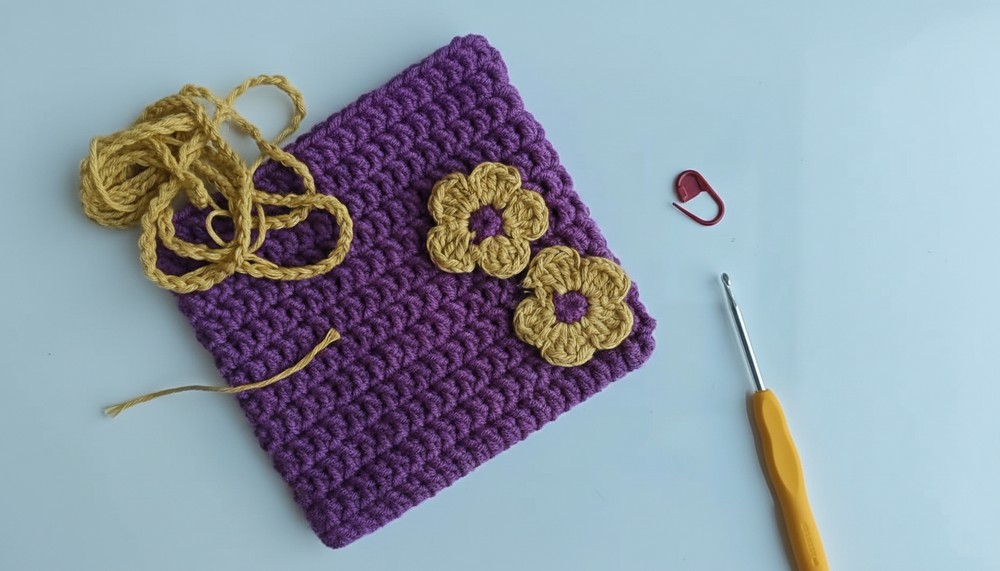
4. Decorative Flowers
Step 1: Magic Ring
- Use purple yarn and create a magic ring.
- Inside the ring, make 5 single crochets (SC) evenly spaced. Tighten the ring.
2: Adding Petals
- Switch to yellow yarn for accents.
- Slip stitch (SL ST) into the first SC and make 2 CH.
- In the same stitch, create 3 DC to form the first petal.
- Make 2 CH and SL ST in the next SC.
- Repeat this process for all 5 petals.
3: Securing Flowers
- Knot and hide the tails using a needle to keep the flower intact.
- Make 4 flowers following this pattern.
5. Attaching Flowers
- Sew or glue the flowers onto the bag near the drawstring edges for decoration.
- Ensure each flower is securely attached with no loose edges.
Special Features
- Compact Design: Perfect for storing lightweight tools and accessories.
- Customization: Add colors or patterns for personalization.
- Beginner-Friendly: Straightforward stitches like CH, SC, DC, and SL ST make this tutorial accessible to novices.
Tutor’s Suggestions
- Use softer yarn for ease and a smooth finish.
- Practice handling the magic ring for seamless flowers.
- Always secure loose yarn tails to prevent unraveling.
Tip
When shaping the bag corners, ensure consistent tension for smooth edges!
Conclusion
This crochet pouch bag is a functional, stylish, and beginner-friendly project. It’s perfect for storing daily essentials or gifting handmade items to loved ones. The detailed guide ensures you create something practical yet decorative with unique touches like drawstrings and floral accents.


Leave a Reply