

Easy Crochet Crop Top Blouse Pattern In Just A Few Steps
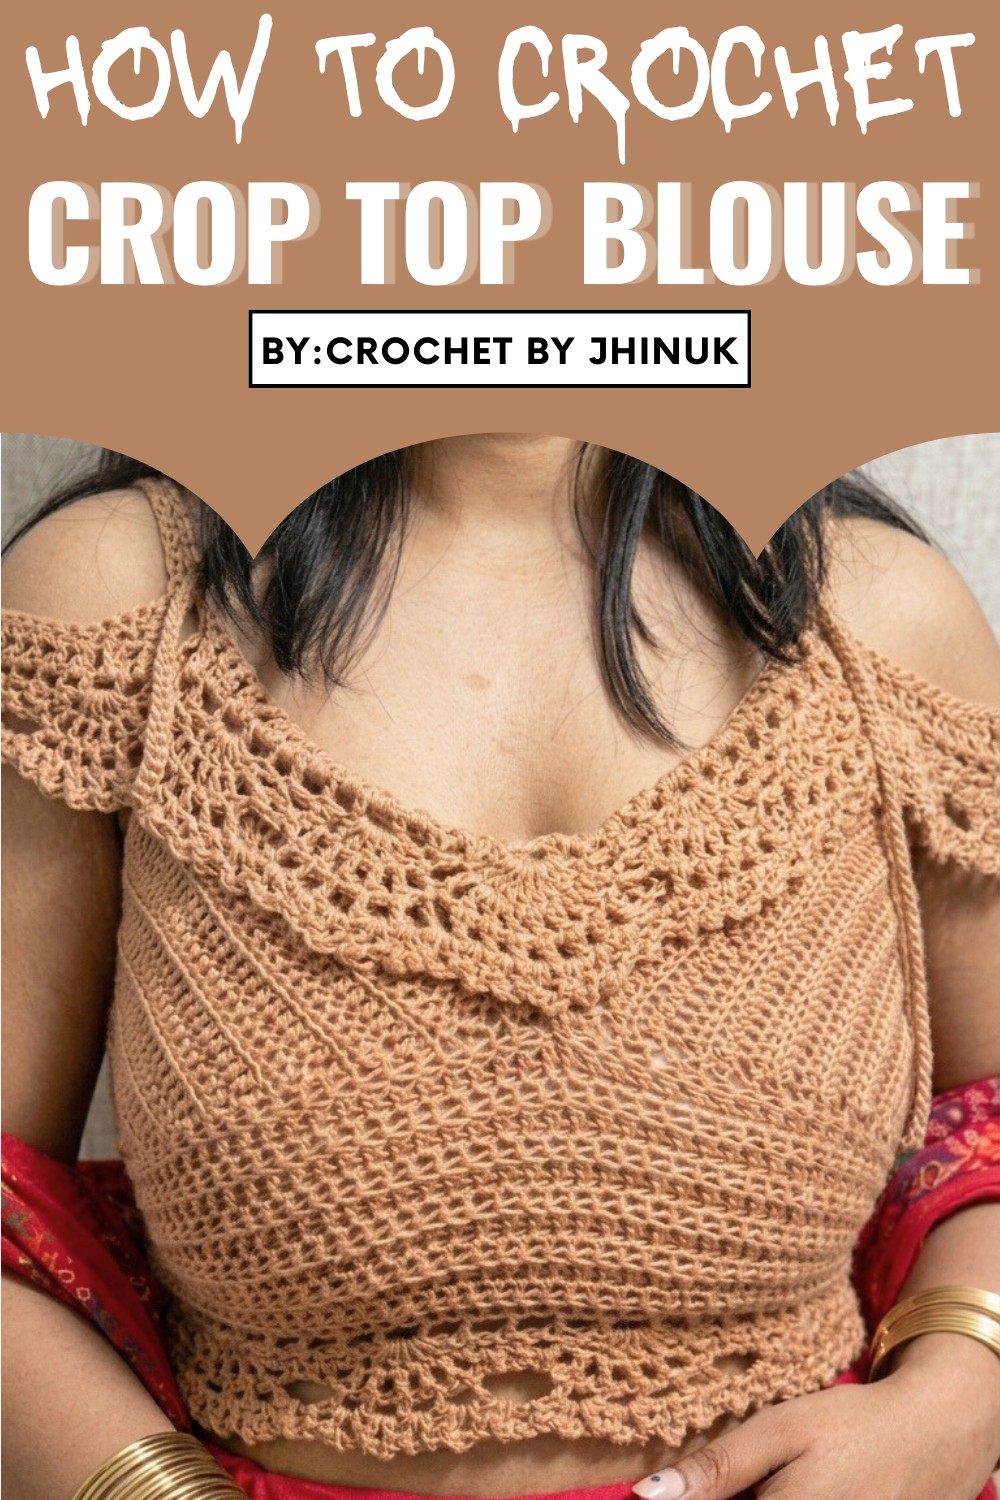
Whether paired with jeans, skirts, or traditional wear, this blouse offers a timeless look that’s both functional and fashionable. The airy pattern allows for breathability, making it a favorite for hot weather, while the textural details add sophistication, making it just as suited for formal settings.
It’s an enjoyable project for intermediate crocheters who want to try something unique yet approachable. Besides being a fun activity, making this top adds a personal touch to your wardrobe, showcasing your skills and style. The beauty of this project is its ability to balance practicality with expressive pattern, making you look effortlessly polished.
Skill Level:
Intermediate
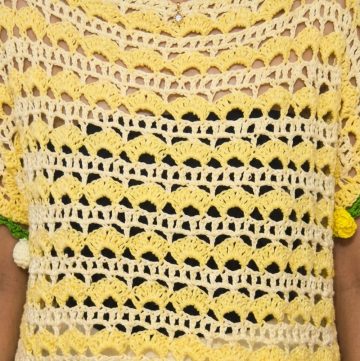
Requires familiarity with half double crochet (HDC), back loops, increases/decreases, shell stitch, and basic joining techniques.
Special Features:
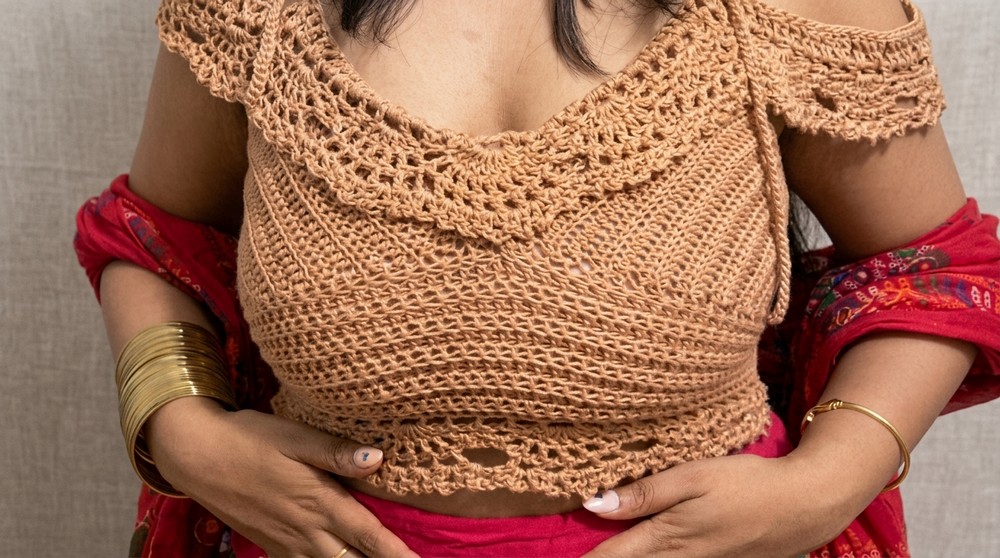
- Texturized back loop HDC stitch pattern for visual appeal.
- Shaped neckline with calculated increases/decreases for a snug fit.
- Decorative shell edging for added elegance.
- Flexible design with adjustable straps and buttoned back.
Materials Needed:
- Bamboo cotton yarn or any lightweight yarn. (Exact yardage depends on size.)
- 4 mm crochet hook.
- Stitch markers.
- Buttons (optional).
- Scissors and yarn needle.
Step-by-Step Pattern
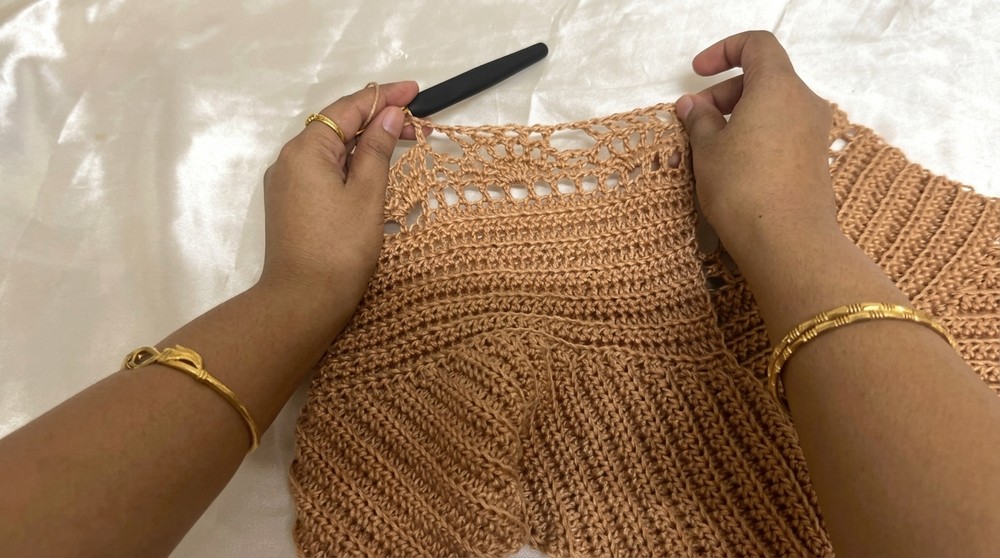
1. Neckline Panel
- Start With Chains:
- Make a slip knot, then chain 30 (neck width, adjust based on size). Add 1 extra chain for turning.
- Row 1:
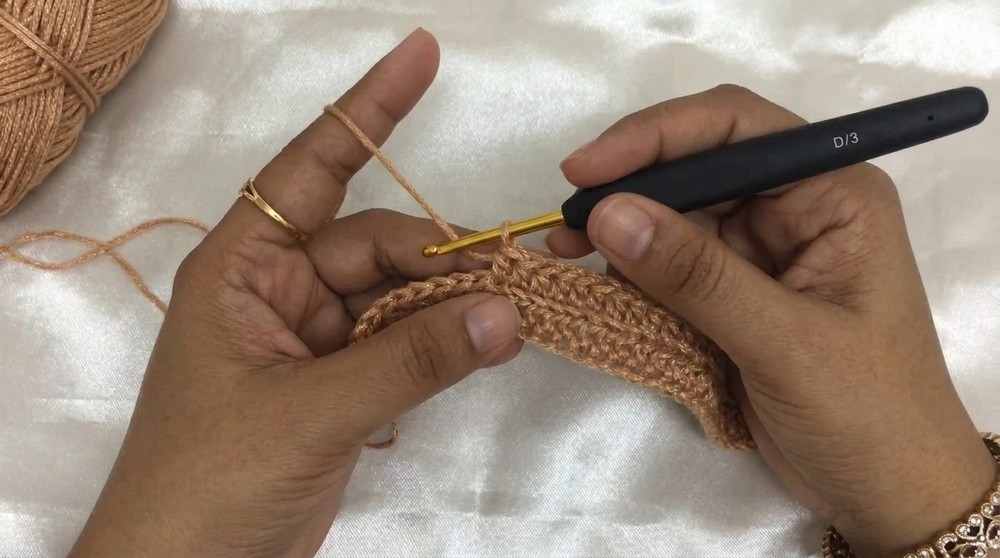
- Make half double crochet (HDC) into every chain.
- Chain 1, turn your work.
- Row 2:
- Use back loop HDC to work across the row (skipping the first stitch).
- Repeat back loop HDC for every row moving forward.
- Row 3 and Onwards:
- On one side (bent side), make 1 decrease per row by skipping the last stitch.
- On the other side (straight side), continue without decreases.
- Continue this pattern for 10-12 rows, ensuring one side becomes straight and the other bent.
2. Transition to Balanced Shaping
- Add Increases:
- On the straight side, begin making increases (2 HDC into the first stitch of the row).
- Continue decreases on the bent side.
- This ensures the stitch count remains constant. Work evenly over both sides.
- Repeat the pattern until your panel measures 34 cm in length (adjust for size).
3. Straighten Edges
- Row Adjustments:
- Chain 1, turn work, make single crochet (SC) for neat edges.
- Skip the next stitch, continue with HDC until 6 stitches remain.
- Work single crochet on 4 stitches and finish with slip stitch.
- Repeat this edge adjustment for both sides to ensure easier assembly.
- Make a second identical panel for the other side of the neckline.
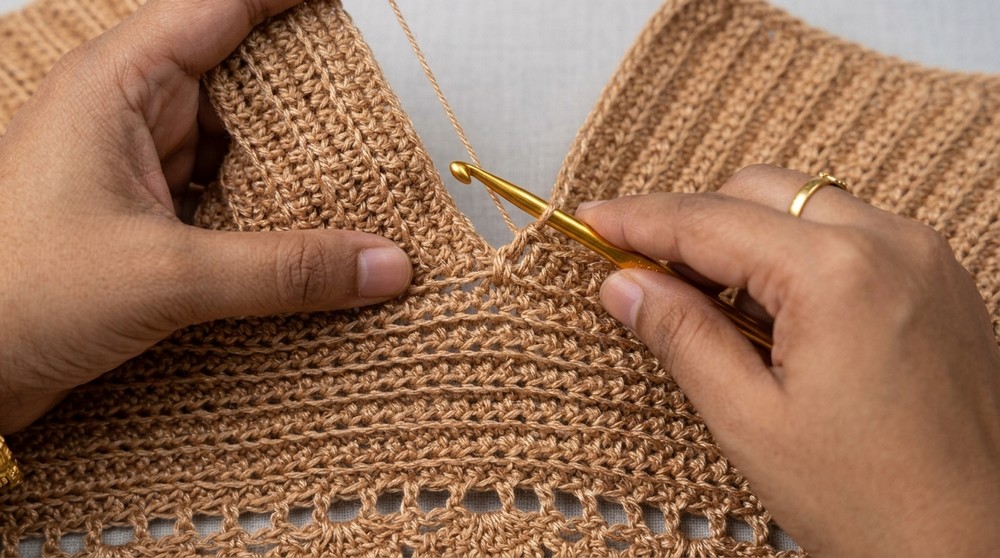
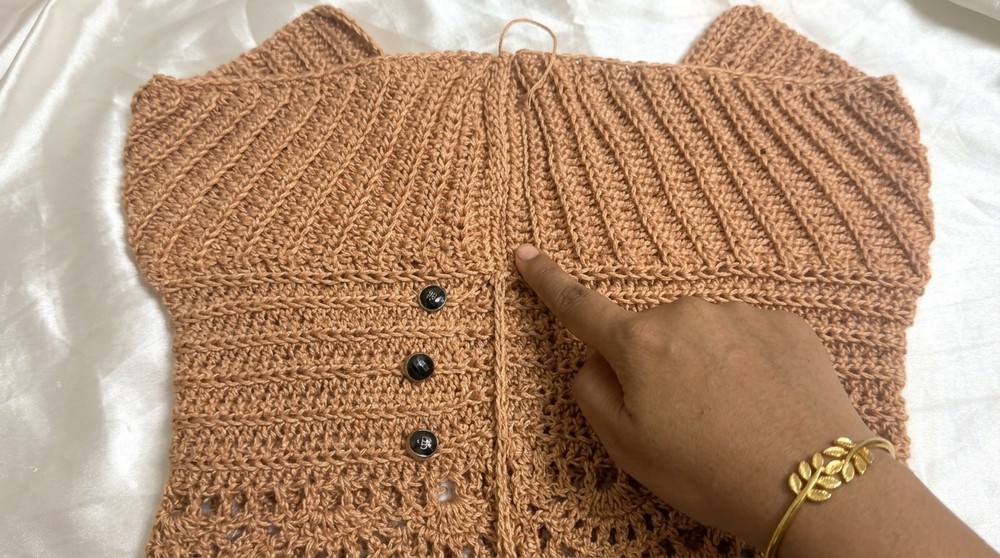
4. Join and Create Lower Panels
- Join Panels:
- Slip stitch panels together at the neckline edge using HDC stitches.
- Ensure both panels are joined evenly, forming the upper body of the top.
- Lower Body Rows:
- Begin working rows of HDC stitches across the bottom edge of joined panels.
- Repeat for 10 rows for a cropped look, or add rows to increase length.
5. Shell Edging
- Shell Row Setup:
- Chain 3, turn your work, and make double crochet (DC) into every alternate stitch (skip one stitch before next DC).
- Complete the row with alternating DCs and chains.
- Shell Design:
- Chain 1, make 5 DCs into each gap for shells.
- Alternate with single crochet (SC) and chain loops (chain 3, SC).
- Repeat the pattern for one row.
- Add Extra Shell Rows:
- To enhance elegance, work an additional shell row by inserting HDC chain loops into each shell gap.
6. Decorative Attachments
- Create Decorative Rings:
- Chain 200 (around 130 cm).
- Join the chain to form a loop and work DCs with chain gaps for detailing.
- Add shells using 5 DC clusters, with 8 DC clusters on opposite ends for attachment points.
- Back Attachment:
- Stitch shells with 8 DC clusters to the back neckline using a yarn needle, ensuring they align with the curve of the neckline.
- Front Attachment:
- Place the decorative ring along the front neckline and carefully stitch the 8 DC shells to secure.
7. Straps and Final Touches
- Create Straps:
- Attach yarn 3 stitches from the outer edge, chain to the desired strap length, and work slip stitches back along the chains. Cut yarn.
- Repeat on all corners to create 4 straps (2 front, 2 back).
- Button Closure (Optional):
- Add buttons to the lower back for adjustable fastening.
Tutor Suggestions
- Sizing Adjustments: Increase the number of rows and stitches in the neckline and lower panel for larger sizes.
- Yarn Choice: Bamboo cotton yarn works well due to its softness and sheen but feel free to explore similar lightweight yarns.
- Customization: Add beads or embellishments along the shell edging for a personalized look.
Uses and Benefits
This crop top is perfect for festivals, summer outings, or pairing with traditional attire like saris for special occasions. Its lightweight design ensures comfort while the decorative shells elevate its aesthetic. The adjustable straps and button details make it practical and customizable for various fits.
Tip!
When adding decorative shells or attachments, use stitch markers to align sections evenly, avoiding uneven joins. This makes stitching quicker and cleaner!
Conclusion
The Crochet Crop Top Pattern offers a rewarding challenge for intermediate crocheters. By combining shaping techniques with intricate shell designs, you’ll crochet a versatile piece that’s both fashionable and functional. With a bit of patience and creativity, this crop top pattern will become your go-to statement piece for memorable celebrations!

Leave a Reply