

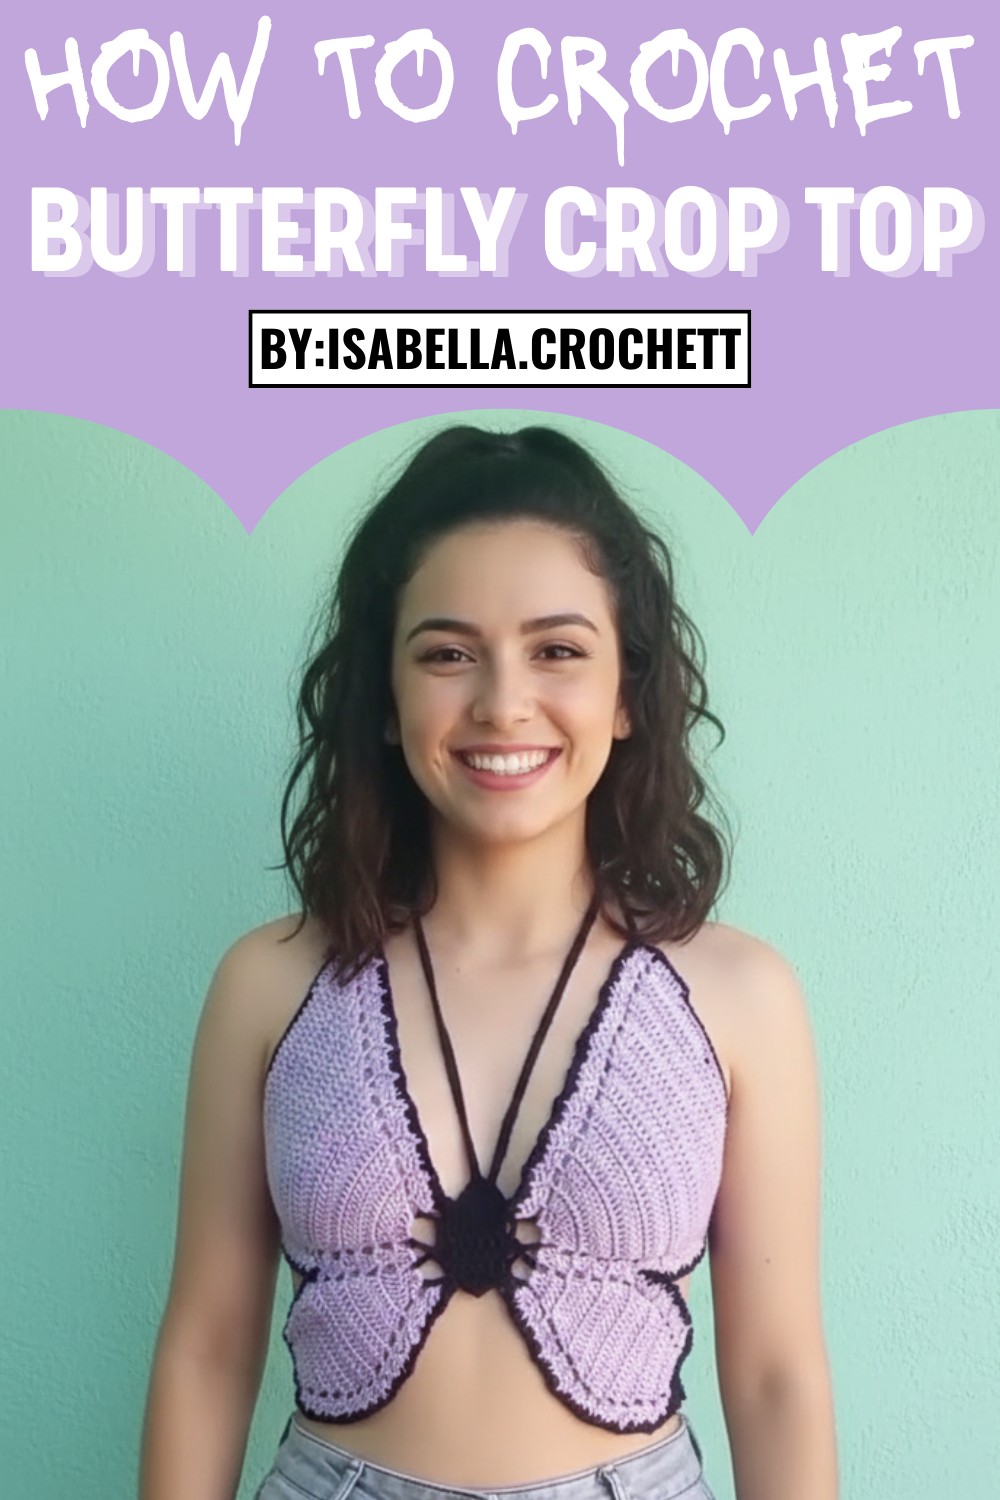
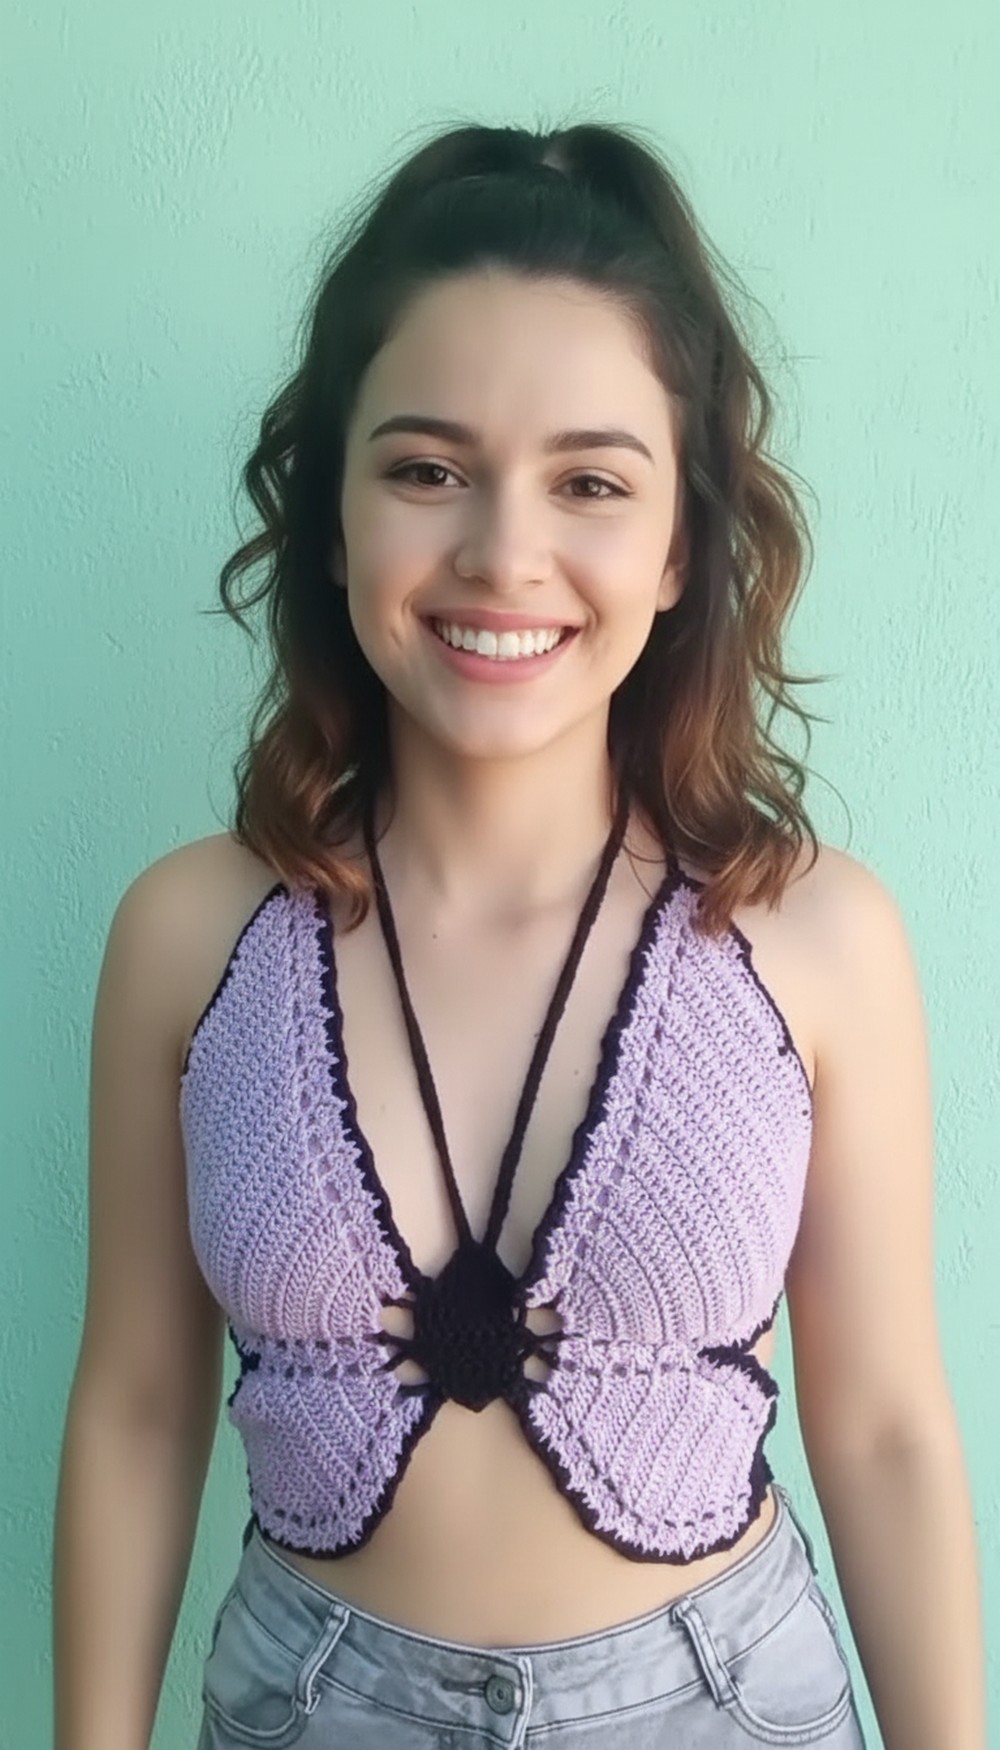
Let your style shine with this Free Crochet Butterfly Crop Top Pattern that is fun to wear simple to make and perfect for warm sunny days.
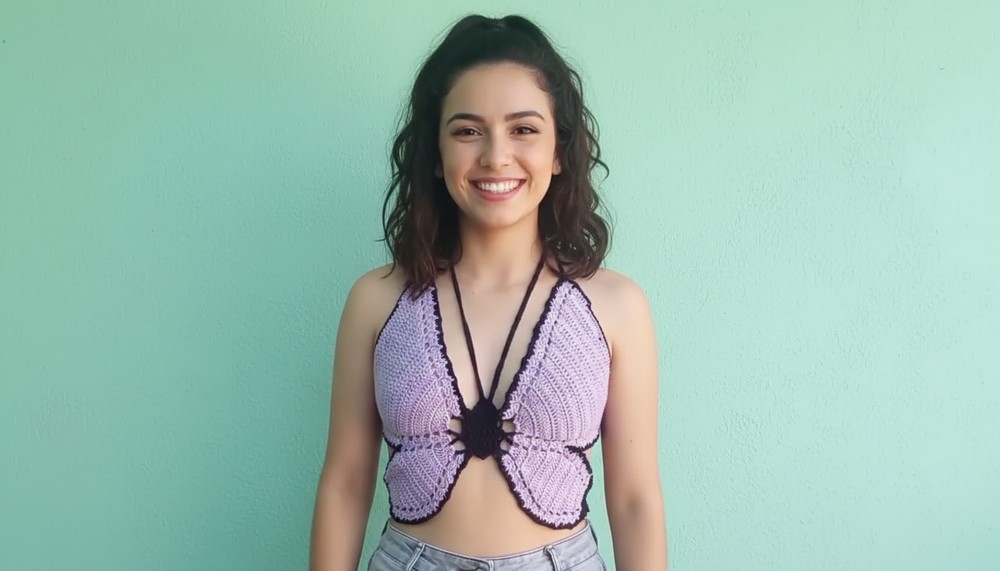
This top looks just like a pretty butterfly resting on your chest. The bright colors make you stand out and the soft yarn feels comfortable on your skin. When you use the Crochet Butterfly Crop Top pattern you can make this lovely top for yourself or someone special. It is light and keeps you cool on warm days so you can wear it to a party picnic or just playing outside.
Lightweight Crochet Butterfly Crop Top for Summer Days
You can match it with jeans shorts or a skirt to make new outfits every day. The steps are easy so anyone can make it even if you have never tried before. Wearing this butterfly top shows your fun side and brings smiles from friends and family. It is not just a piece of clothing but a way to show your love for pretty things and share joy with others.
Crochet Butterfly Top Pattern
Materials
- Yarn: Cotton yarn, DK or sport weight recommended
- Main colors: Purple (wings), Black (accents), plus any color(s) you like for butterfly and body details
- Hook: 2.0 mm (or as recommended on yarn label)
- Notions:
- Scissors
- Tape measure
- Yarn/tapestry needle (for weaving ends)
- Optional: Stitch markers for keeping track of rows/edges
Key Abbreviations (US Terms)
| Abbreviation | Meaning |
|---|---|
| ch | Chain |
| sc | Single crochet |
| dc | Double crochet |
| sl st | Slip stitch |
| st(s) | Stitch(es) |
| inc | Increase (2 dc in same st) |
| dec | Decrease (dc2tog) |
| rep | Repeat |
| RS/WS | Right Side / Wrong Side |
Special Notes
- Pattern can be adjusted for color changes or worked in a single color.
- All increases in the wings are at the start and end unless stated otherwise.
- Work both left and right wings; ensure symmetry and that both are started with right side facing for the correct orientation.
- The “caterpillar” is the center body; “wings” refer to the lace motifs to either side.
- Cord/strings are made with long ch and sl st rows; adjust length for desired fit.
Pattern
1. Stitches Used
- Slip Knot: Standard slip knot to start
- Chain (ch): Yarn over and pull through the loop on hook
- Double Crochet (dc): Yarn over, insert hook, yarn over and pull up loop (3 loops on hook), yarn over and draw through 2, yarn over and draw through 2 again
- Single Crochet (sc): Insert hook, yarn over and pull up loop (2 loops), yarn over and draw through both
- Slip Stitch (sl st): Insert hook, yarn over, pull through all loops
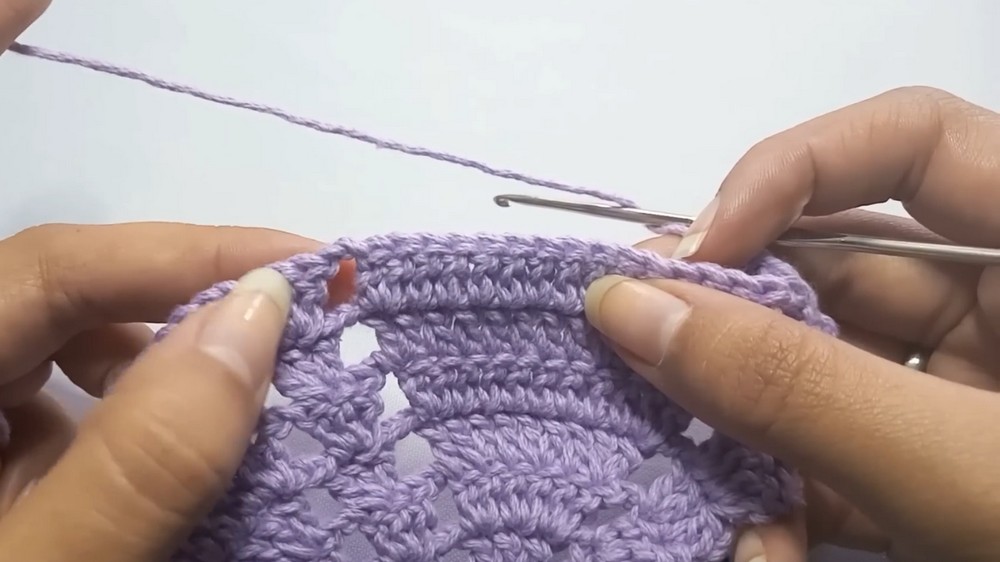
2. Center Caterpillar
Worked in rows. Use desired color for body (yellow in sample):
- Foundation: Create a slip knot. Ch 3.
- Row 1: In the 1st ch, work 4 dc. (First 2 ch count as first dc; you should have 4 dc.)
- Row 2 (Inc on both ends): Ch 2 (counts as dc), turn. Place 1 more dc in first st (inc), dc in following sts, inc in last st (2 dc). (6 dc)
- Row 3 (Inc on both ends): Ch 2, turn. 1 dc in same st (inc), dc across, inc in last st. (8 dc)
- Rows 4–6: Ch 2, turn. Dc in each st across (8 dc). Work for 3 rows.
- Row 7 (Dec at both ends): Ch 2, turn. Dc2tog over first 2 sts (dec), dc in each st to last 2 sts, dc2tog (dec). (6 dc)
- Row 8 (Dec at both ends): Ch 2, turn. Dc2tog at start, dc to last 2, dc2tog. (4 dc)
- Row 9: Turn. Sl st across first 3 sts. Now at last caterpillar st.
- Antennae Cord: Ch 130 (or ~1 meter for neck cord), sl st back down all ch.
- Anchor Cord: Sl st into last caterpillar st. Turn work, sl st across next 3 caterpillar sts. Repeat cord process for second antennae (ch 130, sl st back, sl st to secure).
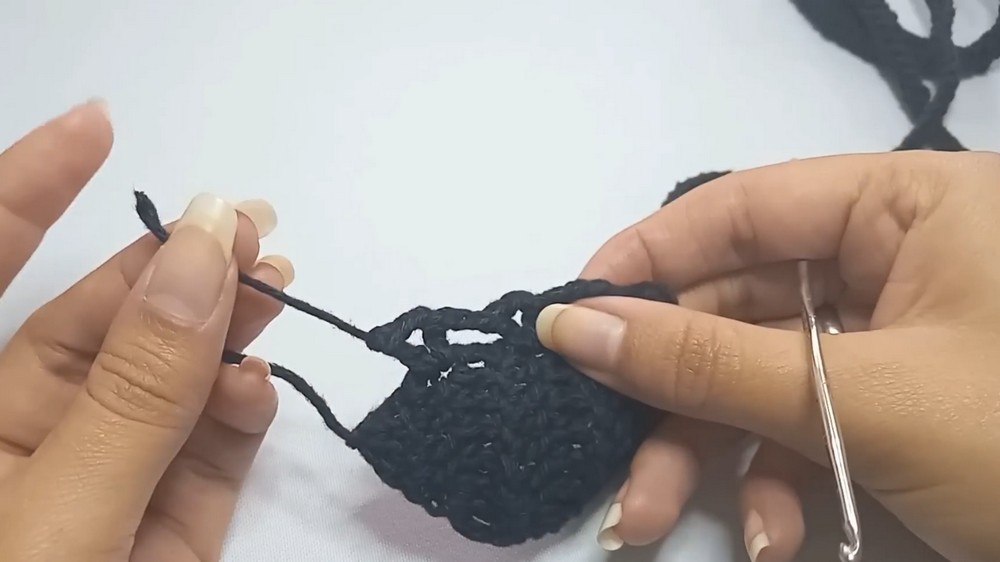
Fasten off.
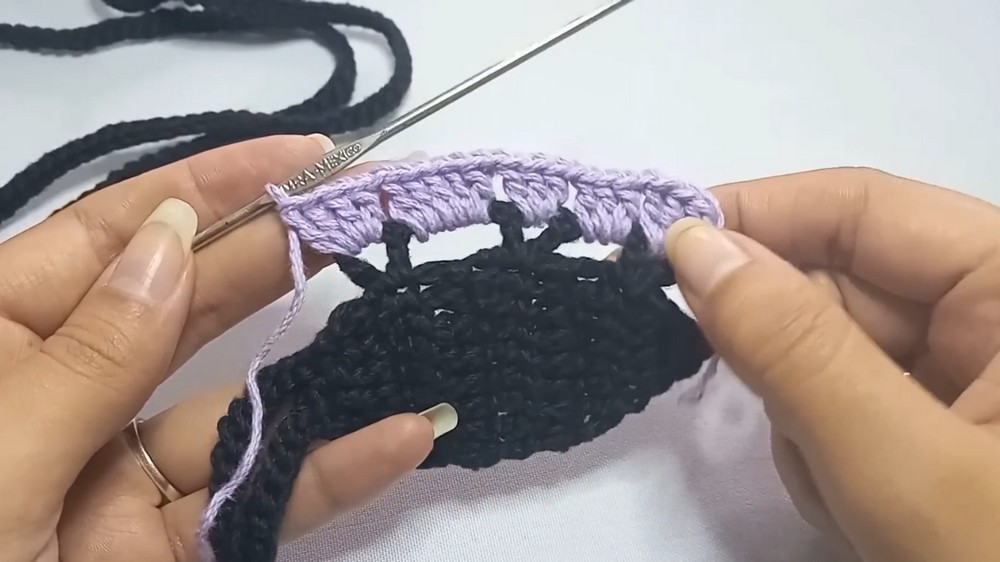
3. Foundation for Butterfly Wings
Foundation stitches are worked into the sides of the caterpillar:
- Sl st down 2 rows of the caterpillar (for wing base):
- Sl st in first row, sl st in second row.
- Repeat to enter “wing base” position (usually 4 sl st).
- Large Wing Section:
- Ch 4 (counts as dc + 2 ch), dc in same sp (wing post).
- Ch 5, skip 2 rows, dc in side of caterpillar.
- Ch 2, dc in same sp (creates large wing space).
- Small Wing Section:
- Ch 3, skip 2 rows, dc in caterpillar.
- At end: Ch 2, dc in same st. Fasten off or continue with new color if changing.
4. Wings – General Instructions
Each side is worked separately (left then right). Always start with RS facing for best symmetry.
LEFT (or start) WING
- Attach yarn at row end (corner of caterpillar).
- Edge/First Row: Ch 2, 3 dc in same spot (counts as 4 dc for the edge), ch 1, 3 dc in next space, continue across for small/middle/large wings as shown in video (edges: 4 dc, mids: 3 dc, large: 5 dc). Chain and dc into appropriate spaces/points as charted.
- Next Row (increases): Ch 2, turn, sl st to 2nd st, ch 2, 2 dc in same st (inc), inc again in next st, continue with 2 ch between wing areas, in large wing do inc in every st (each st gets 2 dc for 10 dc), mids: always 3 dc, small: inc in each st for 6 dc, finish with 2 edge increases (edge: always 4 dc).
- Further Rows: Always sl st 2 to reach wing edge at start, then ch 2, inc ×2 at beg, regular dc or inc between, always finish edges with inc ×2 at end, 2 ch for separation between wings.
- For large and small wings: Next rows do inc at start and end of respective wing sections, regular dc in between.
- Middle section always: 3 dc clustered at the center st.
Continue working until you have:
- XS: 5 rows
- S: 6 rows
- M: 7 rows
- L: 8 rows
- XL: 9 rows
Repeat this increases row pattern until required height for your size is reached.
- Wing Separation:
- After main rows, for small wing, start with decrease (sk st at each end), until 1 st remains.
- For large wing, continue as established to correct length for size (see below), then create steps (see below).
5. Shaping and Separating Wings
Small Wing:
- After desired rows, decrease at the start and end of each row (skipping first and last st) until only 1 dc remains. You can add color changes as desired at final rows. Edge as for previous rows.
Large Wing:
- Continue established increase (inc at start and end) until the required length (check measurements below). For size 34 (S): ~17 cm from center caterpillar.
- When length is reached, create "steps": on RS, leave last 10 sts unworked, turn, sl st 10, ch 2 and complete dc row. Repeat steps as shown in video, until you run out of “step” sts.
- Fasten off when done.
Size Chart (Wing Length from Body/Caterpillar to Edge)
| Size | Wing Length (cm) from Center |
|---|---|
| 30 | 15 |
| 32 | 16 |
| 34 | 17 |
| 36 | 18 |
| 38 | 19 |
| 40+ | 20 |
6. Right Wing
Repeat all as for left wing but mirror the orientation.
- Attach yarn at corresponding place, and when working initial rows (small, then large), be careful to work in the opposite direction as the left wing for symmetry.
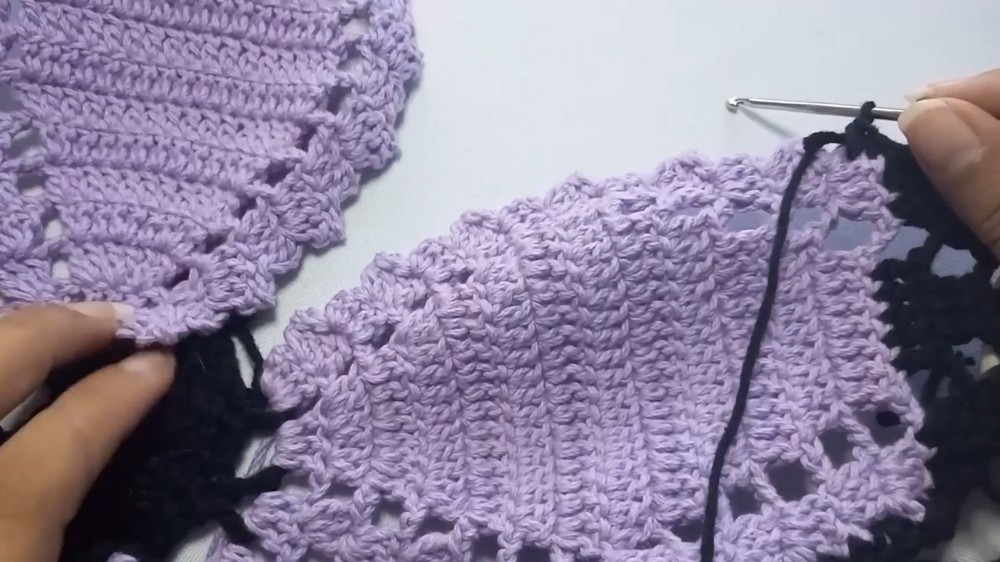
7. Edging
- Single Crochet Edge: Attach desired color at a convenient edge point (e.g. start of caterpillar), ch 1.
- Work sc all around edge of both wings:
- At corners/peaks, place 2 sc in one st.
- At steps, work 1 sc in each dc, 2 sc in each edge dc if needed for smoothness.
- At deep corners, use ch-1 to turn as required.
- For step edges: sc every st, 2 sc in big dcs as needed.
- Fasten off and weave in ends. Repeat for all areas/steps as needed.
8. Cords & Finishing
- Neck cords (antennae): Already made at caterpillar.
- Back/underbust cords:
- Attach yarn at top corner of large wing, ch ~105 (or to 1–2 m as desired); sl st back along chain; sl st to secure and fasten off.
- Repeat for the other side.
- Weave in all ends carefully. Hide ends in matching color sections for neat finish.
9. Wearing
- Tie neck cords around neck.
- Cross the long wing cords at the back, weaving through wing holes if desired for a crisscrossed effect, and tie securely under the bust.
Conclusion
You have created a beautiful and colorful butterfly top! This project combines simple double crochet shaping, increases, and color changes for a striking finished effect. Adjust lengths as desired for fit and comfort—be creative with your color combinations for a unique look.
Pattern Corrections
- Always verify Right Side/Wrong Side before starting or attaching each wing.
- Edges always have 4 dc, middle always 3 dc, follow exact increases and decreases for smooth curves.
- For a solid color top, do not cut yarn during assembly.
Tips
- Use stitch markers to help identify where to work increases/decreases.
- Weave ends securely in their matching color section for invisibility.
- Lay out finished piece flat and lightly block if needed to correct curling or unevenness.
- Adjust cords longer/shorter to your preference.
- For a child’s size or larger fit, adjust number of rows/cords accordingly.

Leave a Reply