

Share love with this Crochet Bunny with Heart Pattern, perfect for gifting or decorating any space while adding a personal handmade touch.
It’s hard to find a gift that truly feels personal and meaningful, but this adorable creation changes everything. The Crochet Bunny with Heart Pattern brings warmth, love, and a cozy charm to life with its delicate details and heartwarming design. Perfect for baby showers, birthdays, anniversaries, or as a heartfelt decoration in any corner of your home, this piece is sure to spread joy wherever it goes.
Loving Crochet Bunny with Heart Pattern for Memorable Gifts

The floppy ears, tender features, and the little heart it holds create a sense of care and affection that’s impossible to ignore. Whether you want to brighten someone’s day or add a handmade touch to your space, this pattern lets you create something truly unique and loving. More than just a design, it’s a symbol of thoughtfulness and connection that anyone would treasure.

Materials
- Yarn: Medium-weight yarn (Size 4 - worsted weight cotton or acrylic)
- Main Color: Choose a color for the body, head, arms, legs, and tail.
- Accent Color: For optional details, such as the eyes, cheeks, or embellishments.
- Crochet Hook: 2.5 mm hook
- Safety Eyes: Size 6 mm
- Stuffing: Polyester fiberfill for stuffing the body, head, and appendages
- Tapestry Needle: For weaving in ends and assembling the parts
- Scissors
- Optional Supplies:
- Glue: For attaching the eyes securely (optional but recommended)
- Pink Blush/Chalk: For adding decorative cheeks
Key Abbreviations
- MR: Magic Ring
- Ch: Chain
- Sc: Single Crochet
- Inc: Increase (2 Sc in the same stitch)
- Dec: Decrease (Sc2tog – single crochet two together)
- Sl St: Slip Stitch
- [...]: Repeat sequence inside brackets.
- (...): Stitch count at the end of the round.
Special Notes
- The pattern uses US crochet terminology.
- Work in continuous rounds unless otherwise stated. Use a stitch marker or contrasting yarn piece to mark the beginning of each round.
- Stuff pieces firmly but evenly to maintain shape. Stuff while crocheting, especially before decreasing rows.
- Crochet tension should remain consistent to ensure uniformity.
Pattern
HEAD
- Round 1: Create a MR, Ch 1, crochet 6 Sc into the ring. Pull to close the ring. (6 Sc)
- Round 2: [Inc] in each stitch around. (12 Sc)
- Round 3: [Sc in the next stitch, Inc] 6 times. (18 Sc)
- Round 4: [Sc in the next 2 stitches, Inc] 6 times. (24 Sc)
- Round 5: [Sc in the next 3 stitches, Inc] 6 times. (30 Sc)
- Rounds 6-10 (5 rounds total): Sc in each stitch around. (30 Sc per round)
Stuff the head firmly but leave space for shaping as you progress.
- Round 11: [Sc in the next 3 stitches, Dec] 6 times. (24 Sc)
- Round 12: [Sc in the next 2 stitches, Dec] 6 times. (18 Sc)
- Round 13: [Sc in the next stitch, Dec] 6 times. (12 Sc)
- Round 14: [Dec] 6 times. (6 Sc)
- Finish: Fasten off, leaving a long tail for sewing. Stuff the piece firmly before closing the opening.
BODY (Similar to Head Start)
- Follow Rounds 1-4 from the Head Pattern. (24 Sc at the end of Round 4)
- Rounds 5-9 (5 rounds): Sc in each stitch. (24 Sc per round)
- Round 10: [Sc in the next 2 stitches, Dec] 6 times. (18 Sc)
- Rounds 11-12 (2 rounds): Sc in each stitch. (18 Sc per round)
- Round 13: [Sc in the next stitch, Dec] 6 times. (12 Sc)
- Round 14: [Dec] 6 times. (6 Sc)
- Finish: Fasten off, leaving a long tail for attaching the head. Stuff the piece firmly.
ARMS (Make 2)
- Round 1: Create a MR, Ch 1, crochet 6 Sc into the ring. Pull to close. (6 Sc)
- Round 2-6 (5 rounds): Sc in each stitch. (6 Sc per round)
- Finish: Fasten off, leaving a long tail for sewing. Do not stuff the arms.
LEGS (Make 2)
- Round 1: Create a MR, Ch 1, crochet 6 Sc into the ring. (6 Sc)
- Round 2: [Sc in the next stitch, Inc] 3 times. (9 Sc)
- Rounds 3-4 (2 rounds): Sc in each stitch. (9 Sc per round)
- Round 5: [Sc in the next stitch, Dec] 3 times. (6 Sc)
- Finish: Fasten off, leaving a long tail for sewing. Lightly stuff the legs.
TAIL
- Round 1: Create a MR, Ch 1, crochet 6 Sc into the ring. (6 Sc)
- Round 2: [Inc] in each stitch around. (12 Sc)
- Rounds 3-4 (2 rounds): Sc in each stitch. (12 Sc)
- Finish: Fasten off, leave a long tail for sewing. Lightly stuff the tail.
HEART (Optional/Decorative Piece)
- Round 1: Create a MR, Ch 1, crochet 6 Sc. (6 Sc)
- Round 2: [Inc] in each stitch around. (12 Sc)
- Round 3: [Sc in the next stitch, Inc] 6 times. (18 Sc)
- Rounds 4-5 (2 rounds): Sc in each stitch. (18 Sc per round)
- Begin decreasing to shape the heart:
- Round 6: [Sc in the next stitch, Dec] 6 times. (12 Sc)
- Round 7: [Dec] 6 times. (6 Sc)
- Finish: Fasten off, leaving a long tail for attachment or decoration. Stuff lightly.
ASSEMBLY INSTRUCTIONS
- Head to Body: Sew the bottom of the head to the top of the body using the long tail left on the head. Sew evenly for a neat and secure connection.
- Attach Arms: Position the arms symmetrically on either side of the body. Sew them in place securely.
- Attach Legs: Sew the legs at the bottom of the body symmetrically for stability.
- Attach Tail: Center the tail at the back of the body.
- Safety Eyes: Attach the safety eyes between Rounds 6-7 of the head, spaced about 4 stitches apart. Use fabric glue for added security.
- Optional Embroidery: Use black yarn or thread to embroider a small mouth or nose below the eyes. For added charm, use pink chalk or fabric paint to create cheek blush.

CONCLUSION
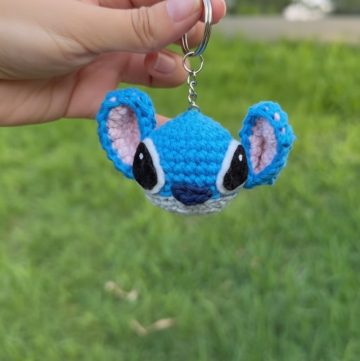
Great work! 🎉 You’ve completed a charming crocheted animal keychain. This project teaches essential techniques like increases, decreases, and shaping for amigurumi, making it an ideal intermediate project. For gifting or decorative purposes, you can add unique details tailored to different styles.
PATTERN CORRECTIONS
- Adjust the yarn type or hook size if your stitches are too tight or too loose.
- Ensure stitch counts match after each increase, decrease, or continuous round to maintain symmetry in shaping.
TIPS
- Marker Usage: Always use a stitch marker for your first stitch in each round to keep track.
- Even Stuffing: Stuff as you go, especially before decreasing rounds, to avoid lumps or misshapen areas.
- Custom Details: Experiment with additional features, such as adding bows, buttons, or a different shape for the tail or accessory.
- Blush Application: Use pink chalk or fabric paint sparingly for cheeks to give extra personality to your creation.


Leave a Reply