

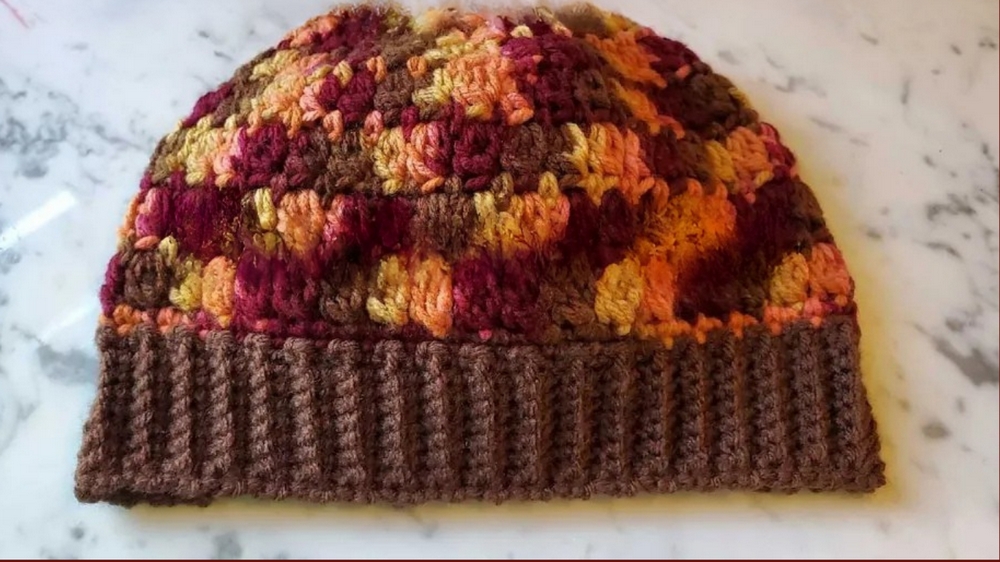
Cozy into autumn vibes with the Free Crochet Autumn Hat Pattern, a stylish and warm accessory perfect for crisp days and seasonal charm.
Autumn breezes often bring a crisp chill that calls for cozy, versatile headwear. A Free Crochet Autumn Hat provides both warmth and style, making it an essential accessory for the season. Perfect for morning walks through falling leaves or casual outings, this hat combines functionality with charming aesthetics. Its textured stitches create a subtle visual interest, while the snug fit ensures comfort for all-day wear. Beyond its protective qualities, this hat serves as a statement piece that complements jackets, scarves, and sweaters, adding a touch of handmade elegance to any outfit.
Stylish Crochet Autumn Hat Pattern to Try This Season

Beginners and experienced crocheters alike can enjoy the satisfaction of producing a wearable item that is both practical and beautiful. The Free Crochet Autumn Hat also makes a thoughtful gift, ideal for friends and family who appreciate handmade items with seasonal flair. Lightweight yet cozy, it balances warmth without feeling bulky, making it suitable for transitional weather.
Using soft, durable yarn ensures the hat maintains its shape and softness even after repeated use. Whether strolling through parks, attending outdoor gatherings, or simply adding a seasonal accent to daily attire, this hat offers comfort, versatility, and a charming handmade touch that celebrates the essence of autumn in a unique and functional way.
Special Features
- Cluster Stitch Design: The hat is created using cluster stitches that give it a textured, stylish look.
- Ribbed Border: The ribbed edging technique adds structure and ensures the hat fits snugly around the head.
- Seasonal Appeal: Inspired by autumn colors and motifs, this hat is a great addition to fall outfits.
- Versatile: The hat can be adapted to different sizes and styles with slight tweaks in stitch count and yarn choices.
Materials Needed
- Yarn:
- Main body yarn (autumn colors such as orange, brown, or yellow).
- Brown yarn for the ribbed edging.
- Crochet Hook: Use an appropriate size for the chosen yarn—recommendation is a 5mm hook for medium-weight yarn.
- Scissors: For cutting yarn.
- Stitch Markers: Optional, to keep track of stitch counts.
- Tapestry Needle: For sewing in tails.
Level of Difficulty
This project is rated as easy to intermediate, with a focus on cluster stitches, increases for shaping, and a textured ribbed border. Beginner crocheters will find the detailed descriptions helpful, while intermediate crocheters will enjoy the complexity of the design.
Step-by-Step Instructions
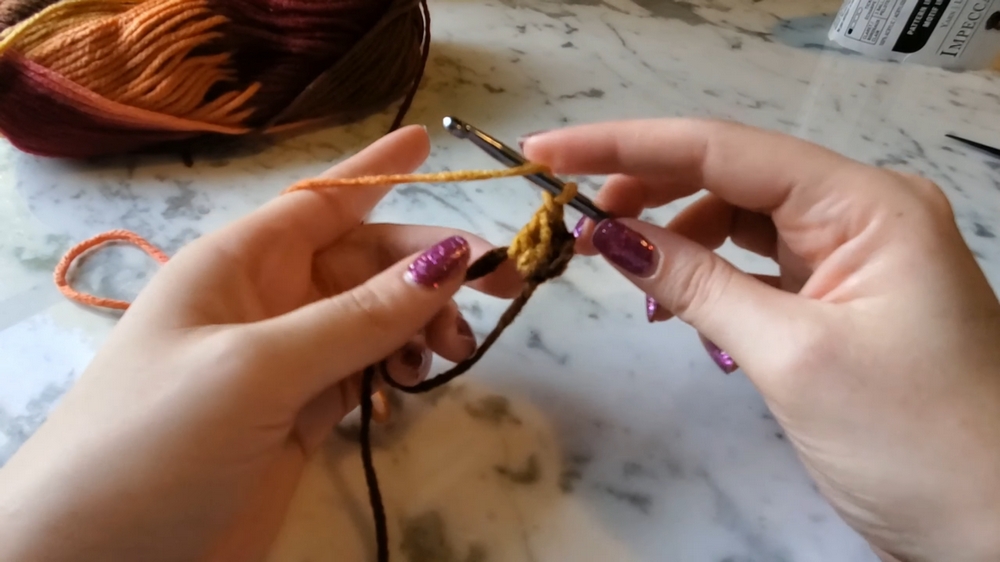
1. Starting with the Magic Circle
- Create the Magic Circle: Lay the tail of your yarn flat, wrap it around your fingers, cross it, and pull through the loop with your hook. Chain one to secure the loop.
- Cluster Stitch: Chain three (counts as the first double crochet), yarn over, pull through the loop, and complete a cluster stitch.
- Repeat: Chain one and make seven more cluster stitches in the magic circle, totaling eight clusters. Pull the tail of the circle to close the gap. Slip stitch into the top of the initial chain three to secure the round.
2. First Increase Row
- Single Crochet and Chain Spaces: Chain one, then place a single crochet in the space between each cluster as well as at the top of every cluster. Continue alternating single crochets and chain ones all around.
- Slip Stitch to Join: Slip stitch into the first single crochet to complete the row.
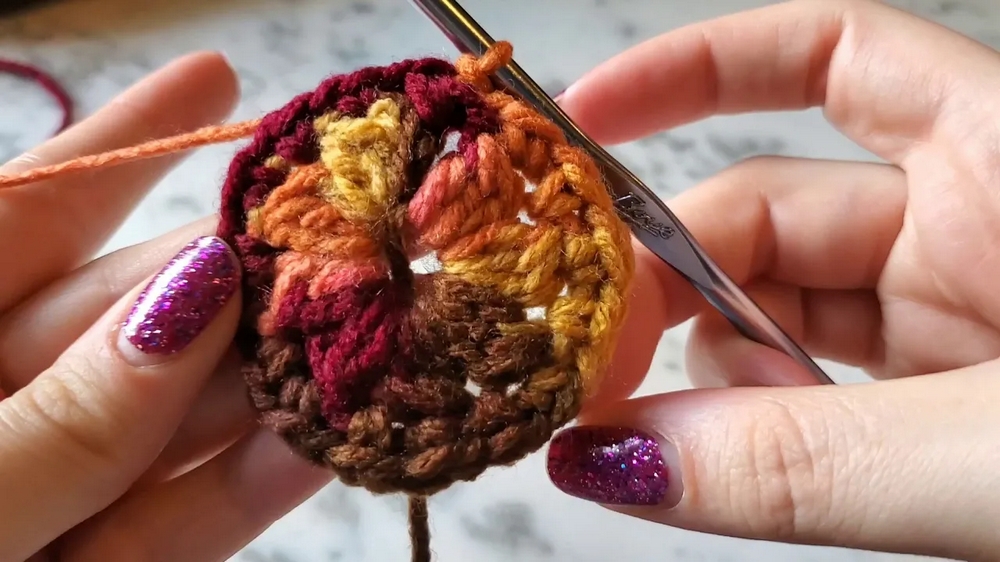
3. Second Increase Row
- Cluster Stitches: Chain three, start clusters in each chain space (total 16 clusters). Chain one between the clusters.
- Join: Slip stitch to the first cluster to complete the round.
4. Third Increase Row
- Pattern of Increases: Add single crochet and chain one spaces between every other cluster.
- Alternate: Work regular single crochets in the gaps and at the tops of clusters, skipping the increases in every other cluster.
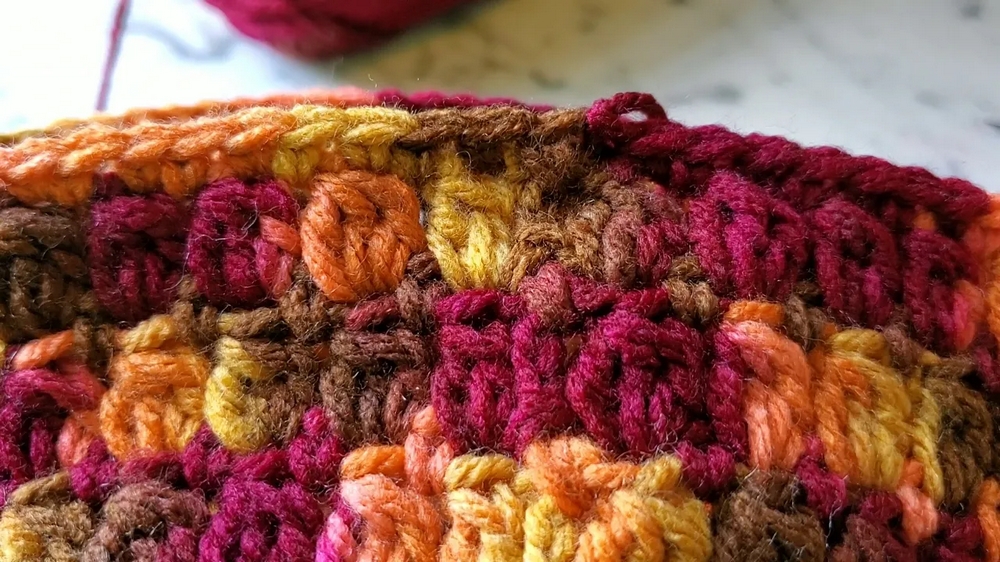
5. Additional Rows with No Increase
- Single crochet and chain one rows until the hat reaches the desired length.
- Continue with regular cluster stitches, ensuring even stitch counts all the way around.
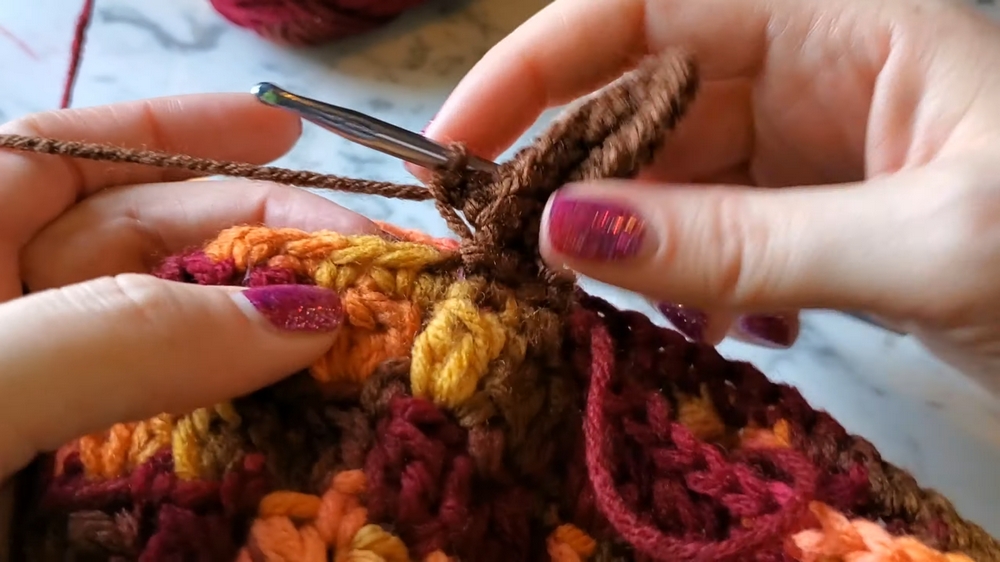
6. Adding the Ribbed Edge
- Attach Brown Yarn: Start at any stitch and chain up to your preferred ribbing height (e.g., chain 8 for shorter ribs).
- Single Crochet in Back Loops: Work single crochets along the back loops of the chains.
- Join to Hat Edging: Slip stitch the end of the chain into the hat’s existing stitches, then chain one and turn your work. Repeat single crochets into the back loops until you complete the ribbed edge.
- Finish the Ribbing: Join the ribbing ends together with slip stitches, ensuring the seam is on the inside.
7. Final touches
- Weave in Tails: Use a tapestry needle to weave in any loose ends.
- Optional Rows: Add another row of single crochets or half-double crochets if desired for an additional border effect.
Tutor’s Suggestions
- Practice the Magic Circle: The tutor emphasizes taking your time with the magic circle, as it can be tricky for beginners.
- Be Patient with Increase Rows: Pay close attention to where increases are placed to maintain proper shaping of the hat.
- Work Slowly on the Ribbing: Back-loop single crochets are detailed work, so take your time to ensure a clean finish.
- Ensure Proper Fit: Regularly check the size and adjust the number of rows or increases as necessary.
Uses of the Finished Hat
- Seasonal Wear: Perfect for autumn outfits.
- Gift: A thoughtful handmade gift for friends or family.
- Decorative Piece: Use it for display or as part of a themed autumn crochet collection.
- Customizable Design: Ideal for adapting to different yarn colors and sizes.
Tip
When using dark-colored yarns for the ribbed edge, keep your lighting bright to help you see the back loops clearly. Also, smaller hooks can help with precision, especially when working on the ribbed border.
Conclusion
This Falling Leaves Autumn Hat is a delightful, textured project that blends seasonal charm with practical crochet techniques. With detailed instructions on cluster stitches, single crochets, and ribbing, it is suitable for crocheters looking to deepen their skills while creating a functional, stylish accessory.


Leave a Reply