

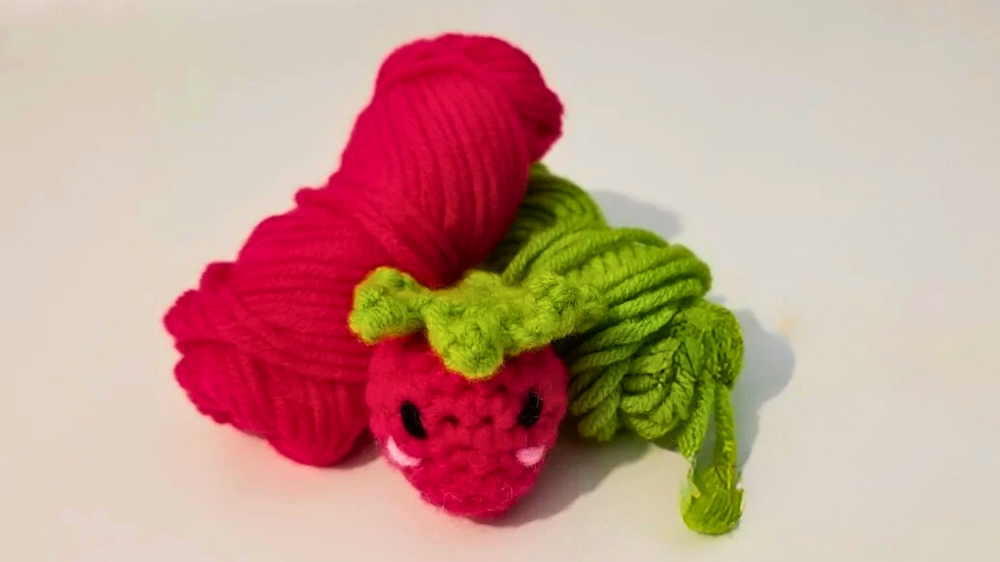
Sweeten your projects with this Crochet Strawberry Pattern, showcasing playful charm, vibrant detail, and delightful handmade appeal.
Bright, cheerful, and instantly recognizable, the strawberry has long been associated with joy, sweetness, and the beauty of summer. In crochet form, this tiny fruit becomes more than a simple motif—it turns into a playful accent that adds charm wherever it is placed. Whether attached to keychains, bags, or used as embellishments on blankets, toys, or kitchen décor, it carries a sense of freshness and delight that instantly uplifts any project.
Sweet Crochet Strawberry that Brings Fresh Elegance
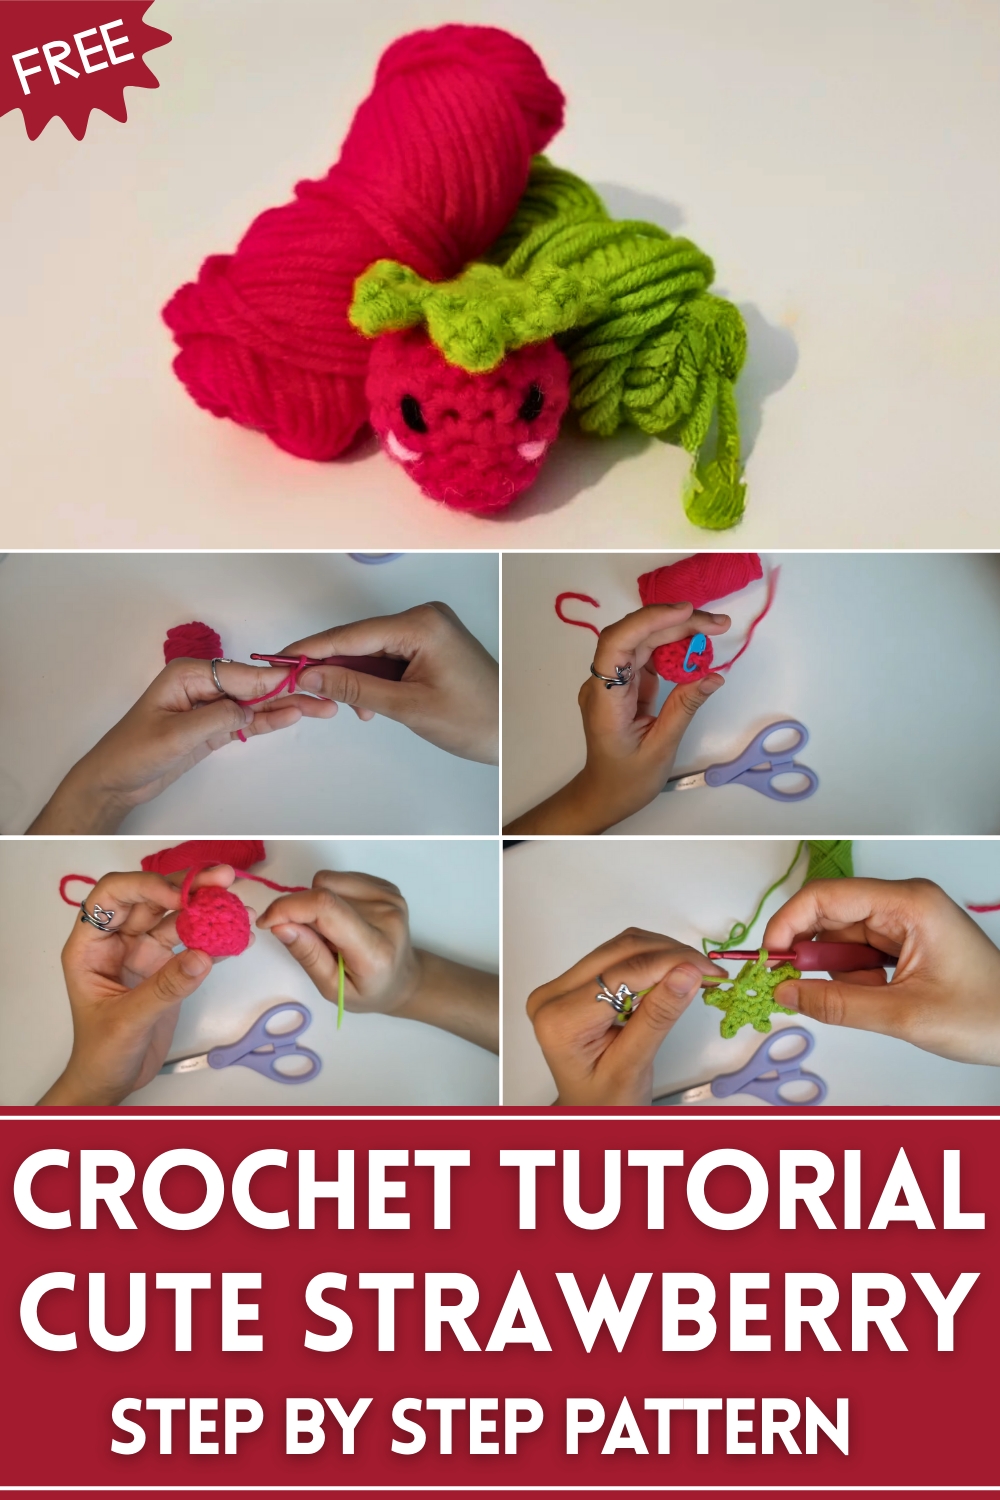
The process begins with a rounded base, shaped through steady increases that mimic the plumpness of ripe fruit. As the rows progress, the body gradually narrows, giving the berry its natural taper. Midway, small details are added through careful stitch placement, suggesting the scattered seeds that make it instantly recognizable. The final touch comes with the leafy green top, worked separately and attached to crown the piece, completing its realistic yet whimsical charm.
Lightweight and quick to finish, this pattern is approachable for beginners while still satisfying for those with more experience. With its versatility and joyful look, the crochet strawberry serves as both a delightful decoration and a thoughtful handmade gift, capturing the timeless appeal of nature’s sweetest treasure.
Materials Needed
- Yarn:
- Dark red yarn (100% acrylic) for the body.
- Green yarn (100% acrylic) for the leaves.
- Some black yarn for the eyes.
- Light pink yarn for the cheeks.
- Hook: 4 mm crochet hook to suit the yarn weight.
- Accessories:
- Stitch marker for marking rounds.
- Scissors.
- Smaller crochet hook or darning needle for weaving in ends.
- Stuffing for filling the strawberry.
Step-by-Step Instructions
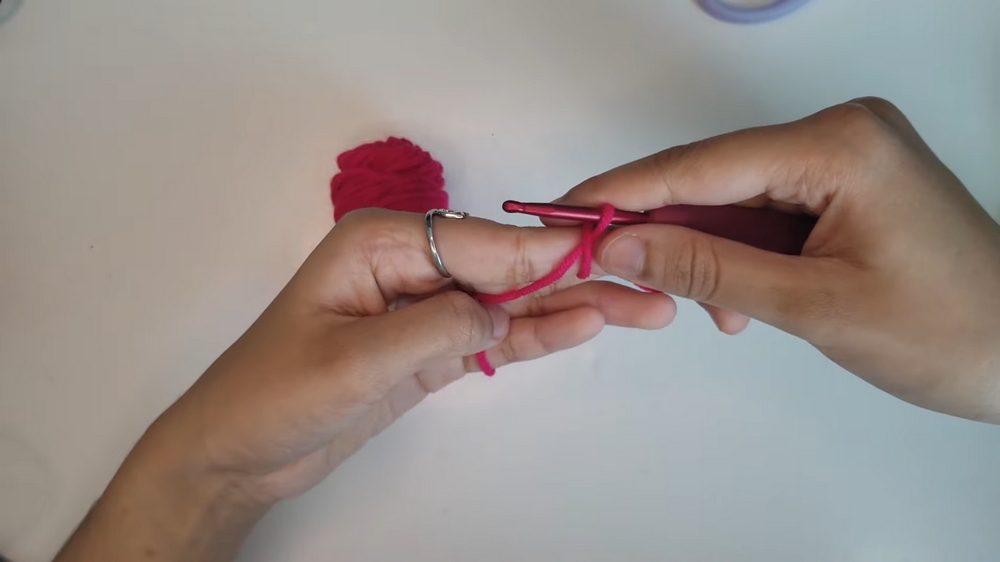
Step 1: Creating the Body of the Strawberry
- Magic Circle:
- Loop the red yarn twice around your finger and create a magic circle.
- Secure the circle and start the first round.
- Round 1:
- Chain one, then work six single crochets (sc) into the magic circle.
- Close the circle by pulling the tail and slip stitch into the first stitch of the round.
- Place a stitch marker on the new round’s starting stitch.
- Round 2:
- Chain one. Alternate between one single crochet in a stitch and two single crochets in the next stitch (increase). Repeat until the end of the round.
- Total stitches: 9.
- Rounds 3 to 6:
- Alternate between rounds with only single crochets and rounds with specific increase patterns:
- Round 3: All single crochets (no increases).
- Round 4: [1 sc, increase].
- Round 5: [2 sc, increase].
- Round 6: All single crochets (no increases).
- Alternate between rounds with only single crochets and rounds with specific increase patterns:
- Round 7 (Decreases):
- Create a sequence of [1 sc, 1 decrease] around.
- To decrease: Insert the hook into the first stitch, yarn over, pull through, insert the hook into the next stitch, yarn over, pull through, then yarn over and pull through all three loops on the hook.
- Stuffing:
- Pull out the current loop temporarily. Insert stuffing into the strawberry. Avoid overfilling to maintain the shape.
- Round 8 (Closing the Strawberry):
- Complete the final round with decreases only.
- Finish off by cutting the yarn, pulling the tail through the last loop, and using a needle to weave the tail through the front loops of the last row. Pull tightly to close the top.
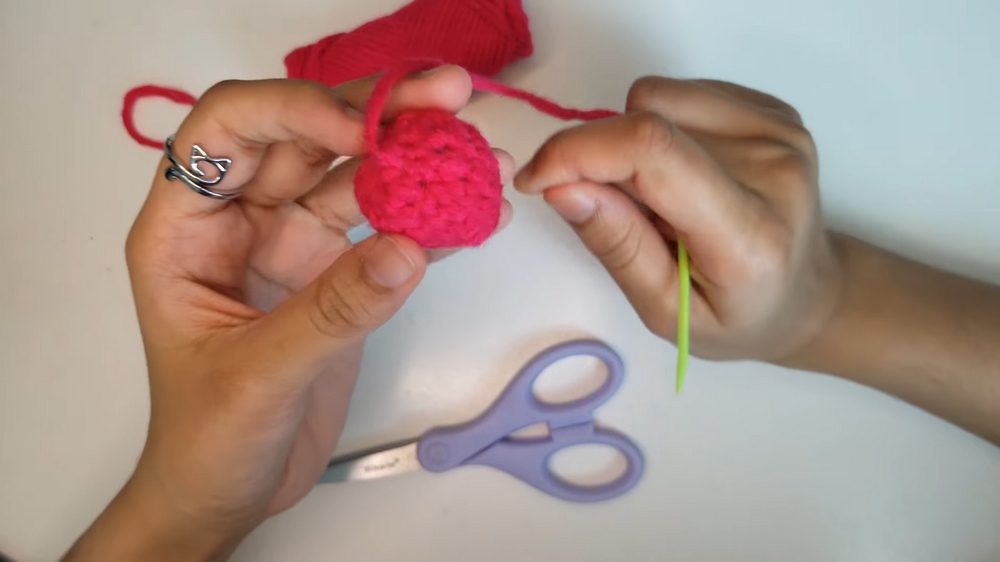
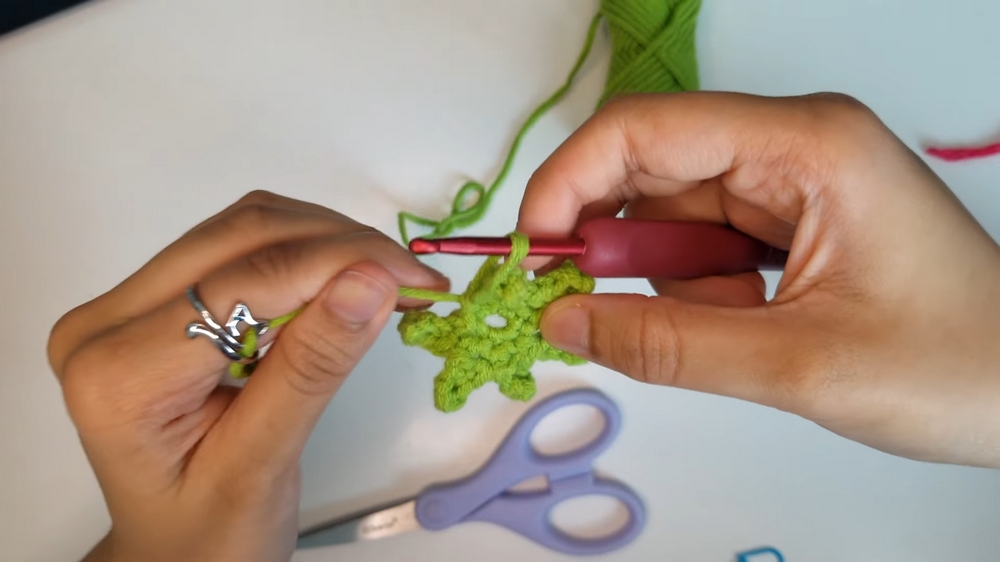
2: Creating the Leaves
- Magic Circle:
- Repeat the magic circle technique with green yarn. Chain one and work six single crochets into the circle. Pull to close the circle.
- Slip Stitch:
- Slip stitch into the first stitch of the round to secure it.
- Leaf Construction:
- Chain four.
- Skip the first chain and single crochet into the remaining three chains.
- Slip stitch into the next stitch of the base magic circle.
- Repeat this process to make five leaves in total around the circle.
- Attach the Leaves:
- Cut the yarn with a long tail. Use the tail and a needle to sew the leaves onto the top of the strawberry. Alternatively, you can use fabric glue for quicker assembly.
3: Adding Embroidered Features
- Eyes:
- Use black yarn and a darning needle to embroider eyes onto the strawberry’s front.
- Position each eye three stitches apart for balance. Knot securely on the back and hide tails inside the body.
- Cheeks:
- Use light pink yarn to embroider small crescent-shaped cheeks under the eyes. Tie and secure the yarn before hiding it inside the body.
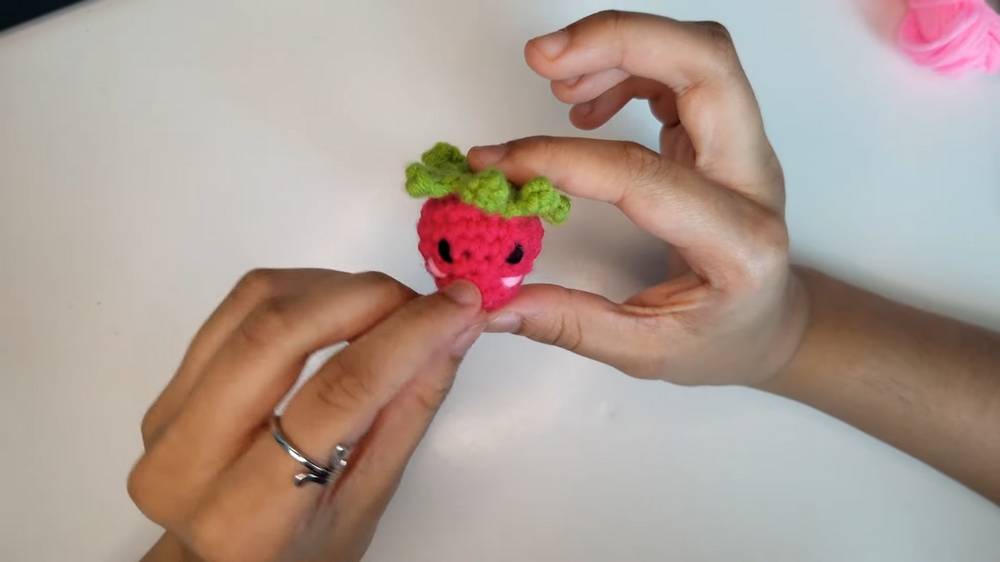
Special Features
- Realistic Shape: The structured use of increases and decreases creates a lifelike strawberry shape.
- Customizable Leaves: The five leaves add an authentic touch and can be adjusted for size.
- Adorable Embellishments: The embroidered eyes and cheeks give the strawberry a playful personality.
Difficulty Level
The project is beginner to intermediate. Beginners can practice fundamental skills like magic circles, single crochets, increases, and decreases, while intermediate crocheters will appreciate the shaping and embroidery details.
Tutor's Suggestions
- Magic Circle Tips: Practice the magic circle technique if you’re new to crocheting in the round. It may take a few tries to perfect.
- Stitch Markers: Always place a stitch marker at the start of each round for accuracy.
- Stuffing: Avoid overstuffing to maintain the shape and prevent yarn stretching.
- Secure Ends: Weave in ends neatly to prevent unraveling.
Uses
- As a cute keychain or bag charm.
- Decorative items for your home (e.g., fruit baskets, dioramas).
- Thoughtful and handmade gifts or party favors.
- Great additions to amigurumi character collections.
Tip
When embroidering the features, use short, clean stitches, and choose a consistent spacing for the eyes and cheeks. This ensures a symmetrical and polished look for your strawberry.
Conclusion
This "Cute Mini Amigurumi Strawberry" is a delightful and beginner-friendly crochet project that mixes practical skills with creative expression. From shaping the strawberry to adding adorable features, this handmade item is as fun to create as it is charming to display. Whether you’re a crochet enthusiast or just starting out, this pattern helps you crochet an impressive little project all on your own.


Leave a Reply