

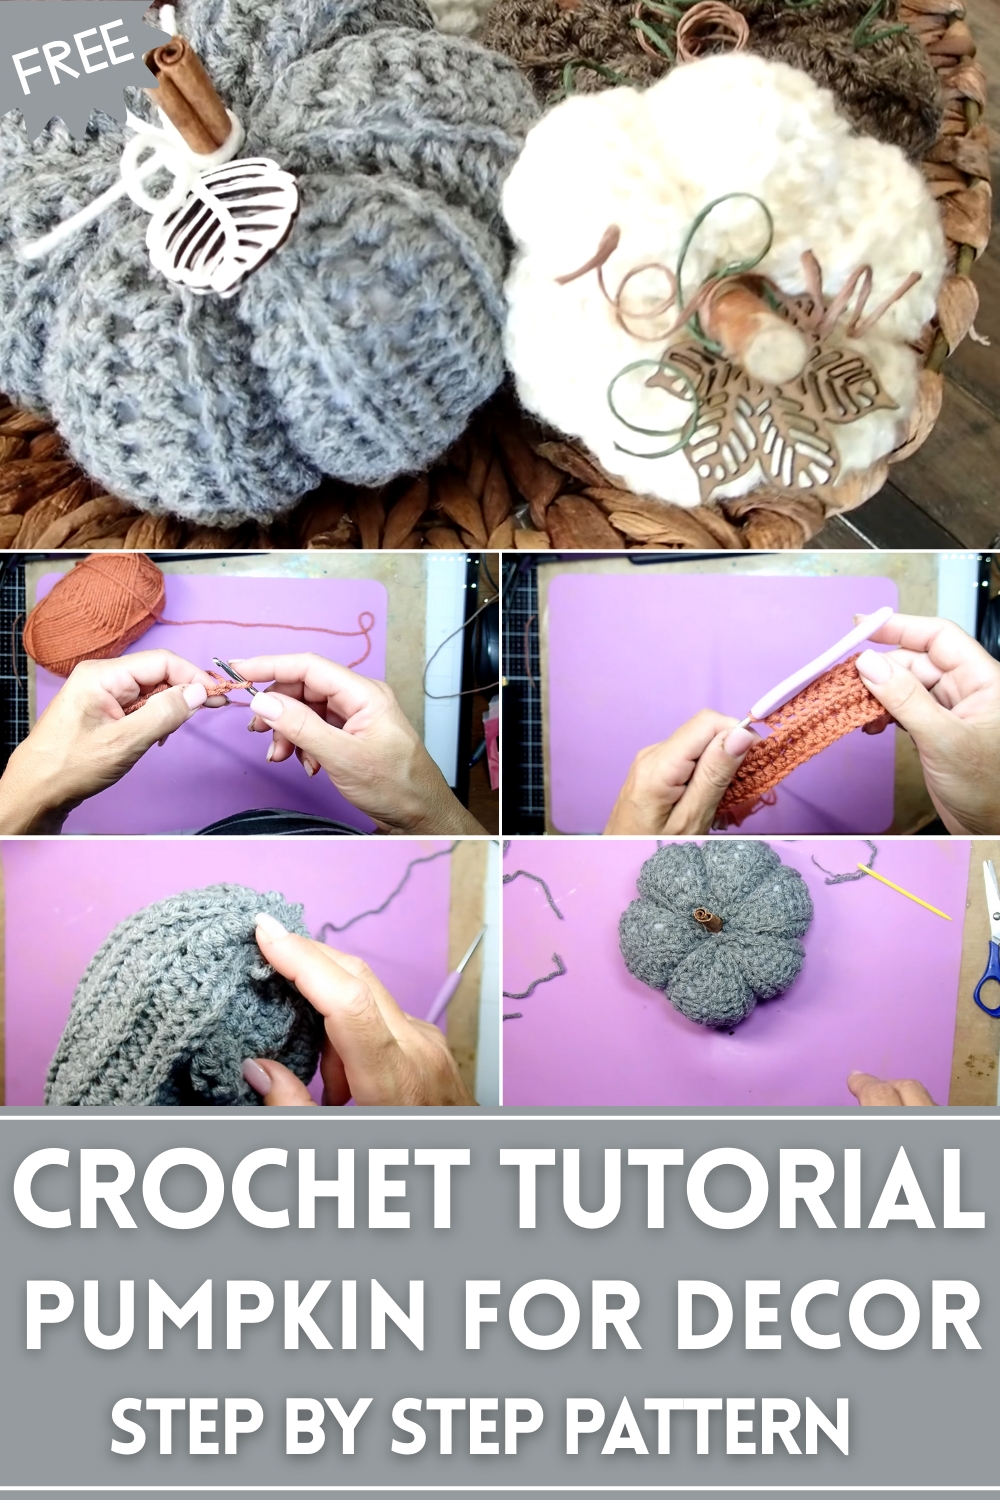
Cozy up your home this fall with the Free Crochet Pumpkin Pattern, perfect for charming decor, festive displays, and handmade seasonal warmth.
Autumn brings a cozy charm that turns every home into a haven of warmth, and there’s a simple way to capture that seasonal spirit with a touch of handmade elegance. The Free Crochet Pumpkin pattern offers a delightful way to add charm to your living spaces, seasonal displays, or table centerpieces. Its soft texture and realistic shape make it ideal for decorating mantels, shelves, or even as playful additions to children’s rooms. Beyond decoration, these crocheted pumpkins can serve as thoughtful gifts, small tokens of appreciation, or unique ornaments for festive celebrations.
How to Crochet Pumpkin Pattern That Feels Handmade
The pattern emphasizes versatility, allowing crafters to adjust size, color, and detailing to suit any aesthetic, from rustic to modern. Creating them also provides a therapeutic rhythm that soothes the mind, making it a satisfying activity for both beginners and experienced crocheters. The steps guide you smoothly from a simple base to a fully formed pumpkin, encouraging confidence while teaching useful crochet techniques like shaping and stitching.
With just basic yarn and a hook, this project becomes a tangible expression of warmth and creativity. Seasonal charm, hand-crafted texture, and personal satisfaction converge beautifully in this pattern, making it an accessible, stylish, and meaningful addition to any home or gifting occasion, celebrating the essence of fall in a gentle, hands-on way.

Step-by-Step Details
Step 1: Gather Your Materials
- Medium weight yarn (#4) in various colors (Joanna used yarn from Dollar Tree).
- Crochet hook suited to your yarn size (approximately 5mm recommended).
- Stuffing material: You can reuse stuffing from an old pillow or buy craft stuffing.
- Scissors
- Tapestry needle
- Glue gun (for decorating)
- Optional embellishments: Cinnamon sticks, floral wire, cardboard leaves, twine.
Step 2: Create the Base Chain
- Start by making a slip knot and then working a chain.
- The chain determines the height of your pumpkin, so decide on the desired size. For example:
- Small pumpkin: Chain 20.
- Medium pumpkin: Chain 30.
- Large pumpkin: Chain 40 or more.
- In this example, Joanna uses a chain of 30 to make a medium-sized pumpkin.

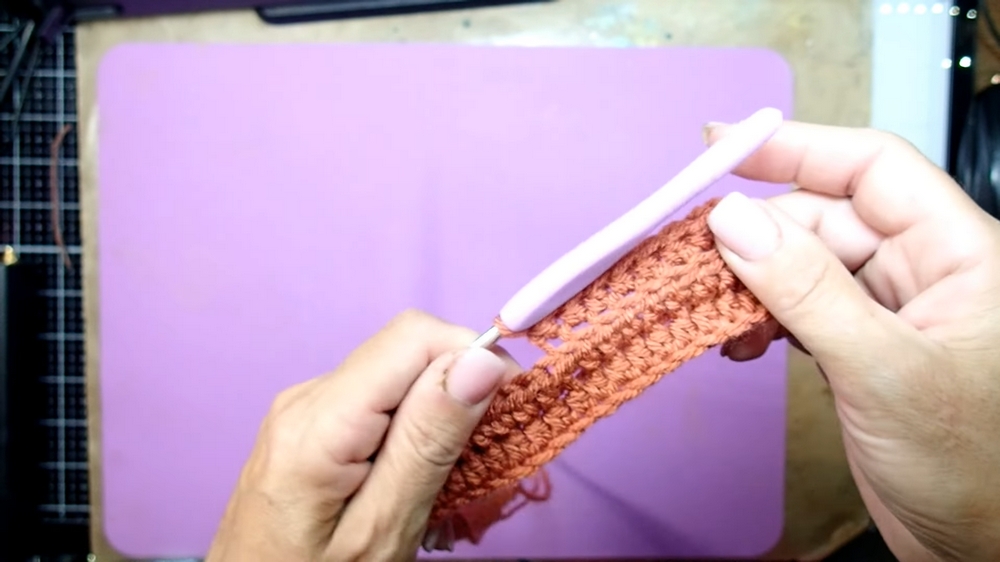
Step 3: Begin the Half-Double Crochet (HDC) Rows
- After completing the chain, yarn over and insert your hook into the second chain from the hook.
- Pull through a loop (you’ll have 3 loops on your hook). Yarn over and pull through all three loops. This is a half-double crochet (HDC) stitch.
- Continue working HDC stitches into each chain until you reach the end of the row.
- At the end of the row:
- Chain 2, turn your work, and begin the next row.
Step 4: Back Loop Only for Texture
- For the second row onwards, work your HDC stitches into the back loop only (rather than both loops of the stitch), as this creates a lovely ridged texture.
- Continue:
- Yarn over, insert the hook into the back loop of the stitch, yarn over again, pull through, and complete the HDC as usual.
- Repeat this process for all rows, maintaining the chain 2 and turn at the end of each row.
Step 5: Determine the Pumpkin's Size
- Continue working rows of HDC until your piece reaches your desired length.
- A good rule of thumb is to work rows approximately 1.5 times the starting chain length:
- For a chain of 30 stitches: Approx. 42 rows.
- For a chain of 20 stitches: Approx. 30 rows.
- A good rule of thumb is to work rows approximately 1.5 times the starting chain length:
- Remember that pumpkins come in all shapes and sizes, so you can create many different variations.
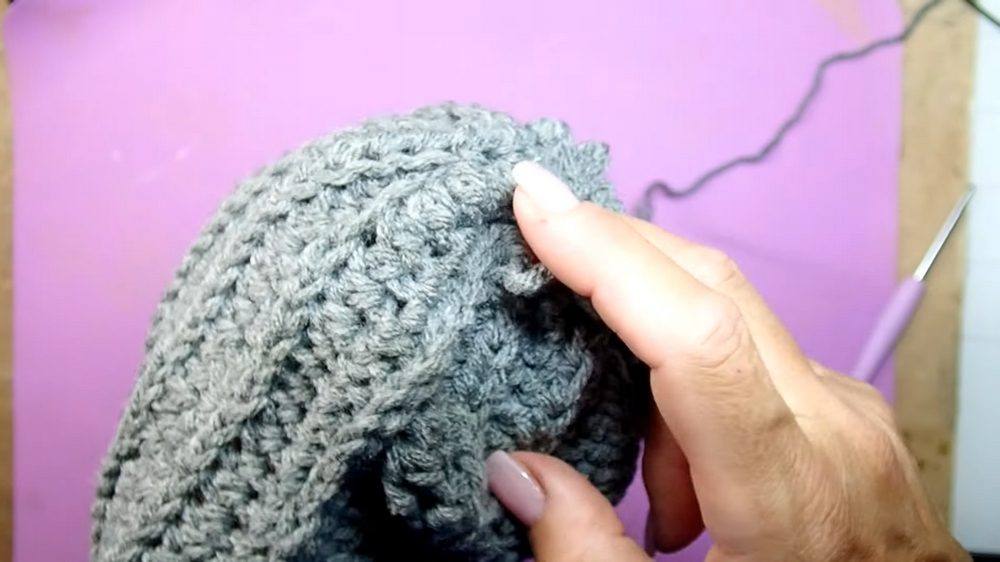
Step 6: Seam the Piece to Form a Tube
- Once your piece is at the desired size, fold it in half lengthwise, aligning the edges.
- Use the remaining working yarn and a slip stitch to seam the edges together:
- Insert the hook into the outer chain of each edge (the outside bottom chain and outside top chain).
- Yarn over and pull through both edges, as well as the loop on your hook.
- Continue slip stitching across the seam until the edges are joined.
Step 7: Close the Bottom
- Attach a tapestry needle to the yarn tail.
- Thread the needle through the stitches along one open end of the tube, working in a circle to gather the bottom edge.
- Pull the yarn tightly to close the bottom.
- Flip the tube inside out to hide the seam and secure the gathered area inside with a few knots or weaving the tail through the stitches.
Step 8: Stuff the Pumpkin
- Add a generous amount of stuffing through the open end, using recycled pillow stuffing or craft stuffing.
- Joanna recommends using stuffing from old pillows for a budget-friendly option.
- Adjust the stuffing to ensure the pumpkin is full and nicely shaped.
Step 9: Close the Top and Add Lines
- Use the same gathering method as earlier:
- Thread a tapestry needle with yarn and stitch through the top edge in a circle.
- Gather the top by pulling the yarn, but leave a small opening for the stem.
- To create the "pumpkin sections":
- Take the yarn around the outside of the pumpkin, threading it from the top to the bottom repeatedly.
- Divide the pumpkin into 6–8 sections, tightening the yarn slightly to create the signature pumpkin ridges.

Step 10: Add the Stem and Decorations
- For the stem:
- Use items like cinnamon sticks, twigs, or rolled-up yarn pieces. Glue the stem into the small opening at the top of your pumpkin.
- For leaves:
- Use floral wire wrapped around a marker to create curly vines.
- Attach leaves made from cardboard, fabric, or other materials. Joanna recommends securing decorations with a glue gun.
- Add small embellishments for a festive look, such as twine bows or paint accents.
Special Features
- Customizable Sizes and Colors: Adjust your chain length and row count to make pumpkins in various sizes and shades for personalized fall decor.
- Ridged Texture: The “back loop only” technique creates beautiful texture and detail.
- Eco-Friendly Option: Use recycled materials like pillow stuffing to make a budget-friendly and sustainable craft.
Level of Difficulty
Beginner-Friendly – This project uses simple stitches (half-double crochet), and the steps are easy to follow. Minimal experience with crocheting is required, making it an ideal project for beginners.
Tutor’s Suggestions
- When seaming the edges, make sure to stitch through the outer loops to ensure the join is neat and hard to detect.
- Experiment with fun fall colors such as white, orange, and gray, or even non-traditional colors like black or pastel shades.
- You can make multiple pumpkins at once to save time and create a beautiful collection for your home or to gift friends.
Uses
- Home Decor: Add to your fall centerpiece, mantel, or shelf displays.
- Party Decorations: Perfect for fall-themed events like Thanksgiving or pumpkin-inspired baby showers.
- GIFTS: Give them to friends and family as handmade seasonal gifts.
Tip
For a more fragrant and festive pumpkin, use a cinnamon stick as a stem for a light autumn scent. However, Joanna notes that real cinnamon sticks might not always have a strong smell, so twigs or other materials work just as well!
Conclusion
Crochet pumpkin is a delightful, beginner-friendly project that allows you to personalize your fall decor. Joanna provides an easy-to-follow tutorial for making pumpkins in various sizes and colors with minimal materials. Whether you’re making them for yourself or as gifts, these adorable pumpkins will bring a cozy, festive touch to any space this autumn.

Leave a Reply