

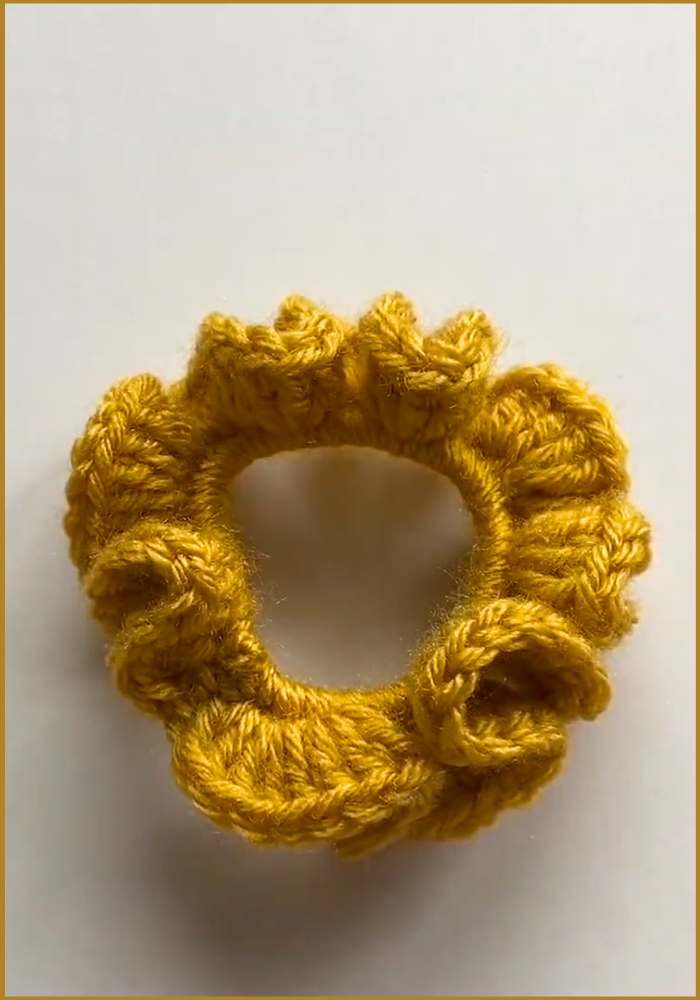
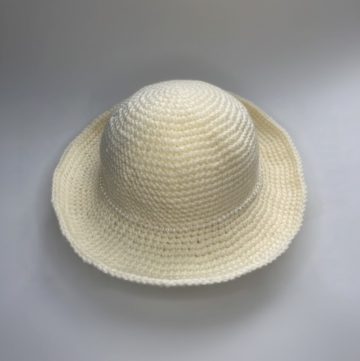
Twist your style with this Free Crochet Scrunchie Pattern, easy to make, trendy to wear, and perfect for fun, handmade hair accessories.
A simple elastic can be transformed into a charming and functional accessory with nothing but yarn, a hook, and a bit of time. Free crochet scrunchie tutorials offer the perfect opportunity to combine beauty with practicality, letting you turn everyday items into personalized treasures. These handmade scrunchies don’t just hold your hair; they add a touch of elegance and individuality to your look. Whether you’re dressing up for an event or opting for a casual day out, their effortless charm enhances your style while keeping your hair neat and secure.
How to Crochet Scrunchie Pattern Quickly and Easily
What makes these scrunchies even more special is their versatility—color, texture, and stitch variations allow endless possibilities to match your outfit or mood. They make thoughtful gifts, bringing warmth and care to each recipient through the loving attention invested in their creation. Additionally, crocheting these accessories is a relaxing activity that fosters mindfulness and creativity. Practical yet beautiful, crochet scrunchies keep waste at bay by upgrading simple hair elastics into lasting treasures.
Materials Required
- Yarn: Medium weight acrylic yarn (Number 4). If using finer yarn, adjust the pattern slightly.
- Crochet Hook: 5mm crochet hook.
- Hair Elastic: Any standard hair elastic will work.
- Scissors: For trimming excess yarn.
- Weaving Tool (Optional): To weave the loose ends securely.
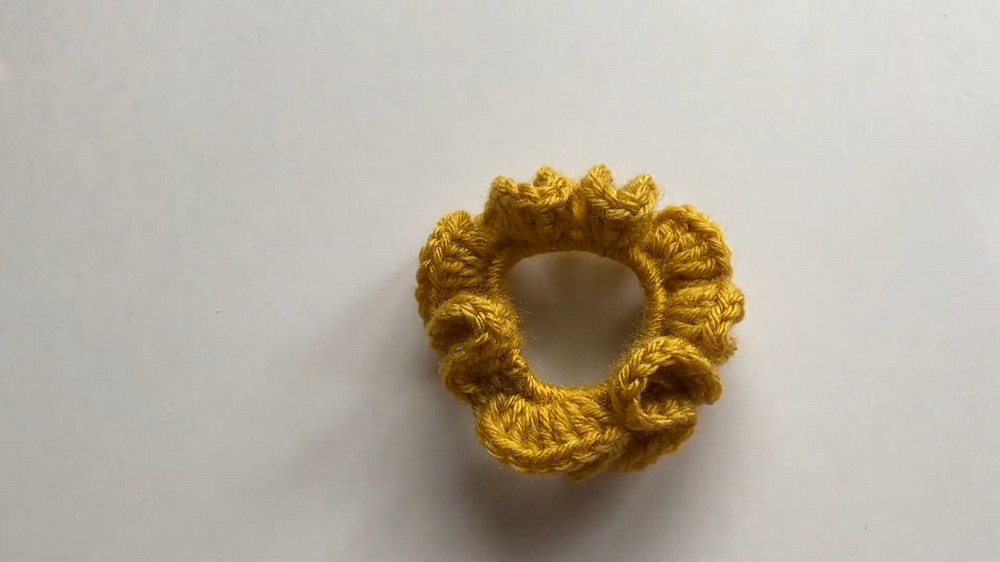
From their softness to their adaptability, crocheted scrunchies carry an irresistible charm. Each stitch intertwines beauty with utility, allowing you to enjoy something functional and simultaneously express your personal style.
Crochet Scrunchie : Step-by-Step Guide
Special Features
- Versatility: The crochet scrunchie works for all hair types and can be customized with different yarn colors or textures.
- Beginner-Friendly Design: The tutorial focuses on simple stitches such as single crochet and double crochet.
- Compact and Portable: You can easily make this project at home or while traveling, as it only requires minimal materials.
Level of Difficulty
This project is beginner-friendly, though some experience with basic crochet stitches (single crochet and double crochet) is highly recommended. Beginners will find it straightforward to follow, as the steps are explained clearly with visual demonstrations.
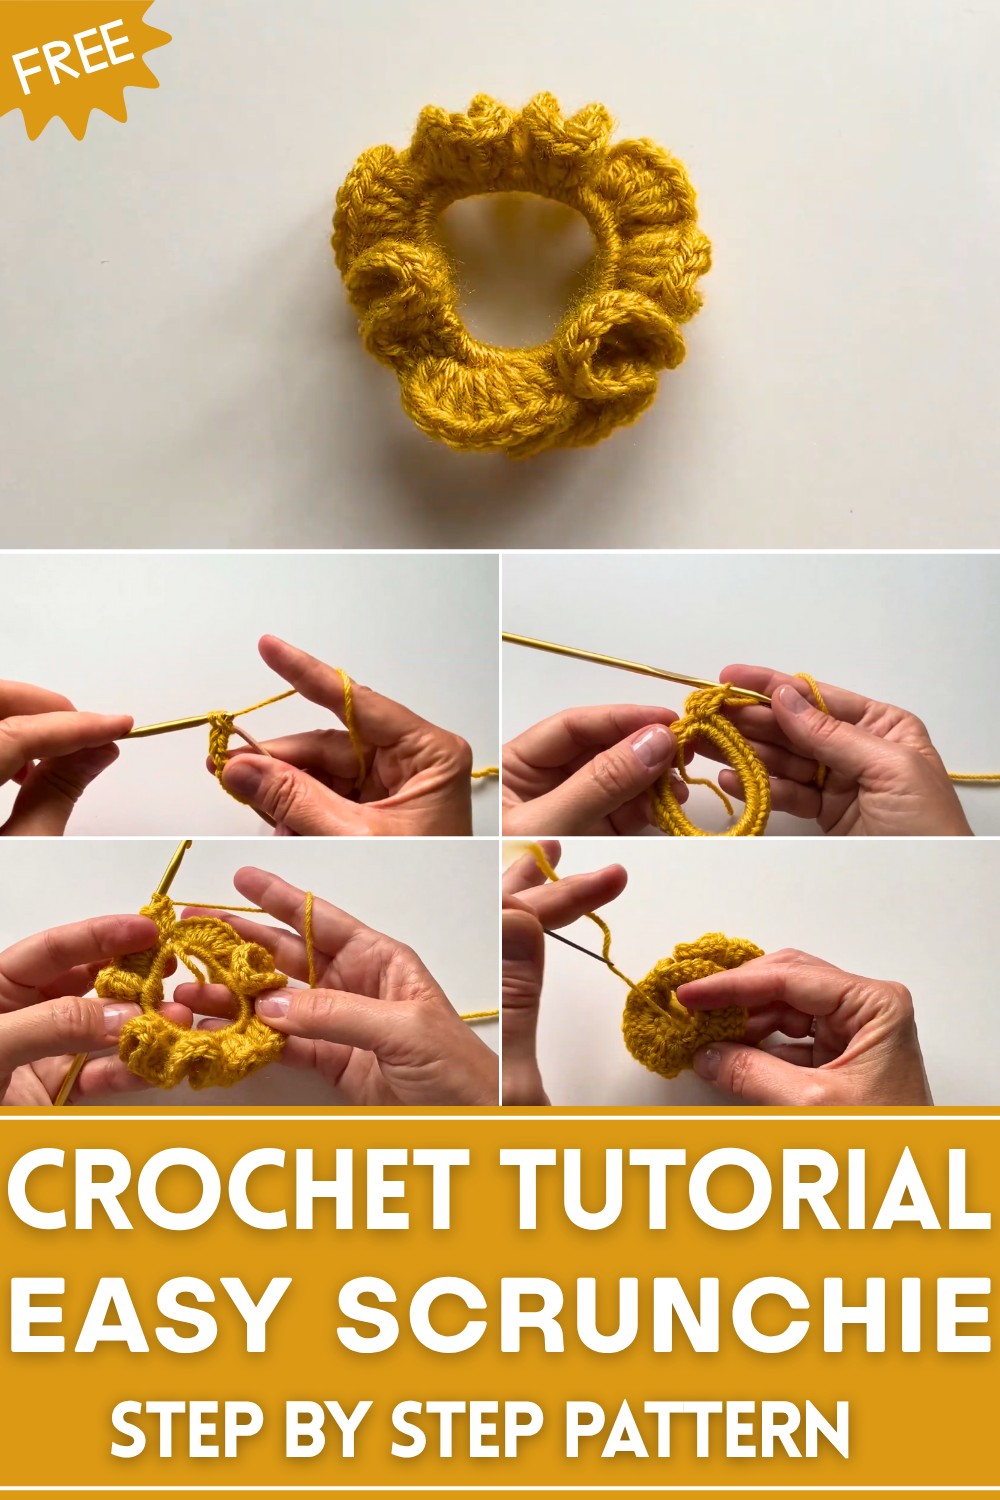
Step-by-Step Instructions
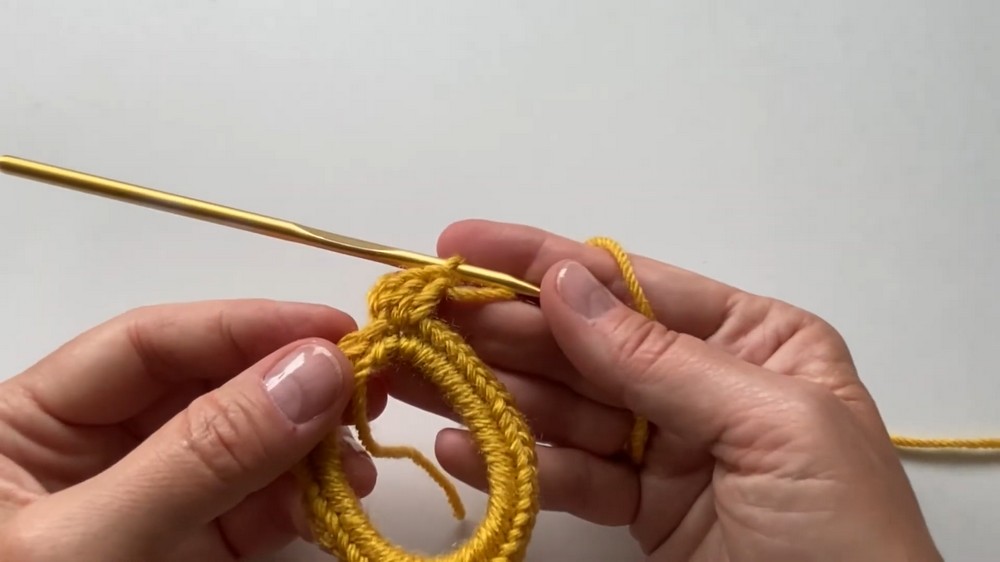
Step 1: Attach Yarn to Hair Elastic
- Tie your yarn onto the elastic.
- Insert your crochet hook into the elastic and pull the yarn forward to create a loop.
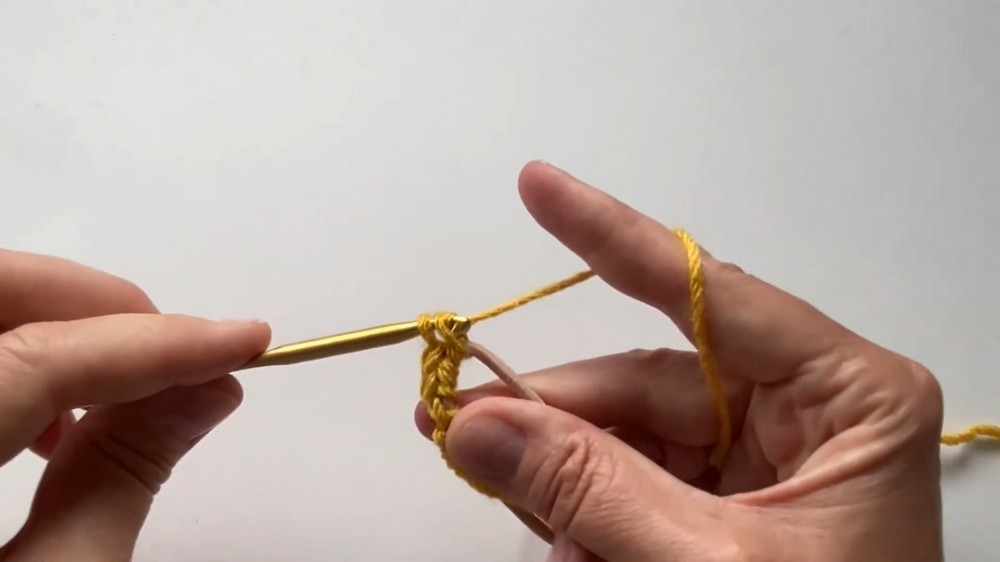
Step 2: Crochet the Base
- Perform single crochets all the way around the elastic band.
- Gather your stitches closely together. Aim for 35–40 single crochet stitches to fill the elastic evenly.
Step 3: Slip Stitch to Join
- At the end of the single crochet row, slip stitch into the first single crochet to join the round.
Step 4: Create Double Crochet Rows
- Begin the next row with a chain 3, which counts as your first double crochet.
- In the first space, add two double crochets to complete a cluster of 3 double crochets.
- Continue making three double crochets into each stitch around the elastic.
Tip for Fine Yarn
- If using finer yarn, start the first row with one double crochet per stitch. In the second row, add clusters of three double crochets.
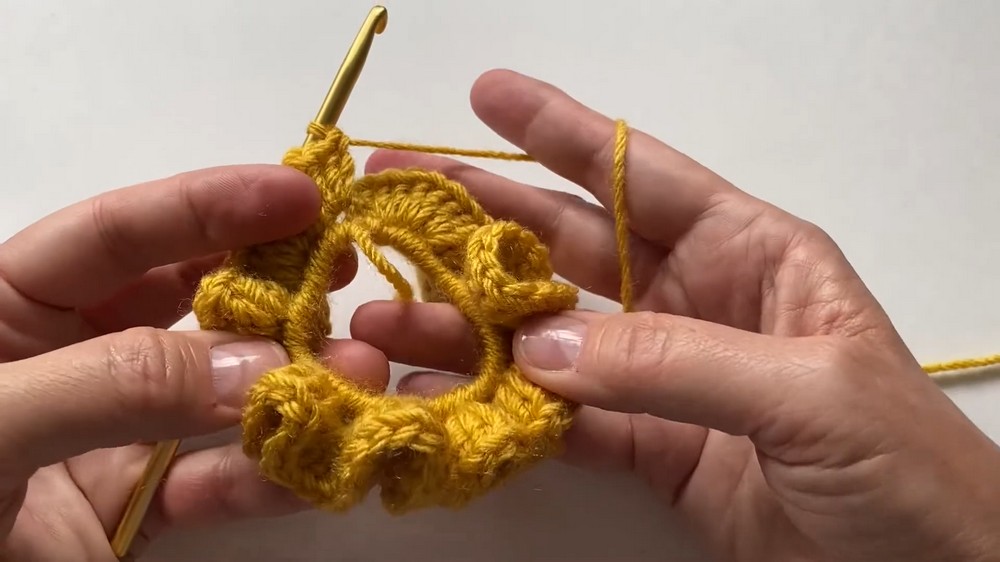
Step 5: Finish with a Slip Stitch
- When you complete the round, slip stitch into the top of the initial chain-3 stitch to close the row neatly.
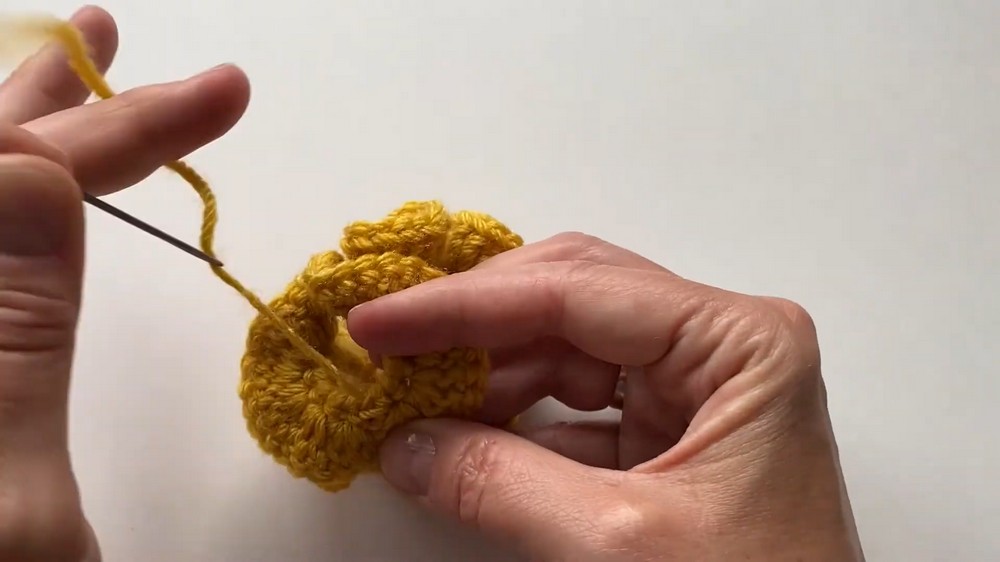
Step 6: Cut and Weave Ends
- Trim the yarn, pull it through the final loop, and weave the ends securely into the scrunchie with a weaving tool or by tying a knot.
Tutor’s Suggestions
- The instructor recommends using medium weight acrylic yarn for best results.
- Beginners should take their time with gathering stitches to avoid unevenness.
- The tutorial emphasizes adjusting the row structure if finer yarn is used.
Uses of Crochet Scrunchies
- Stylish hair accessories for daily use.
- Gifts for friends and family.
- Decorative items you can sell or customize for different occasions.
Helpful Tip
For a professional look and durability, weave the ends securely into the scrunchie instead of leaving them tied. This ensures the stitches won’t loosen over time.
Conclusion
Crocheting your own scrunchie is a simple yet satisfying way to create personalized hair accessories. With minimal materials and easy-to-follow steps, this tutorial is ideal for beginners and anyone seeking quick, creative projects. Watch the video, give it a try, and enjoy the results!
Leave a Reply