

Summer style shines with this Crochet Crop Top Pattern, adding airy comfort, playful elegance, and versatile handmade fashion flair.
On warm summer days, handmade clothing has a special charm, offering both comfort and individuality in every stitch. A crochet crop top brings this charm to life with airy textures and a flattering fit that suits casual outings, beach days, or layered festival looks. Its breathable fabric allows ease of movement while maintaining style, making it both practical and eye-catching. The delicate interplay of stitches creates subtle patterns that enhance its elegance, while the cropped length adds a youthful and playful appeal.
Graceful Crochet Crop Top adding Subtle Handmade Detail to Outfits
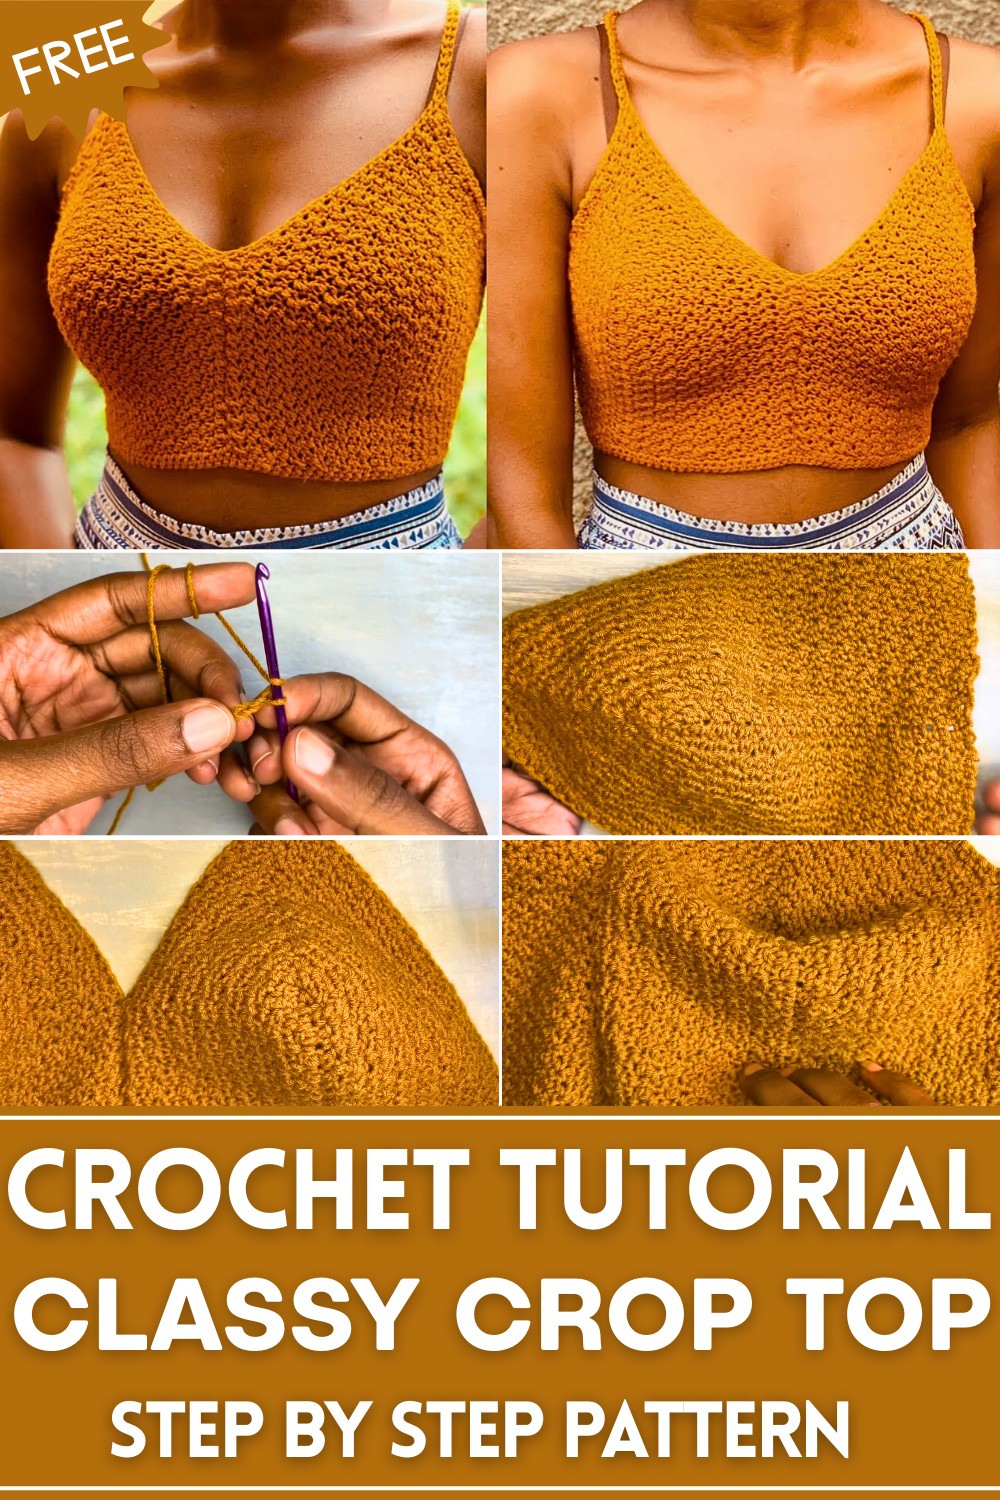
Lightweight yet sturdy, it can be paired with high-waisted skirts, shorts, or trousers, making it a versatile wardrobe staple. Beginners can enjoy following clear steps that guide stitch placement and shaping, while experienced hands can experiment with colors, yarn types, or decorative edging to personalize the piece.
Beyond fashion, it brings the satisfaction of completing a handmade garment that combines utility, beauty, and tactile pleasure. Each top has the potential to become a signature piece, whether worn daily or saved for special occasions. The combination of comfort, style, and craftsmanship ensures that it not only looks stunning but also provides lasting value, making it a joyful addition to any collection of handmade clothing.
Materials Needed
To get started, gather the following materials:
- Three-Ply Yarn (Robin)
- 3mm Crochet Hook
- Stitch Marker
- Darning Needle
- Scissors
Special Features
- Alternating Stitch Pattern: Creates a textured and visually appealing design.
- Customizable Fit: The top can be adjusted for different sizes by altering the chain length and rows.
- Seamless Finish: Features single crochet edges and thoughtful stitching for a polished and professional look.
- Adjustable Strings: The addition of crochet strings and holes ensures the top can be tied to fit securely and stylishly.
Step-by-Step Instructions
1. Start the Foundation Chain
- Make a slip knot to begin.
- For a small size, chain 30 stitches. Adjust the chain length according to your size by measuring from your waist to your bust (up to the nipple).
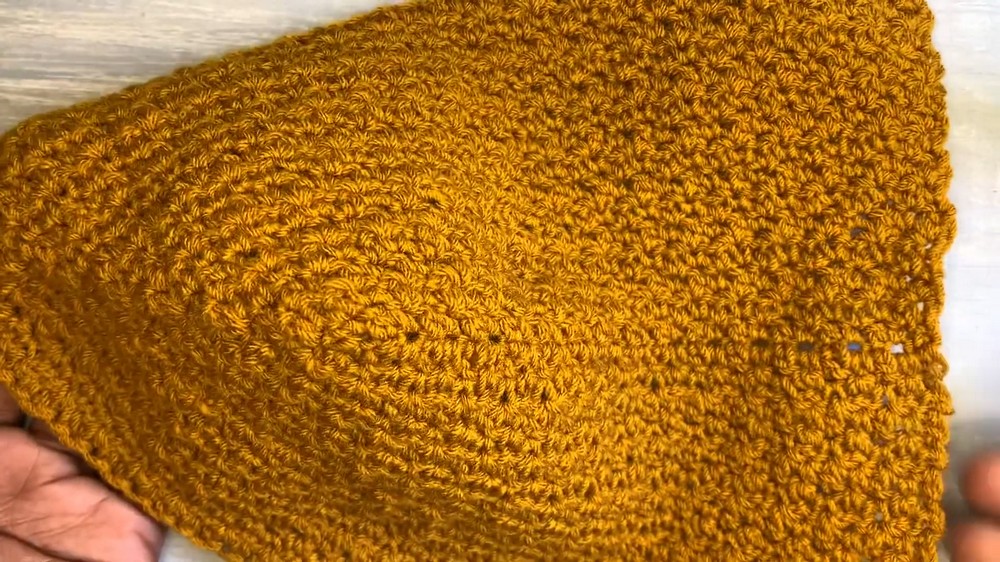
2. First Row (Alternating Stitches)
- Chain 1 more (acts as a turning chain).
- Insert your crochet hook in the second chain from the hook and work the following pattern:
- First stitch: Double Crochet.
- Next stitch: Single Crochet.
- Continue alternating between double crochets and single crochets to the end of the row.

3. Forming the Corner
- In the final chain of the first row, work three stitches in the same place:
- A single crochet,
- A double crochet,
- Another single crochet.
- Use a stitch marker to mark the middle stitch (the double crochet).
4. Subsequent Rows
- Chain 1 and turn your work.
- Continue the same alternating pattern across the row:
- Insert a double crochet where the previous row had a single crochet.
- Insert a single crochet where the previous row had a double crochet.
- When you reach the stitch marker, repeat the process of adding three stitches into the middle (single crochet, double crochet, single crochet). Update the stitch marker to the middle double crochet of the three.
5. Repeat Until Desired Length
- Continue alternating stitches row by row.
- Add extra rows until the piece covers your bust comfortably. For reference, the tutor worked 16 rows for a size small.
6. Create Two Identical Panels
- Once the first panel is complete, repeat the steps to make a second panel of identical size.
- Ensure that both panels have the same number of rows and stitches.

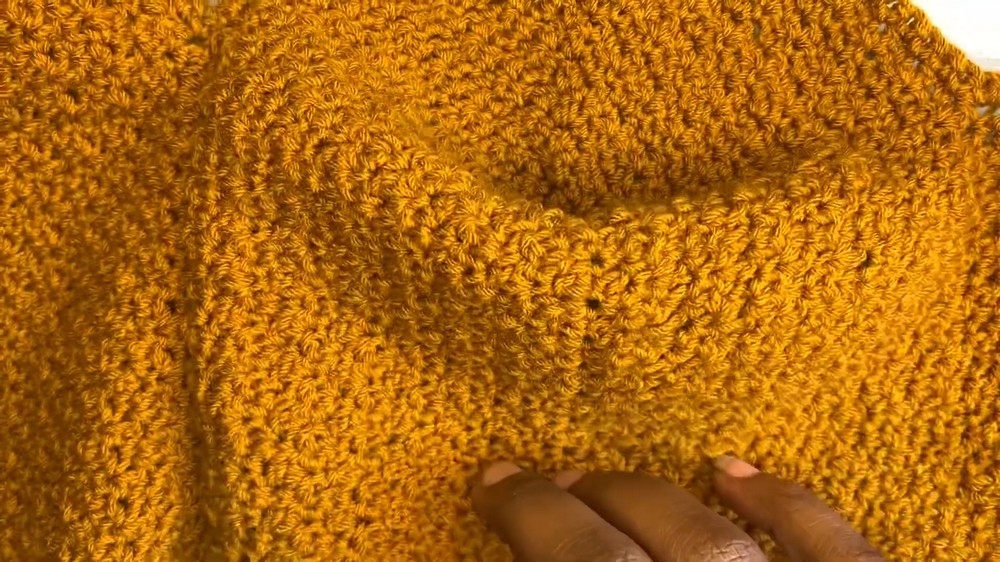
7. Assemble the Top
- Align the two panels, placing the right sides together.
- Count 20 stitches down from the top edge and mark the spot with a stitch marker. This will create the neckline at the center of the top.
- Use a darning needle to sew the panels together, stopping at the stitch marker. This forms the front opening.
- Secure the bottom edges with single crochets or any preferred stitch for a neat finish.
8. Add Extensions
- At the bottom edges, where the strings will pass through, attach your yarn and work five rows of alternating single and double crochets.
- Repeat the same extensions on both sides, ensuring symmetry.
9. Add Edging
- Single crochet around the entire outer edge of the top. This creates a smooth and stable finish.
10. Create the Strings
- Chain 200 stitches (or long enough to tie comfortably).
- Work a row of half-double crochets along the chain to create a sturdy string.
- Attach the strings to the appropriate spots at the top of the crop top.
11. Add Holes for the Strings
- Work along the top edge of the panels to create spaces for the strings to pass through:
- Chain 4 stitches, skip 3 stitches, then insert a single crochet into the fourth stitch.
- Repeat this process to create evenly spaced holes for the strings on both panels.
12. Finishing Touches
- Use the darning needle to weave in and secure any loose yarn ends to the wrong side of the fabric. Cut excess yarn to ensure a clean and tidy finish.
- Add any final adjustments needed for fit and style.
Level of Difficulty
- Intermediate: While the pattern uses basic stitches, the alternating patterns and panel assembly may require some prior crochet experience. Beginners can still attempt it by carefully following the detailed steps.
Tutor’s Suggestions
- Use a stitch marker consistently, especially at the center point during row turns, to ensure even growth on both sides.
- Maintain loose tension to make inserting the hook into stitches easier.
- Regularly measure your work to ensure the desired fit before proceeding with additional rows.
Uses
- A casual cropped top perfect for summertime outings.
- Easily paired with jeans, skirts, or shorts for a stylish, handmade look.
- Customizable to fit various sizes or add flair with different yarn colors.
Tip
To give your top a professional finish, work single crochets around the edges and ensure your rows are even. Small details like clean edges and careful weaving of yarn ends make a big difference in the overall appearance.
Conclusion
This crochet crop top pattern provides a satisfying project that blends simplicity with creativity. Whether you want to add a handmade piece to your wardrobe or gift it to someone special, the detailed guidance ensures success. With its customizable size and stylish outcome, this easy-to-wear top is a great addition to any crochet enthusiast's repertoire.
Leave a Reply