

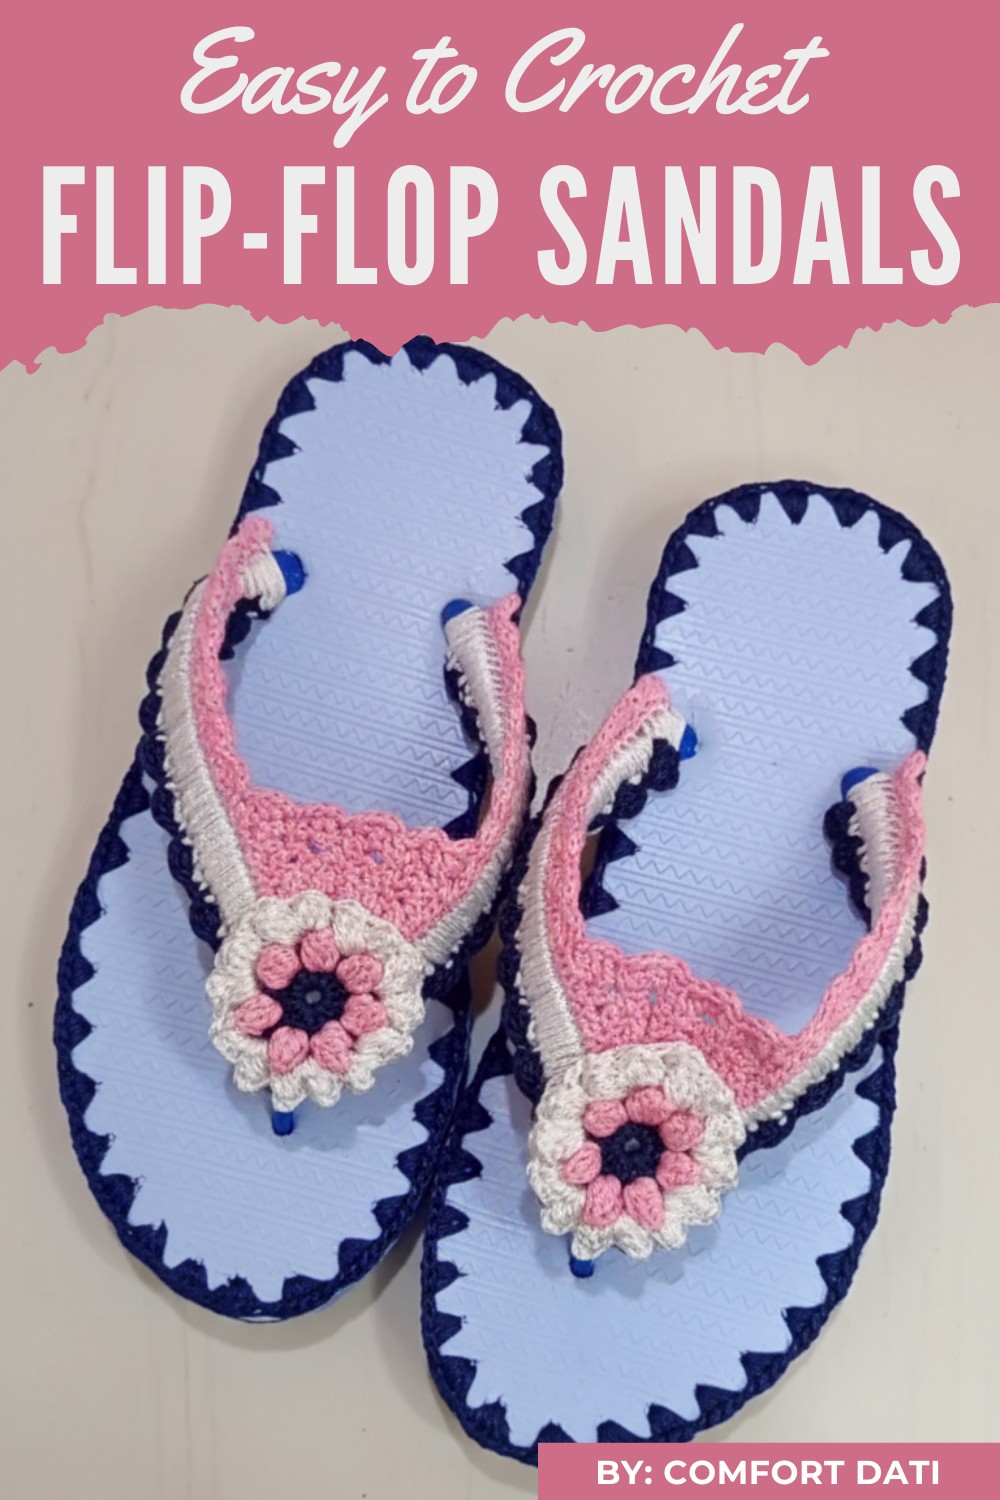
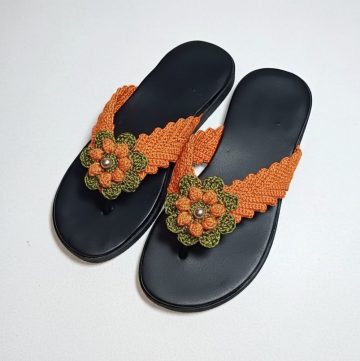
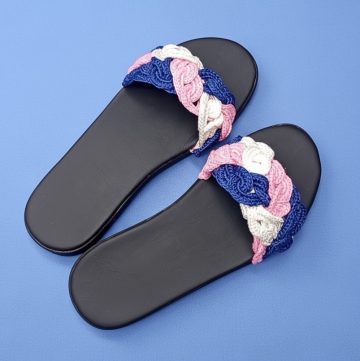
Step into summer with the Free crochet flip-flop sandals Pattern, a stylish, comfy, and breathable way to upgrade ordinary flip-flops with handmade charm.
This summery pair of sandals feels fresh and handmade, its soft yarn weaving around flip‑flop soles in a way that’s both charming and practical. The Free Crochet flip‑flop sandals Pattern offers a clever way to upgrade ordinary foam flip‑flops into stylish crochet footwear, turning simple shoes into lightweight, breathable sandals with a cozy, custom finish.
Cozy Crochet Flip-Flop Sandals Pattern With Handmade Charm
Putting these together feels relaxing — the rhythmic stitching over the soles gives a satisfying flow, and the end result is lightweight yet sturdy. Once finished, you get a pair of handmade, washable sandals perfect for warm weather, beach walks, or simply lounging, blending upcycled materials with creative crochet for stylish and comfortable summer wear.
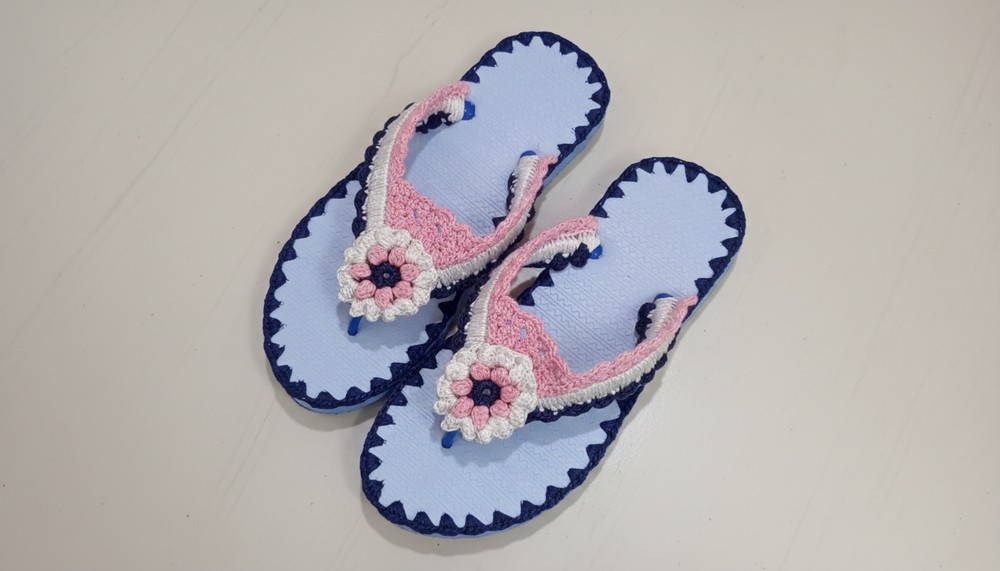
The stitches hug the straps smoothly, creating a secure yet flexible band that looks both neat and decorative.

Beyond its attractive look, this design is very functional: the crochet adds comfortable coverage over your existing soles, making the sandals more wearable and visually interesting.
You can choose cotton yarn for breathability or stronger synthetic fibers for durability, and the hook size can be adjusted depending on your yarn weight.
The pattern is beginner-friendly, with instructions for attaching yarn to the flip-flops and working stitches that anchor firmly without tearing the base.
Crochet Flip-Flop Sandals Pattern
Uses
-
Personalized Footwear: Create unique, custom-fitted sandals for yourself.
-
Recycling Project: Give new life to old or basic flip-flop soles.
-
Gift Idea: Craft handmade, personalized gifts for friends or family.
Materials
-
Soles: A pair of standard rubber flip-flop soles (the straps are removed).
-
Yarn: Two or more complementary colors of yarn (the tutorial uses light pink, white, and two shades of blue).
-
Crochet Hook: A hook size appropriate for your chosen yarn (a smaller size is helpful for working around the sole).
-
Tools:
-
Sharp Object/Awl: Use this to prick holes around the edge of the sole.
-
Sharp scissors.
-
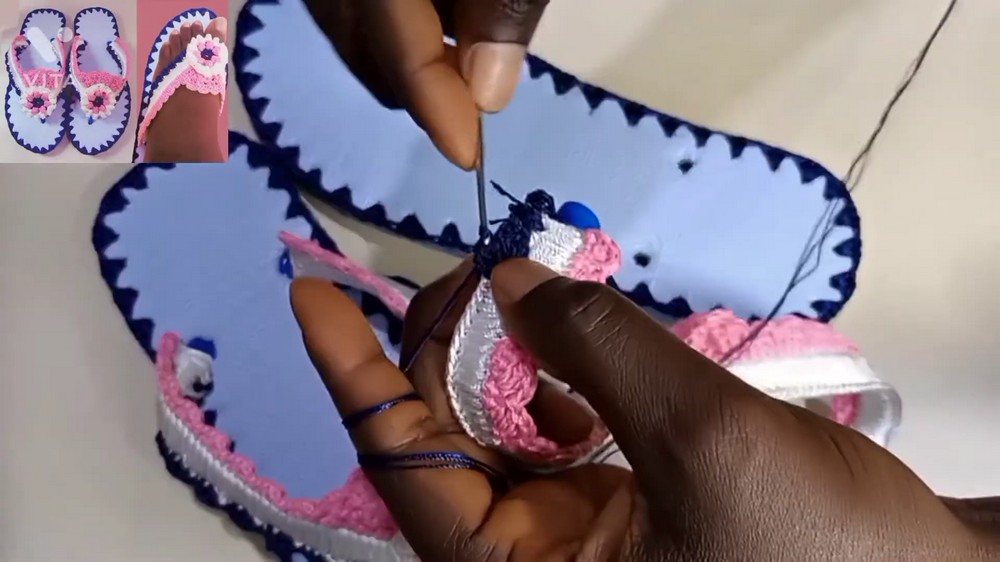
Needle and thread (to sew the final flower embellishment).
-

Special Features
-
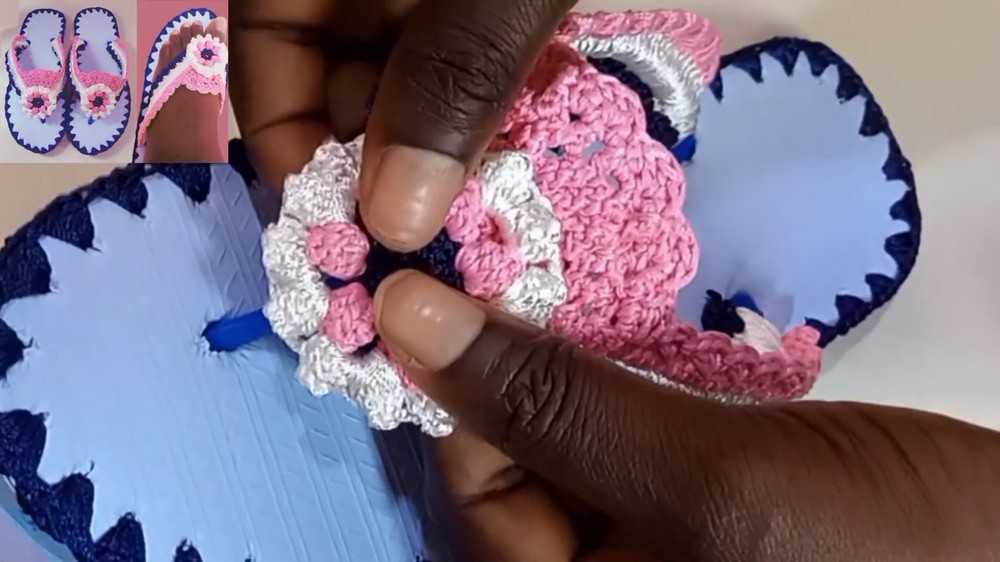
Sole Modification: The project incorporates a unique starting technique where you use a sharp object to uniformly prick small holes around the perimeter of the sole, creating the foundation for the first crochet round.
-
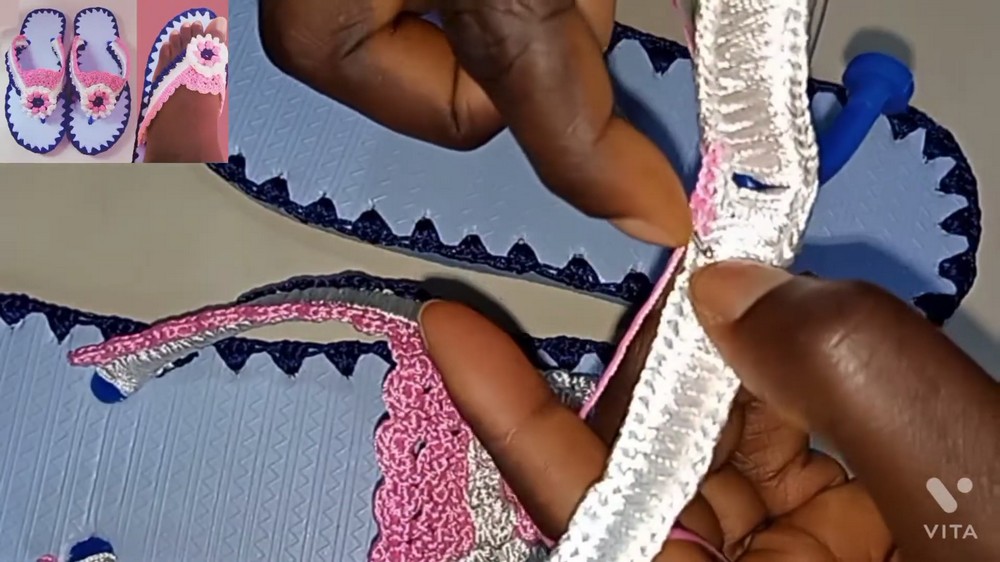
Lace-Up Vamp Design: The main upper of the sandal features a lacy pattern achieved by alternating chains and single crochet stitches, which gives the finished sandal a delicate appearance.
-
Two-Toned Decorative Edging: The front edge incorporates a shell border, worked with alternating double crochet clusters and slip stitches, creating a scalloped finish on both sides.
-
Puff Flower Embellishment: A multi-layered flower made of puff stitches (clusters of double crochets pulled together) serves as the decorative focal point where the shoe strap typically meets the sole.
Level of Difficulty
Intermediate. This project requires precision in preparing the sole and managing increases/decreases for fit. You must know how to:
-
Work a foundation round directly into a perforated rubber sole.
-
Execute basic crochet stitches (SC, DC, Chain).
-
Work specialized stitches like the puff stitch (or cluster stitch for the flower).
-
Read and follow a detailed pattern that requires turning and working back and forth.
Tutor's Suggestions
-
Uniform Hole Spacing: Ensure you prick the holes around the sole at a consistent distance (about half an inch apart) to ensure the foundation row remains neat and even.
-
Start the Vamp Correctly: Begin the lacy vamp pattern by counting in from the center toe space on the inner side of the shoe. The pattern is attached in the second loop away from the center to properly position the vamp over the foot.
-
Reinforce the Flower: When attaching the final flower embellishment, use a needle and thread to securely sew it to the top of the sole where the strap was located. This ensures the focal point is sturdy.
Step-by-Step Instructions
This tutorial demonstrates how you can transform a simple pair of inexpensive flip-flop soles into stylish, custom-made crochet sandals. The process involves preparing the rubber soles by punching holes, crocheting an entire upper sandal component, and then finishing the edge with decorative shells and a two-toned flower embellishment. This modification gives old or plain flip-flops a completely new, personalized look.
Conclusion
You have successfully converted a plain flip-flop sole into a unique, sophisticated crochet sandal. By expertly adapting the rubber base and using a beautiful combination of lacy stitches and decorative edging, you have created a personalized and fashionable piece of footwear.
Tip
Customize the Fit: Since feet sizes and shapes vary, frequently try on the sandal as you work Phase 2 (Building the Main Upper/Vamp). If the vamp seems too loose, consider skipping an extra stitch or two in the chain-4 rows to slightly tighten the span. If it feels too tight, add an extra SC stitch at the end of the non-chain-4 rows to subtly increase the width.

Leave a Reply