

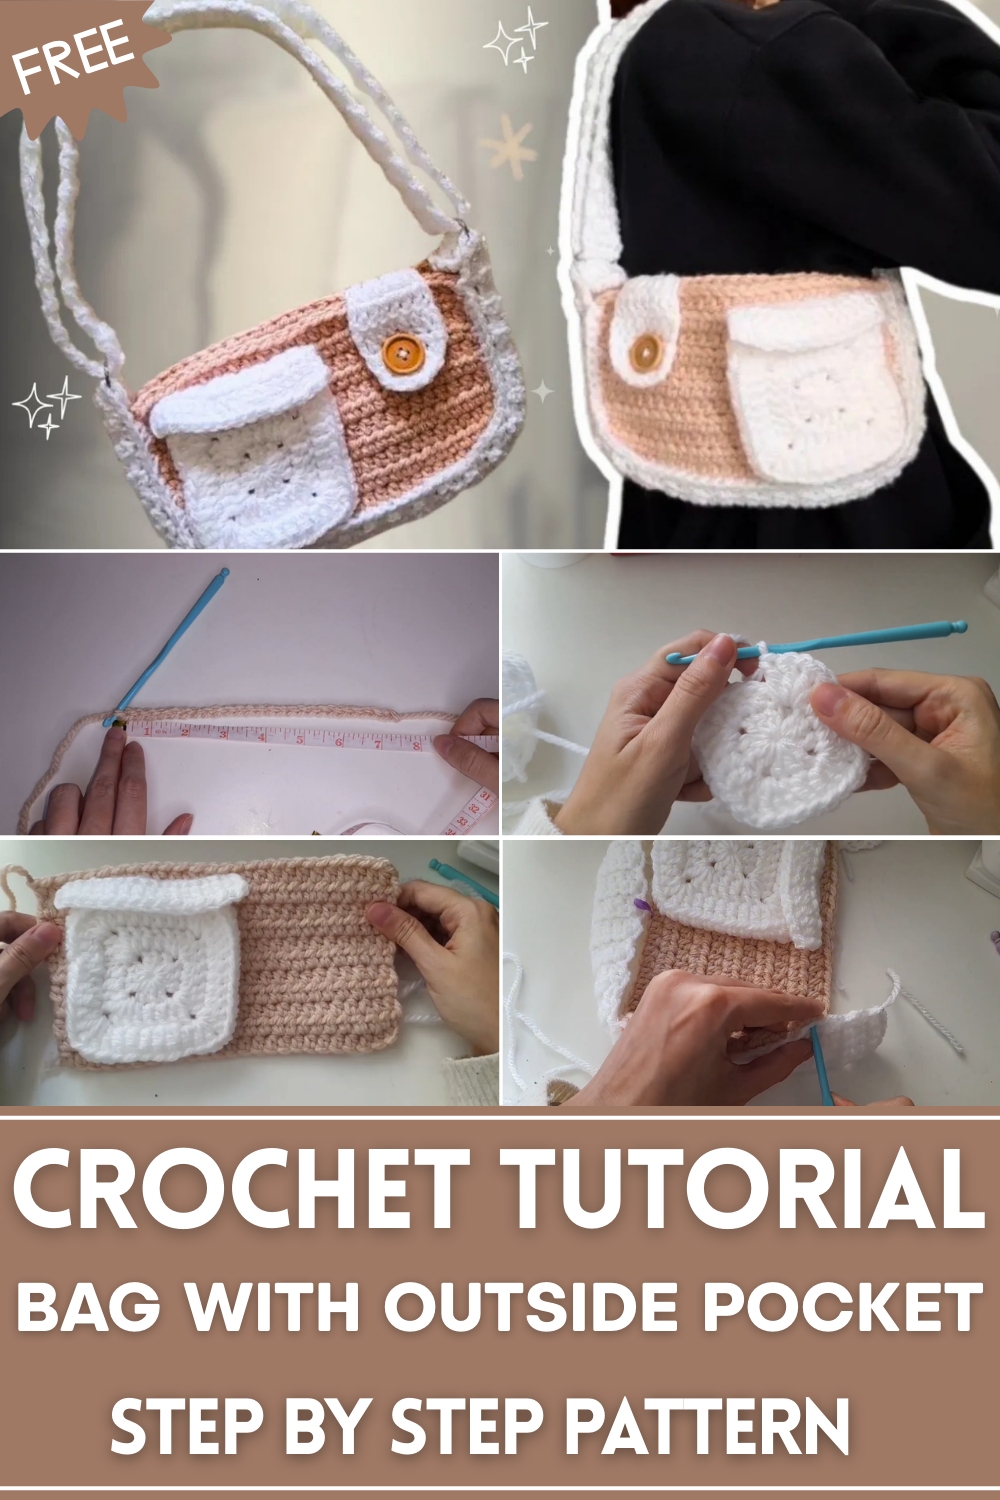
Upgrade your style with a Crochet Bag With Outside Pocket Pattern offering smart storage, sleek charm, and effortless everyday elegance
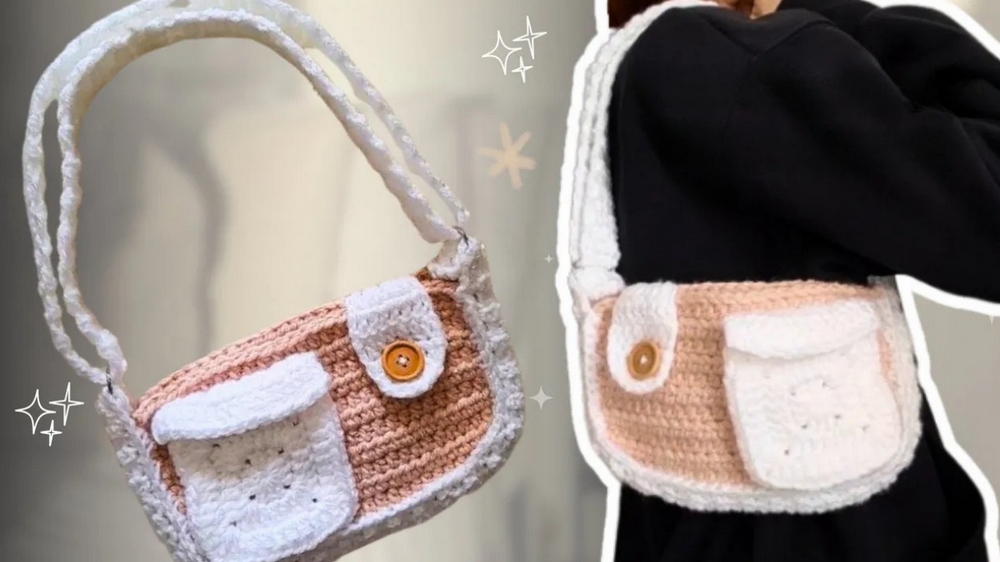
A young professional reached for her favorite bag, one that carried not just essentials but a sense of effortless style. The crochet bag with an outside pocket stands out, combining practicality with charm. Its spacious interior holds daily necessities with ease, while the outside pocket provides quick access to keys, phone, or tickets, making every outing organized and smooth. The soft texture of the crochet fabric adds an artisanal touch, giving the bag a distinct personality that complements both casual and semi-formal outfits.
Handmade Crochet Bag With Outside Pocket for Every Occasion
Lightweight yet sturdy, it balances convenience with durability, ensuring long-lasting use without compromising comfort. Its versatility allows it to accompany errands, coffee dates, or weekend trips, offering functionality without sacrificing elegance. Beyond practical features, this bag brings warmth and charm to everyday routines, turning ordinary moments into subtle statements of refinement.
The thoughtful structure, aesthetic appeal, and user-friendly elements make it an essential accessory for anyone who values items that are as beautiful as they are useful. With each glance at its neatly stitched exterior and easily accessible pockets, this crochet bag demonstrates how artistry and utility can coexist seamlessly, enhancing daily life with convenience, beauty, and a quiet touch of sophistication.
Materials Needed
- Yarn:
- Size and thickness of your choice. Example used:
- Primary Color for the panels and straps.
- Secondary Color(s) for the pockets and details.
- Size and thickness of your choice. Example used:
- Hook: Crochet hook suitable for your yarn size. Example used: 6.5 mm hook.
- Extras:
- Toy stuffing (optional, for giving more structure to the bag).
- Stitch markers to ensure alignment.
- Tapestry needle for sewing pieces together.
- D-Rings (optional, for adjustable straps).
- Buttons (optional, for closures).
- A measuring tape to match your desired size.
Step-by-Step Details
Part 1: Creating the Bag Panels
1: Base Chain
- Begin with a slip knot.
- Chain stitches until the length matches the desired width of the bag. The video uses a chain of 25 (around 19 cm/7.5 inches wide), but you can customize this.

2: Crochet Rows
- Work half double crochets (HDC) across the row, one stitch in each chain. Ensure you maintain the same number of stitches in every row.
- At the end of each row:
- Loosen the loop on the hook slightly.
- Turn your work.
- Begin a new row with half double crochets.
3: Repeat for Size
- Repeat the rows until the panel reaches the desired height. Example: 11 rows (13 cm/5.1 inches tall).
- For the second panel (the back of the bag), repeat the same steps to create an identical piece.
2: Making the Pocket
1: Start with a Magic Ring
- Use the magic ring method and secure it with a chain.
- Make a total of four sets of three double crochets, separated by a chain. Example: 3 DC, chain 1, repeat.
2: Expanding the Square
- Chain 2 at the beginning of each row to count as the first double crochet.
- Work double crochets into each stitch until you reach a corner (hole):
- In each corner, crochet 2 DC, chain 1, and 2 DC to maintain the square’s shape.
3: Add Rows for Size
- Continue this pattern until the square is the size you want for your pocket. Each row follows the same sequence:
- DCs in non-corner stitches, 2 DC + chain 1 + 2 DC in corners.
4: Adding the Pocket Border
- To create depth, crochet into the back loop only along the sides (except for the top, which is left open).
- Finish with slip stitches along the top edge to ensure it remains flat.

Step 5: Add the Flap
- For the optional pocket flap:
- Attach yarn at one side of the pocket’s opening.
- Chain 2, and make DCs across. Add as many rows as desired.
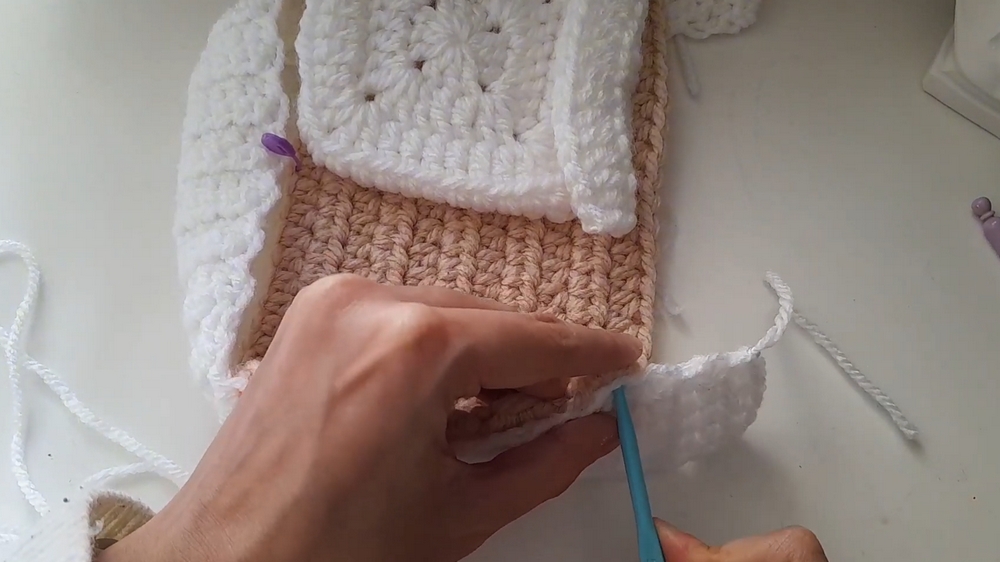
3: Sewing the Pocket to the Bag
- Align the pocket on the front panel of the bag.
- Sew three sides of the pocket (excluding the top opening):
- Insert the tapestry needle from the back, through the pocket, then through the front panel.
- Ensure the pocket remains straight as you sew.
- Secure the flap above the pocket, leaving enough room for functionality.

4: Making the Strap
1: Base Chain and Rows
- Chain 5 stitches for the strap width.
- Work rows of half double crochet until the strap reaches your desired length:
- For a single strap, measure the bag’s outline and add the desired strap length.
- For adjustable straps (using D-rings), make two:
- One short strap (bag width + 10 cm).
- One long strap (approximately 100 cm).
2: Adding Single Crochets
- If using D-rings: Crochet a border of single crochets around the strap ends for reinforcement before attaching hardware.
5: Assembling the Bag
1: Joining the Panels
- Place the front and back panels together.
- Attach the panels with a border of single crochets, starting at one corner.
2: Attaching the Strap
- Connect the ends of the long strap (or shorter straps with D-rings) to the bag sides with single crochets or by sewing.
- Reinforce the stitches where the strap joins the bag for added durability.
3: Optional Closures
- Add a closure for extra security:
- Create a small strap using rows of double crochets.
- Leave a hole for a button to slip through.
Special Features
- Customizable Size and Design: Easily adjust the bag’s dimensions, color patterns, and details to suit your needs.
- Functional Add-ons: Outside pockets and adjustable straps offer both a decorative and practical use.
- Beginner-Friendly Construction: The project revolves around basic stitches, making it approachable for newer crocheters.
Level of Difficulty
- Skill Level: Beginner to Intermediate.
- The crochet stitches are simple (HDC, DC, slip stitch), but assembly and sewing require some care and precision.
Tutor's Suggestions
- Get Creative with Colors: Use leftover yarns for unique results or stick to a single color for a clean look.
- Keep Stitch Counts Consistent: Always ensure you maintain the right number of stitches across rows to avoid uneven edges.
- Practice Sewing: While the tutorial includes simple sewing methods, it’s important to check alignment as you sew to avoid uneven pockets.
Uses
- Everyday Bag: Great for daily use or shopping.
- Gift Idea: Personalize the design and colors for a handmade gift.
- Beginner Crochet Practice: A fun way to refine your crochet skills while creating something practical.
Tip
Before finalizing the strap length, try the bag on your shoulder or across your body to ensure it is comfortable. This avoids adjustments after assembly.
Conclusion
This crochet bag with outside pockets is a versatile project combining creativity, functionality, and customization. Whether you’re looking for an everyday accessory or a thoughtful handmade gift, this bag is a fun and rewarding project. With simple stitches and easy-to-follow steps, this pattern provides everything you need to crochet a stylish and practical crochet bag.


Leave a Reply