

Adding a crochet vintage-style collar to your outfit is like finding a little treasure in your wardrobe. It’s a charming piece that brings a touch of old-school elegance and personality to any look. Made with love and a touch of nostalgia, this collar is the perfect way to spruce up your attire, whether you’re dressing up for a special day or just want to add some flair to your everyday outfits.
Crochet Vintage Style Collar
Materials Needed:
- Cotton yarn in various colors.
- 3 mm crochet hook.
Pattern Overview:
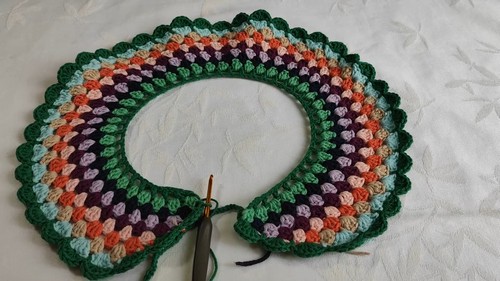
- The project starts with chain stitches and progresses through double crochet stitches to form a row-by-row expanding circular collar. Changes in color each row enhance the design.
Starting the Project:
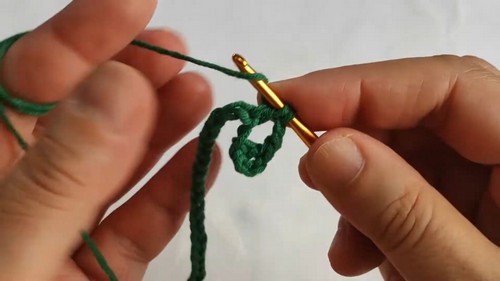
Foundation Chain:
- Start by making 86 chains. Adjust the number of chains based on the size of the neck if making for a smaller child.
Row 1: Setting Up
- Chain 4 more (total of 90, but consider the last 4 as the starting chain for the next row).
- Double crochet into the 5th chain from the hook (counts as the first double crochet).
- Chain 2, skip one chain, double crochet in the next chain. Repeat from * to * until you reach the end of the chain.

For Row 2:
- Cut the yarn and attach a new color.
- Start at the top of the first double crochet of the previous row.
- Chain 3 (counts as the first double crochet), then make 2 more double crochets in the first large chain space from the previous row.
- Continue making 3 double crochets in each large space across the row with no chains in between these sets.
Row 3:
- Change to a navy color or another desired color.
- Similar to row 2, start by attaching the yarn at the same side you finished the previous row to maintain the pattern direction.
- Instead of making three double crochets in each space as previously, increase in every 6th space by making four double crochets to start giving the collar a rounded shape.

Subsequent Rows:
- Continue the pattern of switching colors each row and increasing at regular intervals (every sixth space or as needed to maintain a gentle curve).
- As the rows progress, adjust the rate of increase to ensure the collar lays flat and continues to widen slightly as it should industriously round about the neck area.
Finishing Row:
- After reaching desired size and finish, do not turn the work; cut the yarn and secure.
- Optionally add a picot or scalloped edge around the last row by chaining and slip stitching in each stitch around for a decorative finish.
Attach Laces:
- At each end of the collar row, attach a chain of 60 stitches (or desired length) to create ties for the collar.
- Secure each end and weave in all ends neatly.
Final Notes:
- Always start new rows from the same side to keep the pattern consistent.
- Adjust increases depending on the desired final shape of the collar.
- Hide yarn ends neatly to ensure a professional finish.
Leave a Reply