

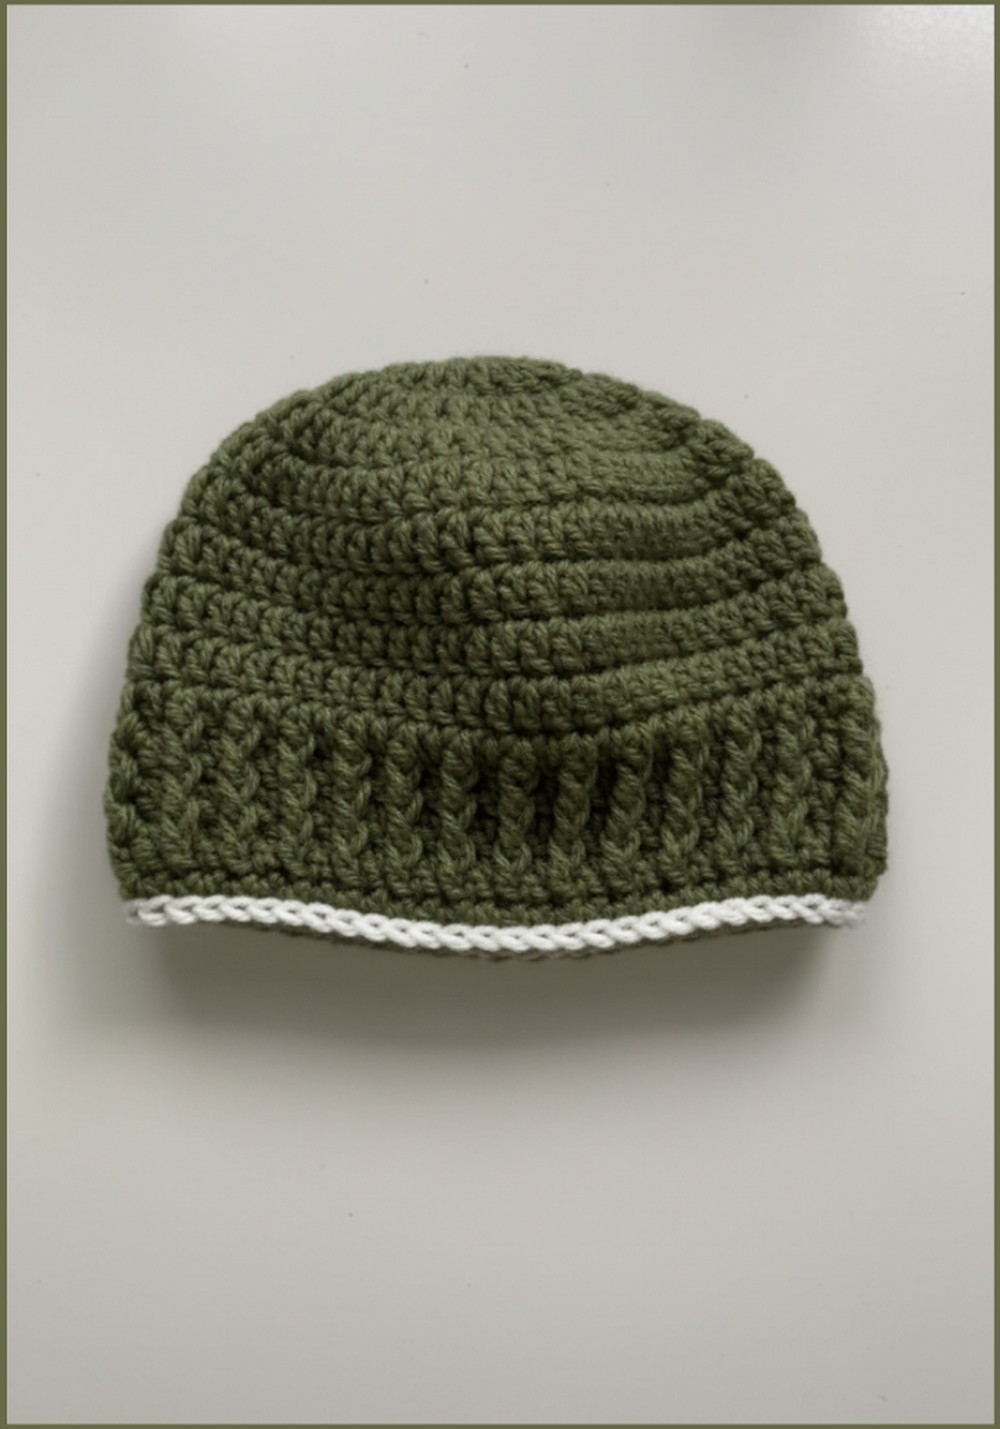
Top off your style with this Free Crochet Beanie Pattern, quick to make, cozy to wear, and perfect for chic, handmade winter vibes.
In the heart of winter, when chilly winds sweep through the streets, a crochet beanie emerges as a symbol of warmth and comfort. Originating from a place of both necessity and creativity, this delightful accessory not only battles the cold but also serves as a canvas for artistic expression. Made with a simple hook and a skein of soft yarn, the beanie offers endless possibilities for customization, be it through vibrant colors, intricate stitches, or playful embellishments. Whether gifted to a loved one or made for personal enjoyment, its snug fit and gentle texture provide a cozy embrace, reassuring in any season.
Free Crochet Beanie Pattern With Chunky, Cozy Appeal

The beauty of a crochet beanie lies in its adaptability, transforming as easily to a stylish fashion statement as it does to a practical piece of apparel. It can adorn the heads of people of all ages, from giggling toddlers to spirited grandparents, bridging generations with its timeless allure.
Materials You’ll Need
- Yarn: Any medium-weight yarn.
- Crochet hook: Size suited for the chosen yarn.
- Darning needle.
- Scissors.

Beyond aesthetics, the act of handcrafting a beanie offers meditative relaxation, encouraging mindful creativity and patience. As the final stitch loops into place, the maker gains not only a cherished garment but also a sense of accomplishment and joy. The crochet beanie thus stitches together beauty, warmth, and personal significance, enhancing every wardrobe it graces.
Step-by-Step Instructions
Preemie Size
- Starting with the Magic Circle
- Form a magic circle and chain 2.
- Row 1: Crochet 11 double crochets (dc) inside the magic circle. Tighten the circle and join with a slip stitch to the top of the first dc (11 stitches).
- Increasing Rows
- Row 2: Chain 2 (counts as the first stitch). Work 2 double crochets in each stitch around. Join with a slip stitch (22 stitches).
- Row 3: Chain 2. Work 1 double crochet in the first stitch, then 2 double crochets in the next; repeat around. Join with a slip stitch (33 stitches).
- Rows 4-7: Chain 2, work 1 double crochet in each stitch around. Join with a slip stitch (33 stitches in each row).
- Adding Texture with Front Post Double Crochet
- Row 8: Chain 2. Work 1 front post double crochet (fpdc) around the first stitch, then 1 double crochet in the next stitch; repeat around. Join with a slip stitch (33 stitches).
- Row 9: Chain 2. Alternately work fpdc around previous row’s fpdc and double crochet in every other stitch. Join with a slip stitch (33 stitches).
- Final Rounds
- Row 10: Chain 1. Crochet 1 single crochet (sc) in each stitch around. Cut the yarn, finish off with an invisible stitch, and weave in the ends.

Zero to Three Months
- Magic Circle and Increasing Rows
- Follow the same steps to form a magic circle and make 11 double crochets in it.
- Row 1: Join with a slip stitch (11 stitches).
- Row 2: Work 2 double crochets in each stitch around (22 stitches).
- Row 3: Work 1 double crochet in the first stitch, 2 in the next; repeat around (33 stitches).
- Continuation
- Row 4: Work 1 double crochet in each stitch (44 stitches).
- Row 5-9: Repeat the double crochets (44 stitches each row).
- Adjusting for Odd Number of Stitches
- Row 10: Add one more stitch at the end for a total of 45 stitches.
- Front Post and Finishing
- Rows 11-13: Alternate front post double crochets and double crochets.
- Finish with a round of single crochets and an invisible stitch.
Three to Six Months
- Magic Circle and Initial Increase
- Same initial steps forming a magic circle and making 11 double crochets.
- Row 1: Slip stitch to join (11 stitches).
- Row 2: Work 2 double crochets in each stitch (22 stitches).
- Expanded Increases
- Row 3: Work 1 double crochet in the first stitch, 2 in the next (33 stitches).
- Row 4: Work 1 double crochet in each stitch (44 stitches).
- Rows 5-9: Repeat (44 stitches each row).
- Finishing Touches
- Row 10: Adjust to 45 stitches.
- Rows 11-13: Follow the alternating front post and double crochet pattern.
- End with single crochets and invisible joining.
Six to Twelve Months
- Magic Circle
- Form a magic circle and make 11 double crochets.
- Row 1: Slip stitch to join (11 stitches).
- Subsequent Increases
- Increase with double crochets in each row to reach the desired stitch count progressively:
- Row 2: 22 stitches.
- Row 3: 33 stitches.
- Row 4: 44 stitches.
- Row 5: 55 stitches.
- Rows 6-9: Continue with 55 stitches.
- Increase with double crochets in each row to reach the desired stitch count progressively:
- Final Details
- Row 10: Increase one stitch to get an odd number.
- Rows 11-13: Add texture with front post double crochets.
- Finish with single crochet round and invisible stitch.
Child Size
- Magic Circle
- Form a magic circle and make 11 double crochets.
- Row 1: Slip stitch to join (11 stitches).
- Row-by-Row Increase
- Increase the number of stitches with each round:
- Row 2: 22 stitches.
- Row 3: 33 stitches.
- Row 4: 44 stitches.
- Row 5: 55 stitches.
- Rows 6-11: Continue with 55 stitches.
- Increase the number of stitches with each round:
- Brim and Finish
- Rows 12-14: Alternate front post and double crochets for the brim.
- Finish with a round of single crochets and invisible stitch.


Adult Size
- Magic Circle
- Form a magic circle and crochet 11 double crochets.
- Row 1: Slip stitch to join (11 stitches).
- Increasing Stitches
- Increase stitches progressively across the rounds:
- Row 2: 22 stitches.
- Row 3: 33 stitches.
- Row 4: 44 stitches.
- Row 5: 55 stitches.
- Row 6: 66 stitches.
- Rows 7-14: Continue with 66 stitches.
- Increase stitches progressively across the rounds:
- Brim Detailing
- Merge two stitches at the end for 65 stitches.
- Rows 15-17: Work alternating front post and double crochets.
- Perform a round of single crochets and use an invisible stitch to finish.

Special Features
- Versatility: Six sizes from preemie to adult.
- Detailing: Front post double crochet for texture.
- Finish: Invisible stitch for a seamless look.
Level of Difficulty
- Beginner to Intermediate: Suitable for both new and experienced crocheters.
Tutor’s Suggestions
- Take Your Time: Slowly work through the steps, especially when forming the magic circle and performing front post double crochets.
- Use Quality Yarn: Opt for soft yarn suitable for baby skin.
Uses
- A perfect handmade gift for babies, crafted with love and care.
- Can be customized with additional trims, flowers, or pom-poms.
Tip
When finishing with the invisible stitch, weave your ends in the direction opposite to the stretch of the hat to ensure they stay secure and the final product maintains a clean finish.
Conclusion
Creating a crochet baby beanie is a rewarding experience that results in a charming and functional accessory. This tutorial simplifies the process with clear, step-by-step instructions across various sizes. The end result is a beautifully textured hat that is both practical and endearing. Enhance your crochet skills while making a thoughtful, handmade gift that will be cherished by its recipient.
Leave a Reply