

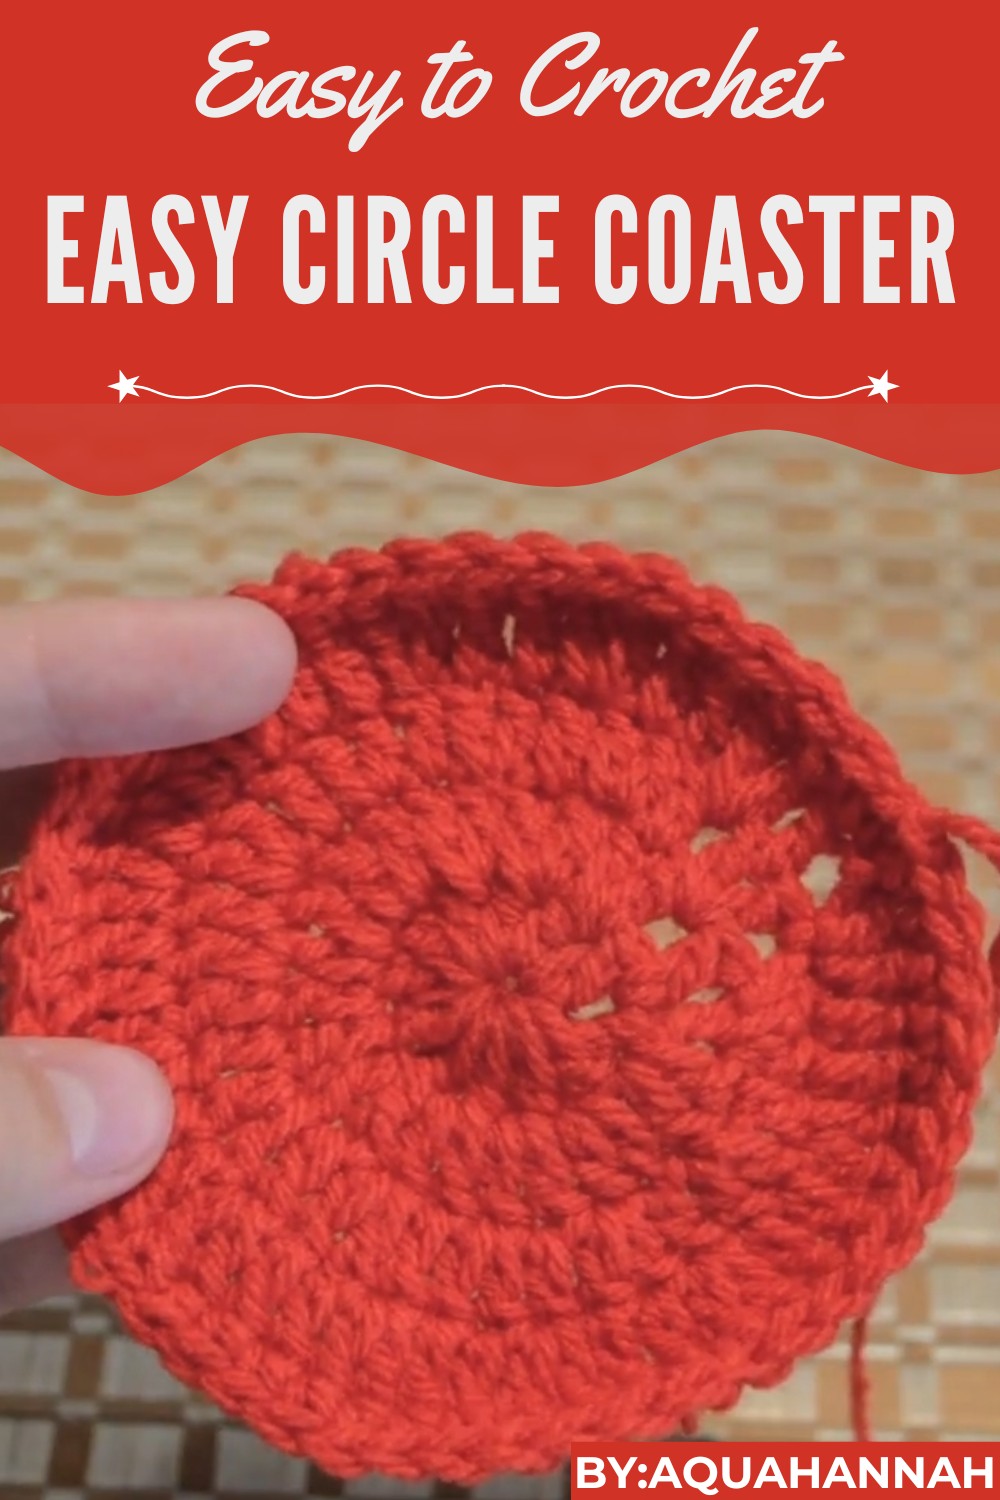
How to Crochet a Circle Coaster Pattern that Elevates Your Interior Style
This project is perfect for beginners eager to try an easy and rewarding design, as well as seasoned crocheters looking for a relaxing, functional item to make. The lightweight yet sturdy pattern fits seamlessly into any decor style, whether rustic, modern, or traditional. It not only protects your furniture but also acts as an expression of your personality and skill.
Ideal for gifting on special occasions or simply adorning your home, this versatile pattern blends functionality with a touch of charm. A crochet pattern isn’t just an everyday item – it’s a thoughtful creation that brings beauty and purpose to the spaces you cherish.
Materials Needed
- 2.5 mm crochet hook (or any preferred hook size for finer work).
- Yarn of your choice (lightweight cotton or acrylic is recommended).
Special Features
- Beginner-friendly design.
- Versatile uses, such as home decor or thoughtful gifts.
- Made with basic crochet techniques like slip stitches, double crochets, and single crochets.
- Lightweight yet durable.
Level of Difficulty
This project is rated easy by the tutor, suitable for crocheters who are just starting. The consistent stitch pattern makes it accessible and fun while helping beginners practice foundational techniques.
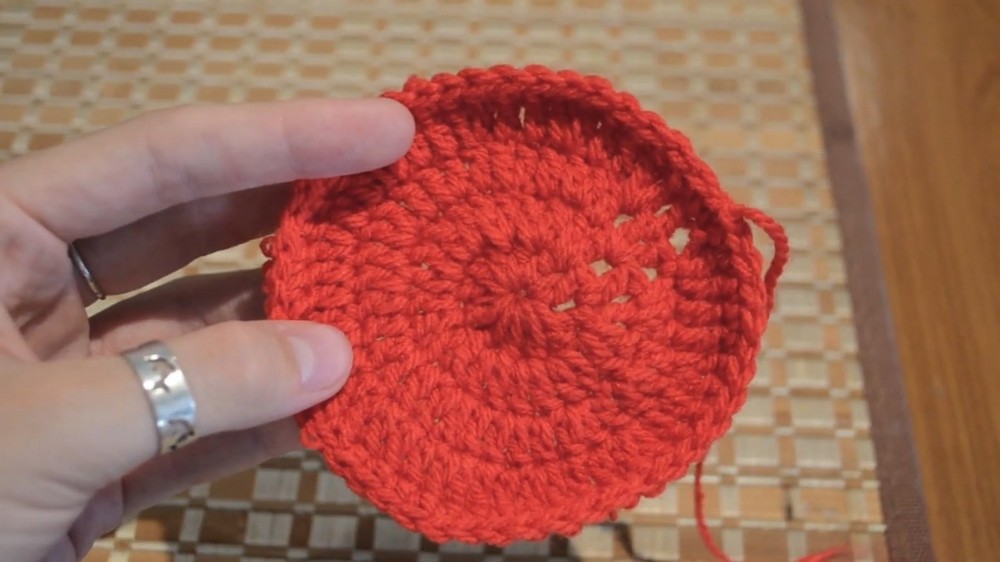
Step-by-Step Instructions
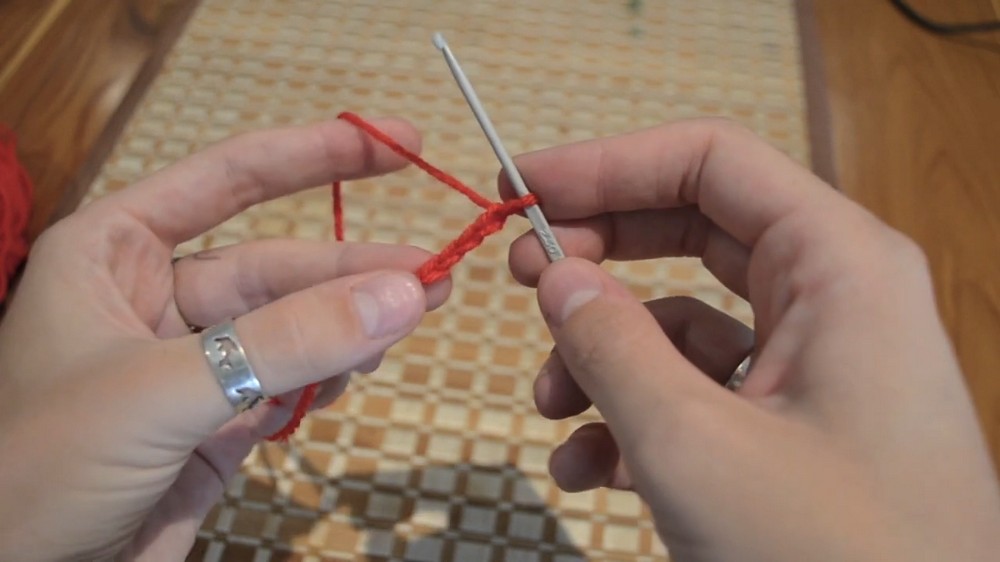
First Row: Foundation Ring
- Begin by making a slip knot and chaining 4 stitches.
- Create a slip stitch into the first chain to form a ring.
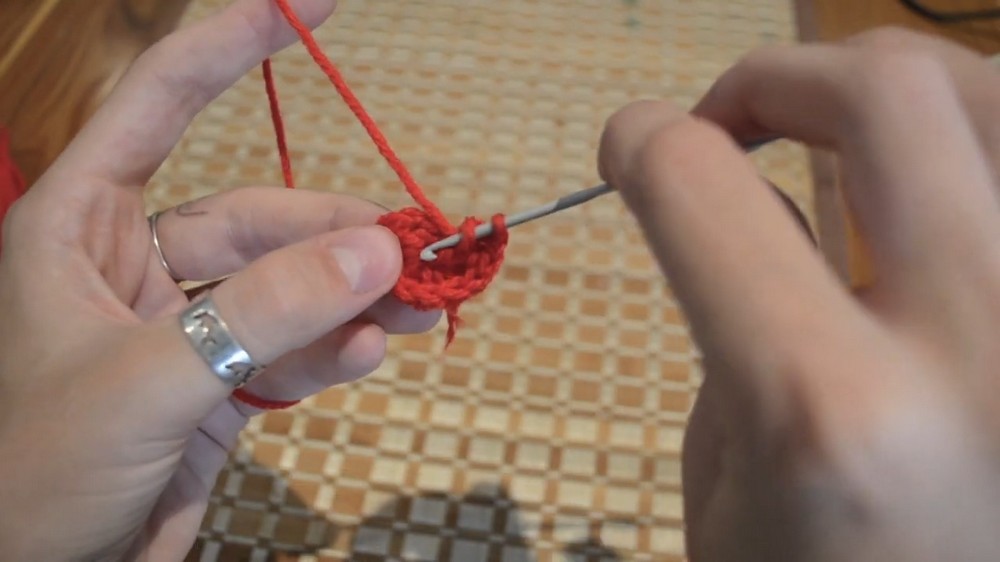
- Chain 3 stitches and work 12 double crochets (dc) into the center of the ring.
- Each stitch will be spaced evenly around the circular ring.
- Complete the row by slip stitching into the first chain 3 space.
Second Row: Increasing the Size
- Chain 3 stitches, then do 1 double crochet (dc) into the same stitch as the chain 3.
- Continue working 2 double crochets into each stitch around the circle.
- Slip stitch into the chain 3 space to finish the row.

Third Row: Two-and-One Pattern
- Chain 2 stitches to start the row.
- Work 2 double crochets in the first stitch, followed by 1 double crochet in the next stitch.
- Repeat the 2 dc - 1 dc pattern until you reach the end of the round.
- Finish with a slip stitch into the chain 2 space.
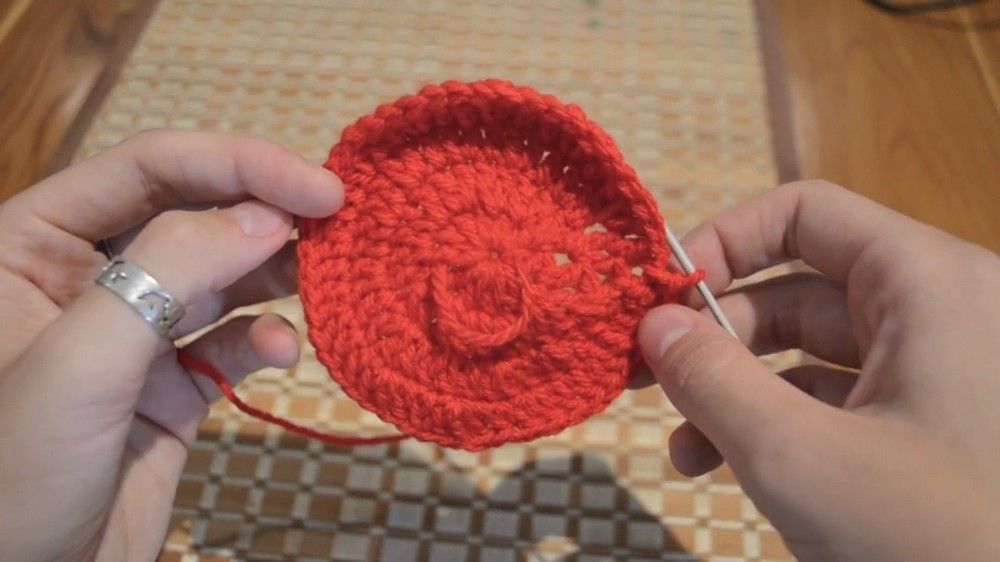
Fourth Row: Two-Single-One Pattern
- Start the row by chaining 2 stitches.
- Make 2 single crochets (sc) into the next two stitches, followed by 2 double crochets (dc) in the stitch after.
- Repeat this 2 single crochet - 2 double crochet pattern for the entire row.
- End the row with a slip stitch into the chain 2 space.
Final Row: Single Crochet Border
- Begin by chaining 1 stitch.
- Work single crochet (sc) into each stitch around the entire coaster.
- Complete the row with a slip stitch into the chain 1 space.
- Cut the yarn and weave in the ends.
Tutor’s Suggestions
- Use light-colored yarn to highlight the details of the coaster.
- Maintain consistent tension throughout your work for a polished finish.
- Clear your workspace for ease and focus while crocheting.
Uses
These coasters are perfect for tables, counters, and desks, preventing heat damage or moisture rings from mugs and glasses. They can also be paired with creative color choices to elevate your home’s interior design.
Tip
To avoid overcrowding stitches, gently pull and adjust the yarn as you work through each row. This will keep the coaster looking neat and flat instead of rippling or curling.
Conclusion
This easy crochet circle coaster pattern is quick to make and offers a delightful way to practice essential crochet techniques while crocheting something functional and stylish. Whether used at home or gifted to loved ones, this project brings warmth and personalization to every space.


Leave a Reply