

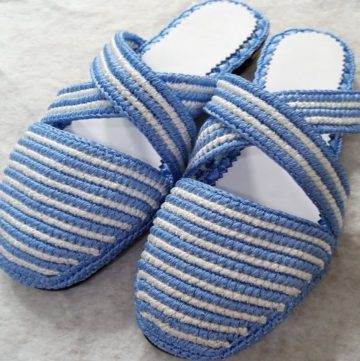
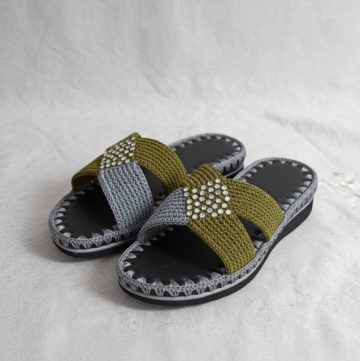
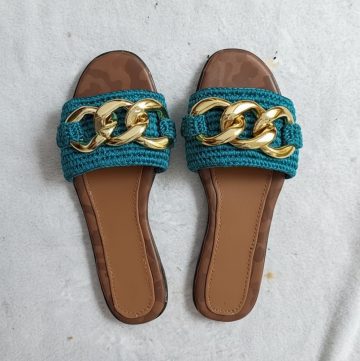
Slide into cozy charm with the Free Crochet flat ladies slippers Pattern, making comfy, cute, and handmade footwear that brightens every step.
Comfort and style can coexist effortlessly with handmade footwear designed for everyday elegance. Step into a pair of cozy flat slippers that offer both warmth and support, perfect for lounging at home, quick errands, or thoughtful gifts. The Free Crochet flat ladies slippers Pattern allows you to create footwear that combines timeless charm with modern practicality.
Step in Style Crochet Flat Ladies Slippers Pattern
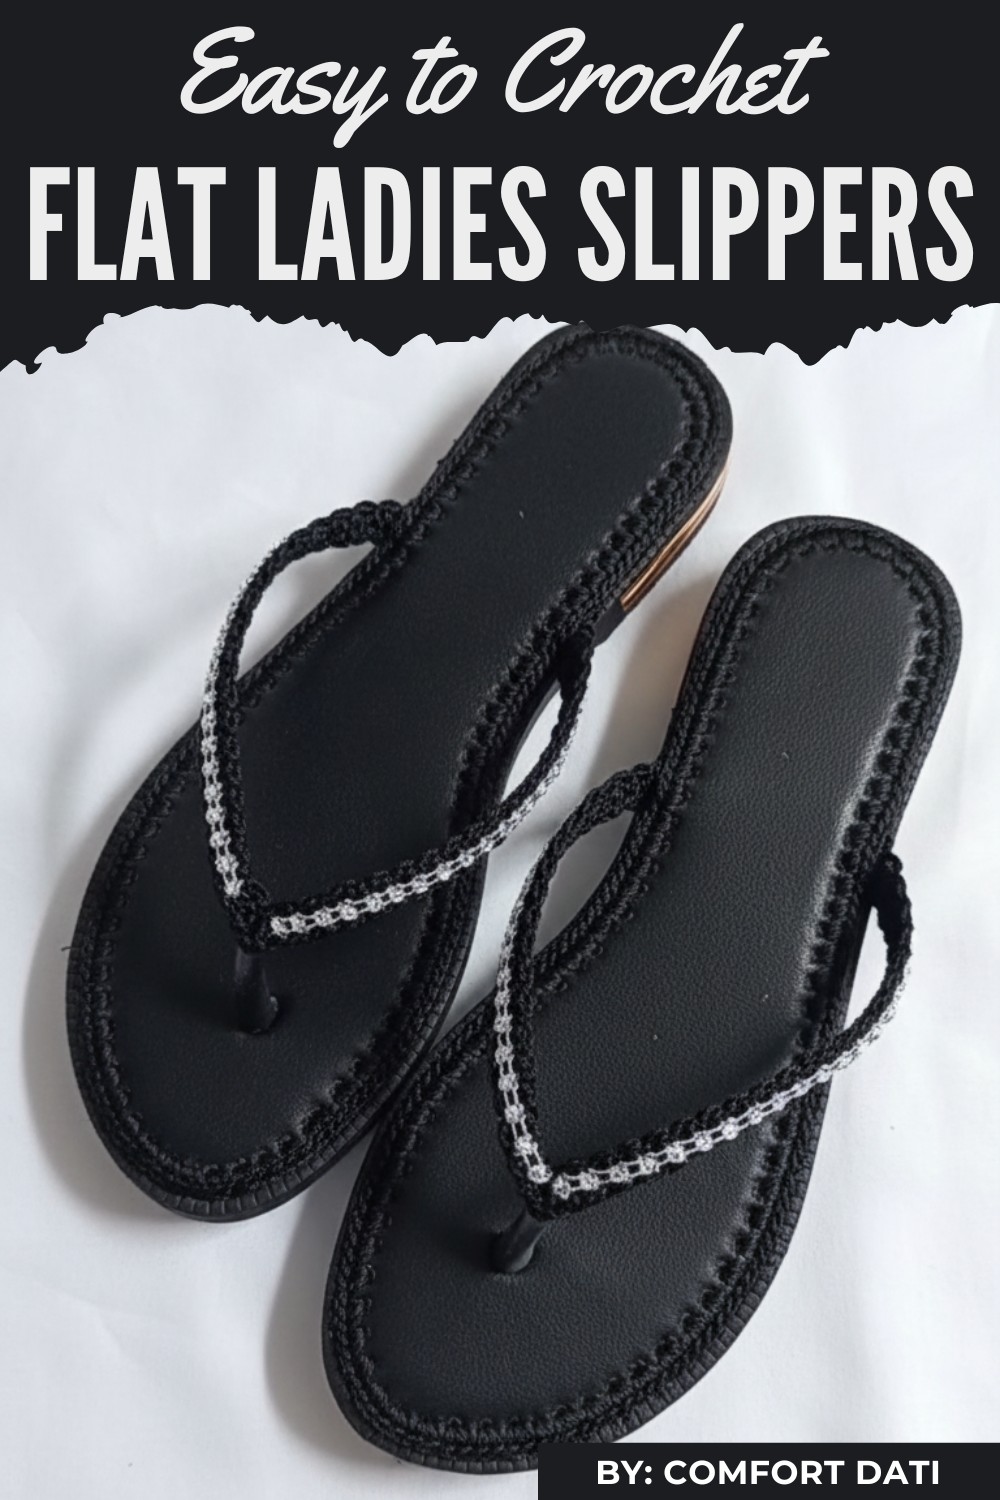
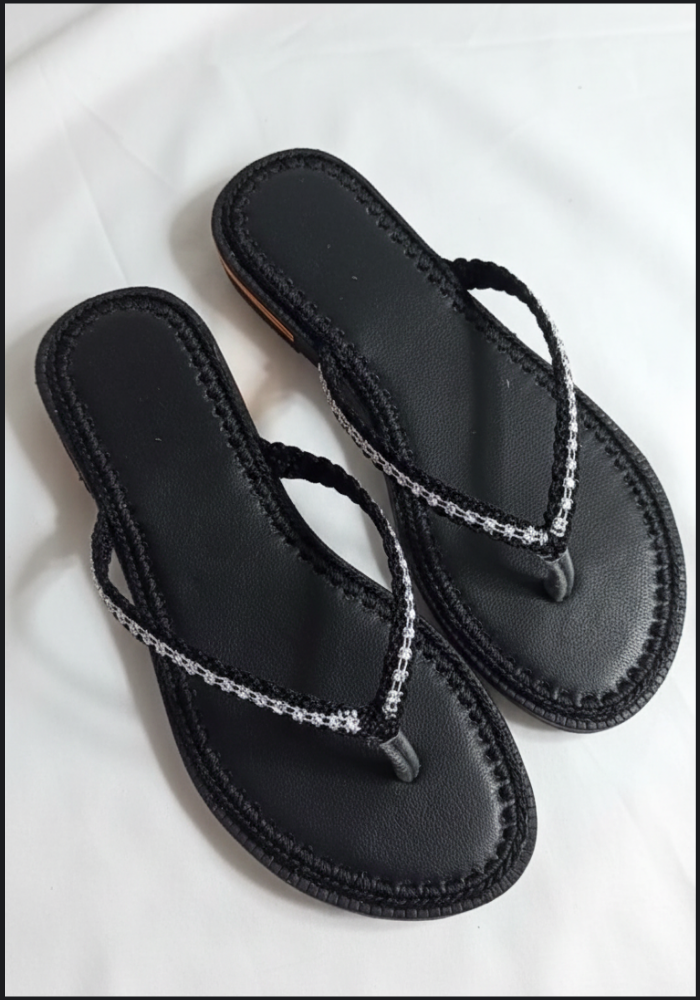
Its clean lines and snug fit flatter every foot while providing a gentle, cushioned step that keeps you comfortable all day long. Crocheted using simple crochet techniques, these slippers are highly customizable—choose your favorite yarn colors, textures, or subtle embellishments to reflect your personal style. Beyond their aesthetic appeal, they promote foot comfort and breathability, helping reduce fatigue and adding a soft layer of support for daily wear.
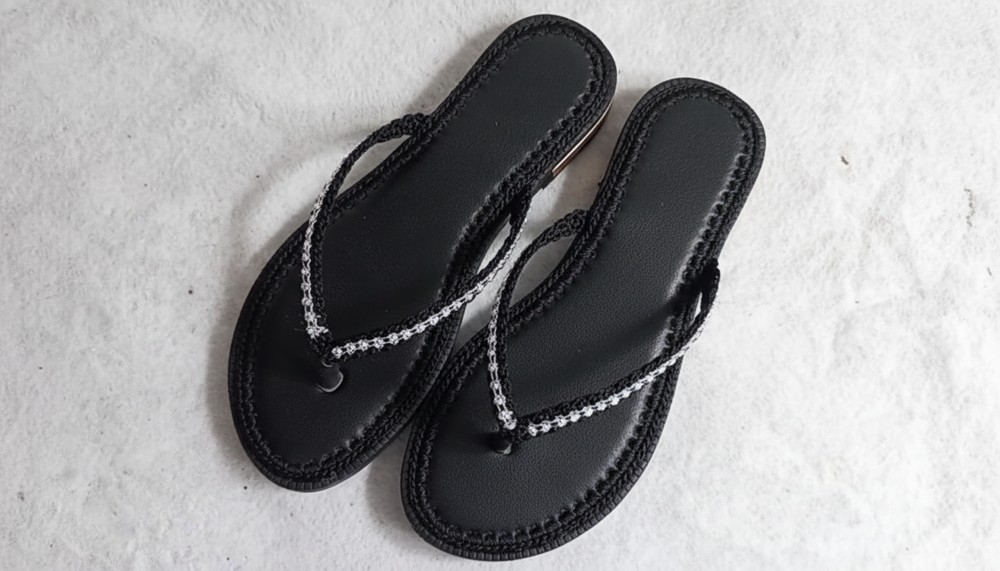
Lightweight yet durable, they are ideal for indoor use, pairing effortlessly with loungewear or casual outfits. Creating them brings a sense of accomplishment, transforming a functional accessory into a creative expression. The result is footwear that radiates handmade charm, practicality, and sophistication, offering both visual delight and cozy comfort for your feet. With this pattern, making elegant, personalized slippers has never been more accessible or rewarding.
Materials Needed
To make these crochet slippers, you’ll need the following materials:
- Knitting yarn – Can use leftover yarn from other projects.
- Crochet hook – Suitable for the chosen yarn.
- Shoe soles and insoles – Links to related instructions were mentioned by the tutor.
- Scissors
- Gum/adhesive – Tutor recommends a strong foreign gum for durability.
- Optional: Decorative stones – For embellishment.
Step-by-Step Instructions
Step 1: Creating the Tiny Straps
- Begin by tying a knot on the yarn.
- Make three chains, then start crocheting from the second chain.
- Insert the hook, yarn over, pull through, and complete a single crochet.
- Chain one, turn, and repeat the single crochet process until you complete 60 rows for the strap.
- Finish the 60 rows, cut the yarn, and weave in the edges. The tutor emphasizes repetition to master the process.
Step 2: Measuring and Preparing the Straps
- Make a second identical strap for the other leg. Ensure both straps are of the same size.
- Measure two inches to align and sew the strap edges together. The tutor suggests sewing discreetly for a neat finish.
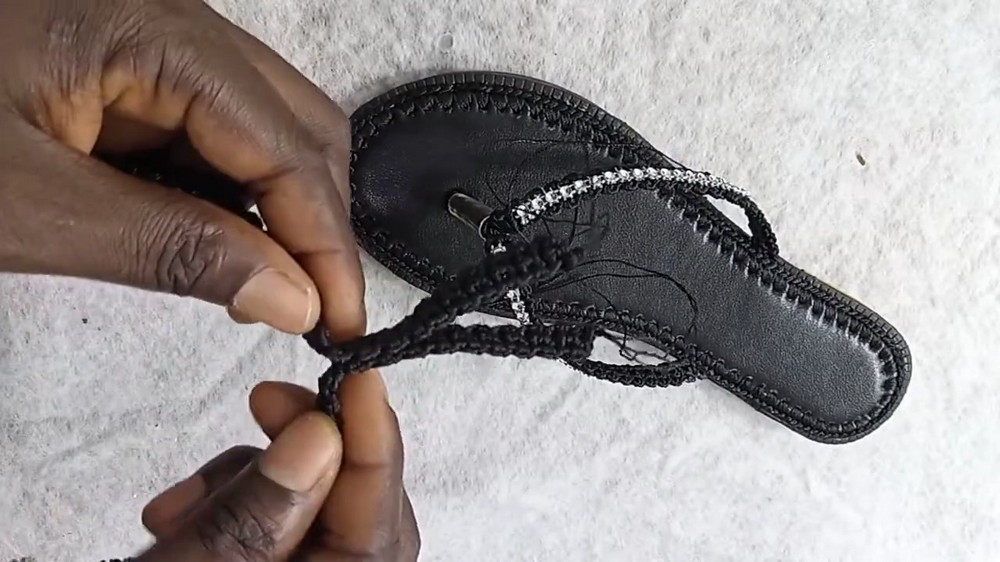
Step 3: Adding the Tube
- Cut small pieces of 1-inch-long tubes/piping for the straps.
- Insert your crochet hook through the tube and pull to adjust.
- Sew the tubes in place where the straps will eventually attach to the insole.
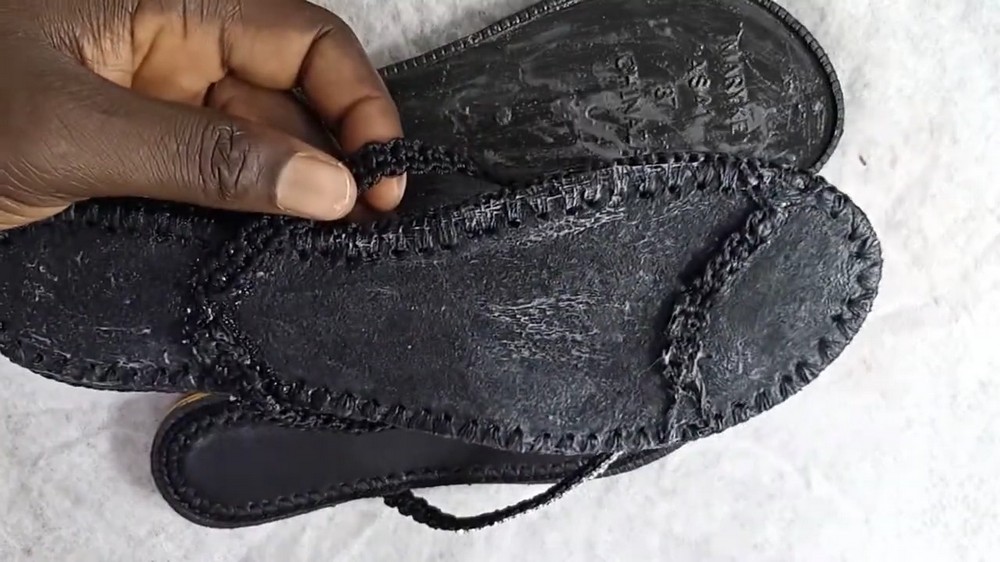
Step 4: Preparing and Punching the Insoles
- Place the insole over the shoe sole and mark the exact placement with a pen or marker.
- Punch holes in the marked areas of the insole for attaching straps. Tip: For speed, punch both the insoles and shoe soles simultaneously.
- Mark and punch carefully, ensuring correct alignment of the straps.
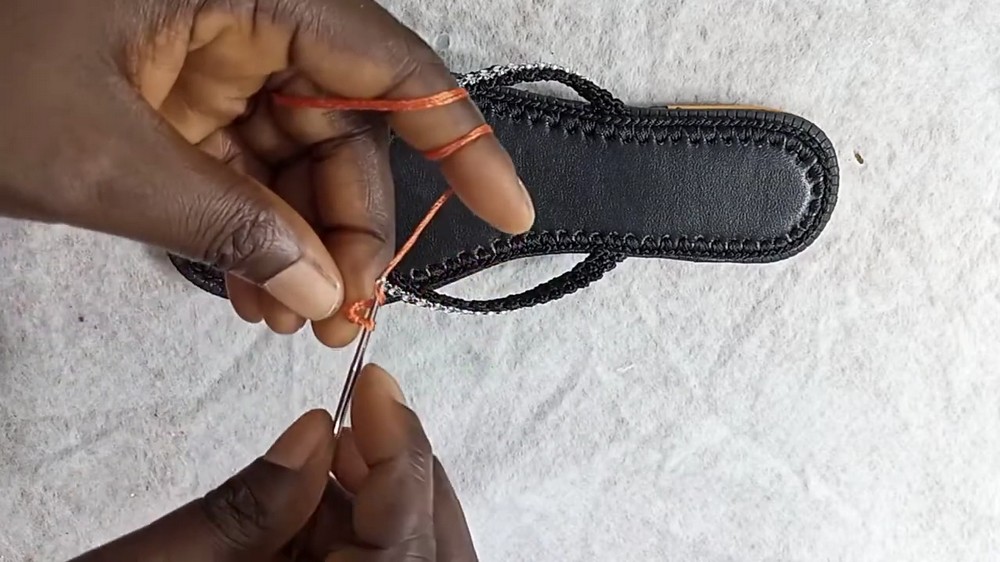
Step 5: Attaching the Straps and Inner Sole
- Insert the straps into the holes of the insole and fix them securely with super glue for a firm hold.
- Use a crochet hook or hand-stitching to lock any loose thread pieces in place.
- Gently press the glued sections to ensure a proper bond and neat finish.
Step 6: Gluing the Sole and Final Assembly
- Lightly scratch and file the sole surface to create a better grip for the adhesive.
- Apply a layer of strong gum (e.g., foreign gum) to the sole's edges and let it dry slightly.
- Use a heat gun to activate the glue.
- Carefully press the sole and insole together, ensuring proper alignment.
- Use a hammer to securely attach both layers and ensure the gum sets properly.

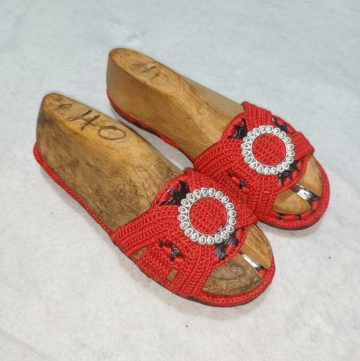
Step 7: Adding Decorative Finishes
- Cut small decorative stones to around 4 inches and attach them to the slippers.
- Use hot glue to neatly place these embellishments on both sides of the straps.
- Repeat the process for the second slipper, ensuring symmetry.
Special Features of This Project
- Quick and Simple: You can complete this project in just under an hour, providing an easy and fun way to use leftover yarn.
- Customizable: Use different yarn colors and decorative elements to match your personal style.
- Affordable: Materials like leftover yarn and inexpensive decorations make these slippers cost-effective.
Tutor’s Suggestions
- The tutor highlights the importance of using contrasting yarn colors for clarity when learning.
- She recommends super glue or foreign gum for a strong, lasting hold.
- Use a heat gun to activate the gum for better adhesion.
- For beginners, practice single crochets beforehand for a smoother process.
Uses of These Crochet Slippers
- Home Wear: Ideal for creating cozy and comfy slippers for indoors.
- Gifting: Handmade slippers make thoughtful and personalized gifts.
- Recycling: Perfect for repurposing leftover yarn into functional items.
Level of Difficulty
This crochet project is beginner-friendly, as it primarily involves simple single crochets and basic assembly techniques. However, using hot glue and aligning soles may require some careful handling.
Tip for Success
Work patiently when aligning and attaching the soles. Ensure the gum is adequately activated and follow clean glue application techniques to prevent a messy finish.
Conclusion
This step-by-step guide helps you create beautiful, durable tiny strap crochet slippers that are both functional and stylish. The process is easy to follow, suitable for beginners, and perfect for using leftover yarn creatively. If you enjoy this project, don’t forget to explore more ways to customize your slippers and make multiple pairs for yourself or loved ones.
Leave a Reply