

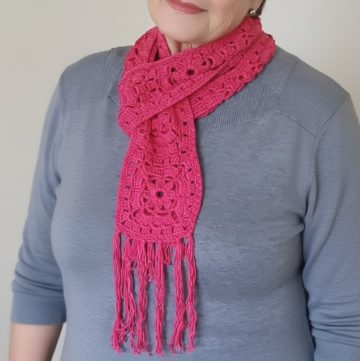
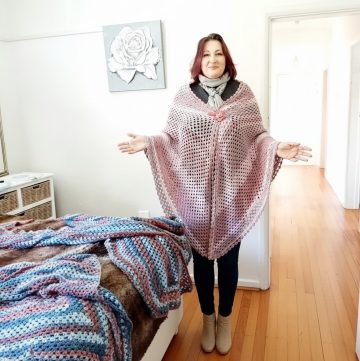
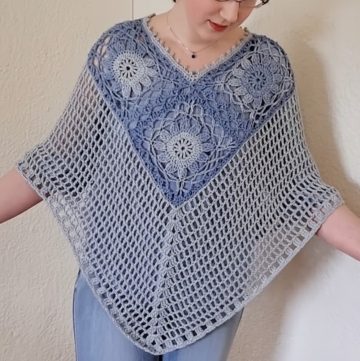
Gracefully enhance your outfits with the Free Crochet Poncho Fringes Pattern, blending style, movement, and warmth in every handmade detail.
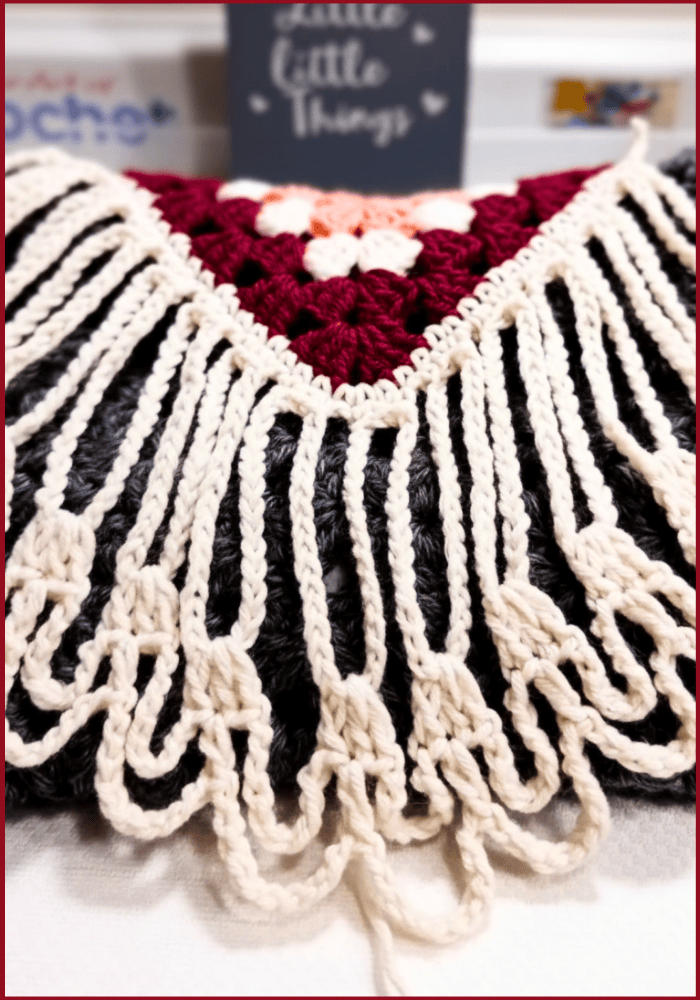
Soft folds of fabric come to life with the graceful addition of crochet poncho fringes, turning everyday wear into a masterpiece of charm and movement. These delicate fringes sway with elegance, adding depth and texture to any poncho, blanket, or wrap. They embody both beauty and practicality, creating designs that are timeless yet functional. The fringes catch the light as they gently ripple, bringing a playful yet sophisticated energy to your garments. Perfect for layering during cooler days, they offer warmth while elevating the look of your outfit, allowing you to carry both comfort and style effortlessly.
Wow-Worthy Poncho Fringes Crochet Styles You’ll Adore
Whether as a subtle accent or a bold feature, poncho fringes have a way of transforming a simple garment into something extraordinary. Their rhythmic motion adds personality, while their versatility makes them suitable for a range of wardrobe choices—from casual outings to evening elegance.
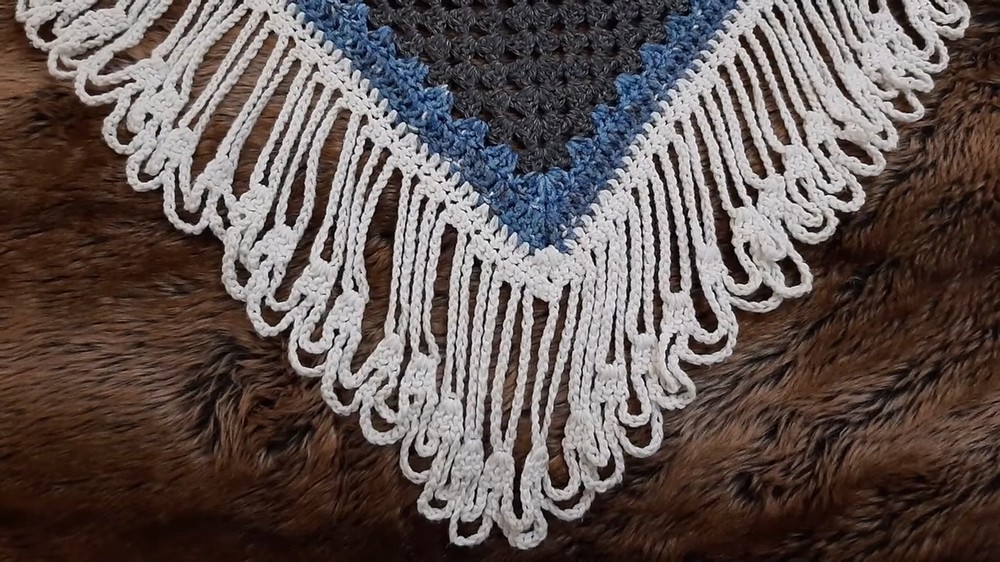
Beyond their visual appeal, their thoughtful design contributes to durability, discouraging tangling or wear over time. These fringes open up endless possibilities for creativity—allowing you to shine with stunning details that are both timeless and unique. Adorning your shawls or ponchos with crochet fringes truly adds an essence of rhythm and grace to your wardrobe.
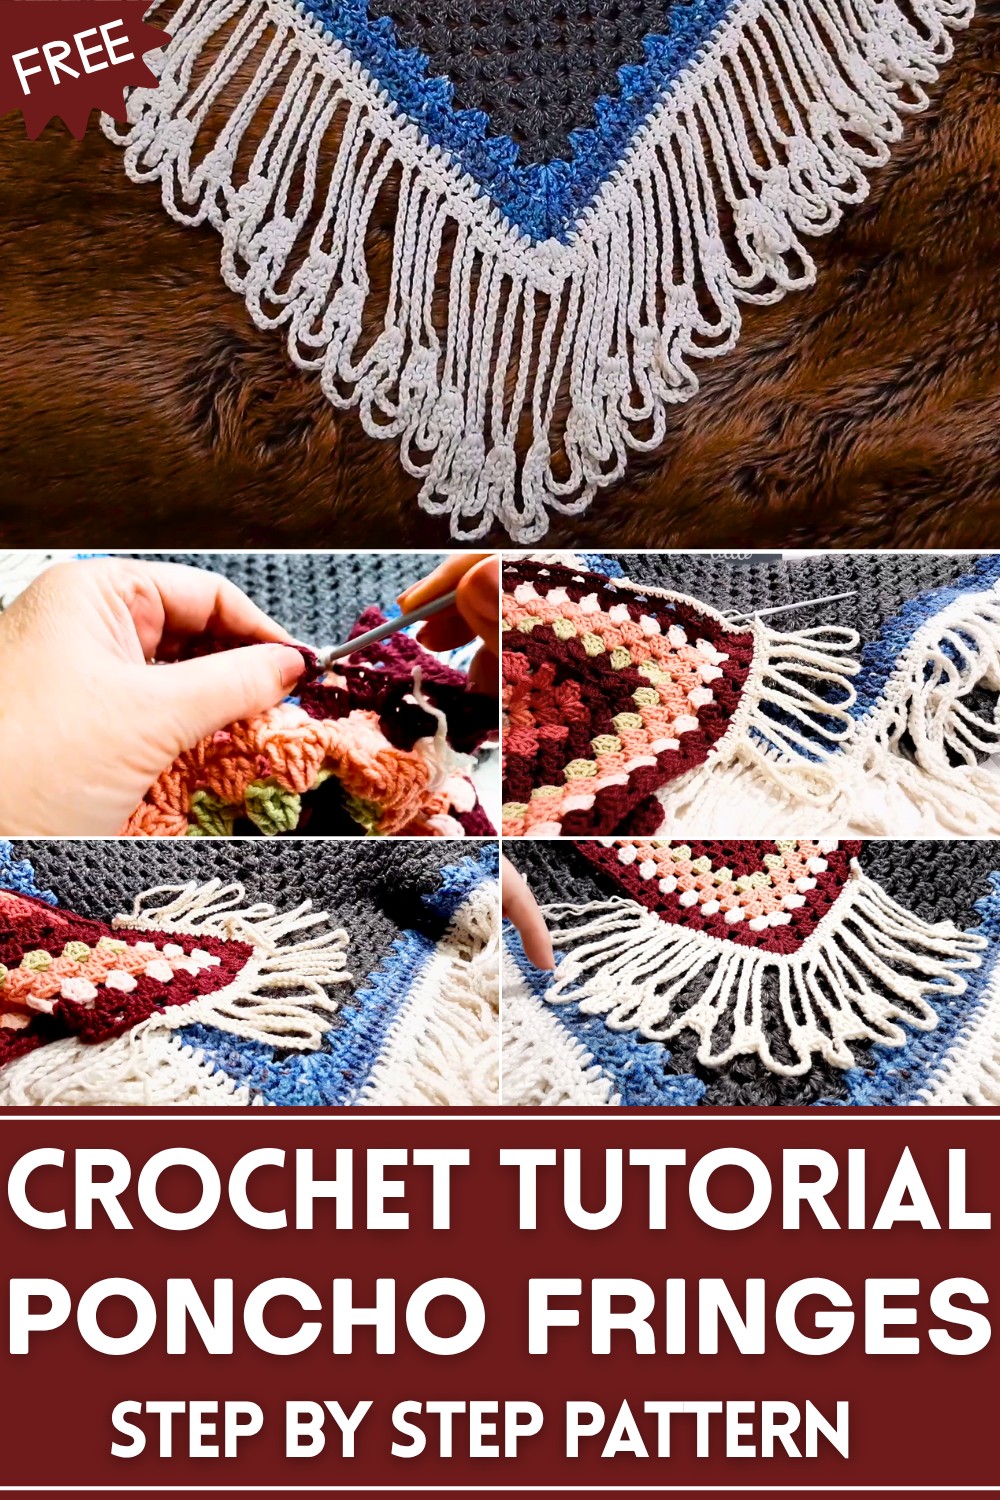
Step-by-Step Guide to Creating the Poncho Fringe
1. Materials Needed
The tutor lays out the essential materials:
- Yarn: Recommended options include Himalaya Everyday Anti-Pilling Acrylic (used for poncho border) and Pure Gold Vanilla yarn (for fringe). Both are soft and durable.
- Hook Size: While the yarn packaging suggests 3–5 mm hooks, the tutor uses 4 mm crochet hooks for this fringe.
- Other Tools: Pair of scissors and a yarn needle.
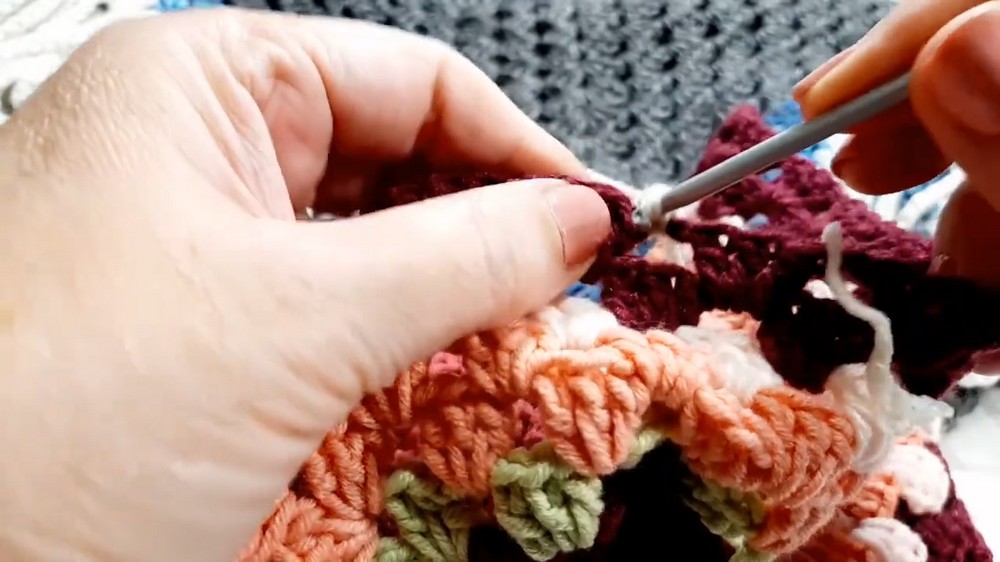
2. Row 1: Initial Foundation
- Start with a slip knot and attach to your work on a small granny square sample (or the project edge).
- Crochet single crochets in every stitch of the previous row. This forms the fundamental base for the fringe.
- You can use single crochets or double crochets, depending on your preference for the width of the border.
- Work all the way around—front, over shoulders, around the back of the project—to complete the row.
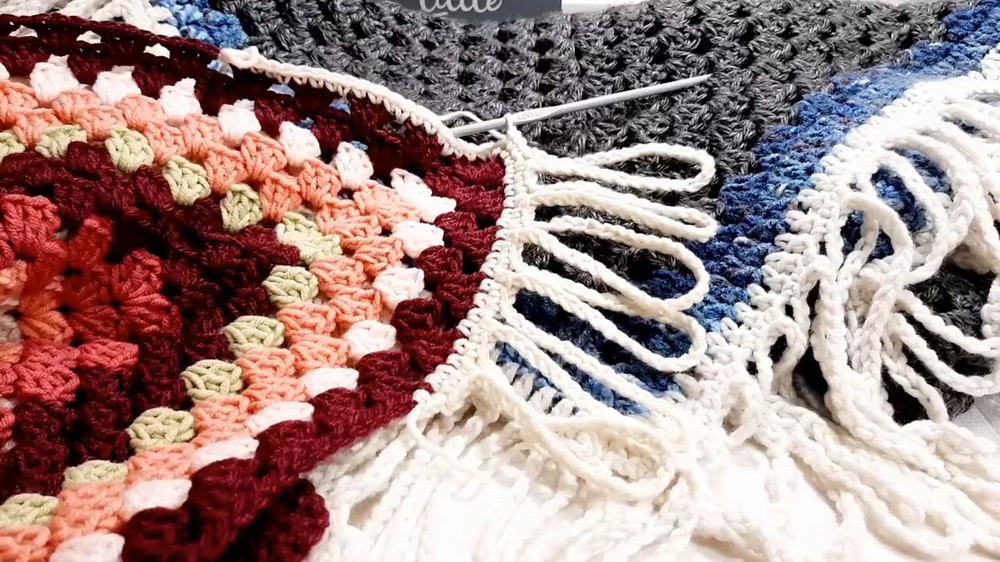
3. Row 2: Creating Chain Loops
- Join yarn with a slip knot and make one chain to adjust height.
- Crochet three single crochets on top of three previous single crochets.
- Create a 30-chain loop, then repeat by crocheting three single crochets followed by another 30-chain loop.
- Continue this process around the poncho or sample, ensuring symmetry. Meet back at the starting point and join with a slip stitch.
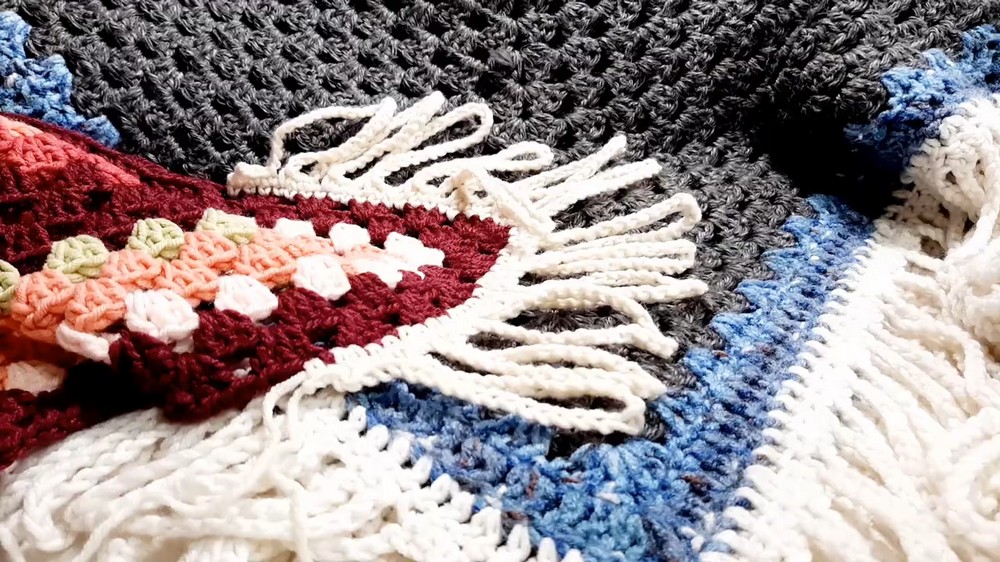
4. Row 3: Adding Double Crochet Clusters
- Slip stitch your way up each chain loop until you reach the top of the 30-chain loop.
- Make three double crochets (cluster) at the top of the loop. Pin the first double crochet through the chain center for stability; the remaining two double crochets can pass through the loop itself.
- Chain 10, then move to the next chain loop. Repeat the process of adding double crochets at the loop center with additional chains.
- This row adds decorative dimension to the fringe and stabilizes the chain loops as well.
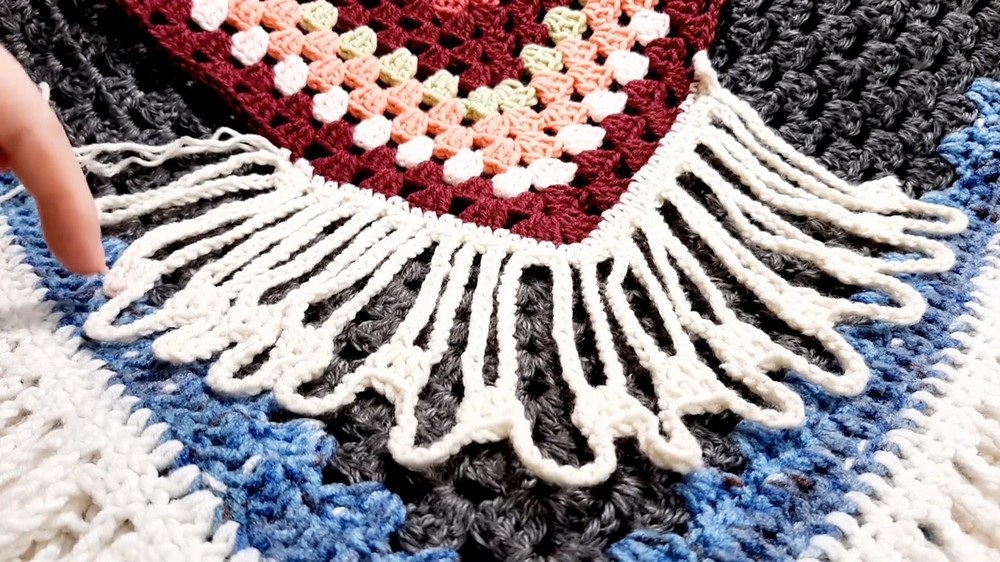
5. Row 4: Final Row Detailing
- Slip stitch into the previous row’s cluster to reach the center double crochet.
- Make a double crochet in the top of the center double crochet (of the cluster) and chain 10.
- Continue chaining and double crocheting in the top of consecutive cluster centers across the row.
- End the row by slip stitching into the starting chain’s double crochet. Work in any remaining loose yarn ends and gently adjust the fringe by hand to ensure the loops are evenly spaced.
Special Features
- Tangling Prevention: The fringe design ensures it stays intact after washing, resisting tangling and maintaining its beauty.
- Durable Yarn Choice: The tutor emphasizes soft, long-lasting yarn, like Himalaya Everyday Anti-Pilling Acrylic and Pure Gold Vanilla, that’s machine washable.
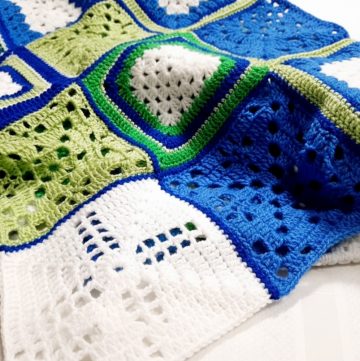
- Adaptability: You can use this fringe technique for ponchos, blankets, shawls, and more. The materials and stitch adjustments allow for customization.
Level of Difficulty
- Beginner-Friendly: The tutorial is easy to follow, focusing on basic stitches like single crochet, double crochet, slip knots, and chain loops.
- No advanced techniques are required, making it accessible for all skill levels.
Tutor’s Suggestions
- Yarn Splitting: While the Pure Gold Vanilla yarn is soft, the tutor mentions that it splits occasionally. It’s recommended to handle splits patiently and correct them during stitching.
- Custom Widths: Adjust the border width by opting for double crochets instead of single crochets during Row 1.
- Color Coordination: Consider matching fringe colors with your outfit (e.g., jeans, boots) for a cohesive look.
Uses
- Ponchos: Add durable yet decorative fringes that enhance the style.
- Blankets: Use this fringe to elevate plain designs with a gentle flow.
- Wearables: Suitable for shawls, scarves, or other accessories needing lightweight movement.
Tip at the End
Hand Block Your Fringe: Once completed, lightly adjust the loops and clusters with your hands to ensure even spacing. This simple step ensures consistency and beauty throughout your project.
Conclusion
The fringe tutorial delivers an easy, effective way to upgrade crochet projects while maintaining durability and elegance. With step-by-step guidance, thoughtful yarn choices, and a focus on practical design, this tutorial is perfect for hobbyists of all levels. Dive in, get creative, and craft beautiful fringes that complement any outfit or project.
Leave a Reply