

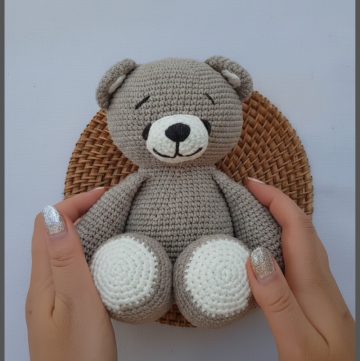
Spark joy with this Free Crochet Stitch Amigurumi Pattern as you crochet lovable and playful friends perfect for gift and treasured keepsakes.
A soft and cute little character with bright colors and a friendly smile can easily make anyone feel happy. The beauty of crafting such a delightful toy comes from following a Crochet Stitch Amigurumi pattern which shows every step to shape its round body and gentle expression. This special yarn friend is perfect as a gift or keepsake bringing warmth to kids and grown-ups alike.
Beautiful Free Crochet Stitch Amigurumi Pattern for Playful Friends

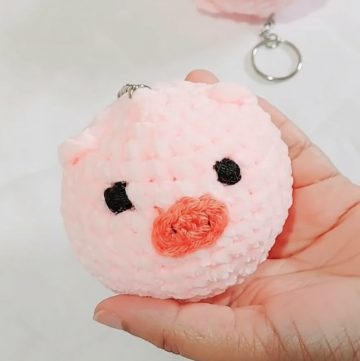
Using the pattern you can create animals dolls or playful cartoon figures and select the colors that suit your taste. The instructions are simple and easy to follow even for beginners. The finished piece is not only adorable but also durable and safe making it a beloved companion that lasts for years. With just a little yarn and guidance this craft opens a world of imagination and allows anyone to make a heartwarming creation to cherish forever.

Crochet Amigurumi Stitch Pattern
Materials
- Yarn:
- Main (blue)
- Accent (light blue, pale pink)
- Dark blue (nose)
- Hook: 2 mm (or size for tight amigurumi)
- Stitch Markers
- Scissors
- Yarn Needle (Tapestry Needle)
- Polyester Stuffing
- Felt: Black and white for eyes
- Craft Glue or Hot Glue
- White paint or correction fluid (for eye highlights)
- Optional: Keychain finding
Abbreviations (US Terms)
| Abbreviation | Meaning |
|---|---|
| MR | Magic Ring |
| ch | chain |
| sc | single crochet |
| inc | increase (2 sc in one stitch) |
| dec | decrease (sc2tog: single crochet decrease) |
| sl st | slip stitch |
| hdc | half double crochet |
| dc | double crochet |
| st(s) | stitch(es) |
| FLO | front loop only |
| rep | repeat |
Special Notes
- Work in continuous spirals unless otherwise specified.
- Always place a stitch marker in the first stitch of each round.
- Switch to a smaller hook if your fabric is not tight enough (amigurumi should have no gaps).
- For a neat color change, always finish the last pull-through of the last st before change with the new color.
- Ears are made with double layers and sewn together for shape and durability.
Instructions
1. Stitch’s Head (Blue, Light Blue Band)
Round 1:
With blue, make a MR, 6 sc in ring (6). Pull tight.

Round 2:
Inc around (12)
(2 sc in each st)
Round 3:
[sc, inc] around (18)
Round 4:
[sc 2, inc] around (24)
Round 5:
[sc 3, inc] around (30)
Rounds 6–9:
sc in each st (30)
Color Change to Light Blue:
On last sc of Round 9, begin sc in blue and finish last ‘pull-through’ with light blue. Finish round.
Tip: Cut blue yarn and tie off gently, weave in end.
Round 10:
With light blue:
Join with sl st to first st, ch 1.
(For an even color line, work this entire round as sl st in the FLO of each st; do NOT pull tight)
You should have 30 slip stitches. Join with a sl st to first sl st, ch 1.

Round 11:
Continue with light blue:
- [sc 3, dec] around (24)
Round 12:
- [sc 2, dec] around (18)
Stuff firmly but don’t overstuff.
Round 13:
- [sc, dec] around (12)
Round 14:
- dec around (6)
Finish off leaving a long tail. With a yarn needle, weave through FLO of remaining 6 sts and pull tight to close. Secure with a knot and hide yarn end inside head.

2. Ears (Make 2 Blue, 2 Pink; Each Ear is Double-Sided)
With pale pink (inner ear) or blue (outer ear):
Row 1:
Ch 7.
Row 2:
Starting in 2nd ch from hook: 5 sc, 3 sc in last ch (work around end to the other side).
On opposite side: 5 sc, then 2 sc in last st (same st as previous sc; this forms a round). (Total: 15 sc)
Row 3:
- 3 dc
- 3 hdc
- 1 sc, 1 inc (2 sc in next st)
- 1 sc
- 3 hdc
- 3 dc
Finish with sl st to join, ch 1. Leave long tail for sewing. Fasten off.
Assembly:
Stack one blue (outer) and one pink (inner) ear piece wrong sides together.
With blue, join them using sc or whipstitch through both layers around the edge.
Finish, leave tail for sewing to head. Repeat for second ear.
3. Nose (Dark Blue)
Row 1:
Ch 4.
Row 2:
Sl st in first ch, hdc in next, sl st in last ch.
Ch 1, fasten off. Leave tail for sewing.
4. Face Details
Eyes:
- Cut 2 small ovals from white felt and 2 smaller ovals from black felt.
- Layer black on white and glue together. Paint or dot a small white highlight with white paint/correction fluid for added realism.
- Glue eyes to head.

Nose:
- Place nose on center lower half of face, sew or glue in place.
5. Assembly
- Sew or glue eyes in place, centering them horizontally with a small gap between.
- Place the nose between/just below the eyes, and sew or glue.
- Sew ears to sides of head, slightly above eye line, fanning outward.
- Weave in any loose ends and trim.
- For a keychain: Attach a split ring or chain to the top of head with a few stitches or a small loop of yarn.
Conclusion
This Stitch keychain is simple and beginner-friendly, yet produces a detailed and recognizable face. It’s perfect as a bag charm or gift for fans. The use of slip stitches and careful color-changing creates a professional finish.
Pattern Correction & Tips
- Tight Stitches: For amigurumi, keep stitches firm—stuff should not show through.
- Color Change: When changing colors, always work last pull-through of the last stitch in the old color with the new color.
- Sl st Round: Work loosely or use a 0.25 mm larger hook; otherwise, the round will cinch and distort the shape.
- Ears: Stack and sc together for stiff, neat edges.
- Eyes/Nose: If you prefer, use small black safety eyes instead of felt, and embroider a small nose.


Leave a Reply