Ready to make something super fun? This Crochet Shark Amigurumi pattern is perfect for anyone who loves quirky and adorable projects. With simple yarn, a hook, and a bit of creativity, you can whip up a cute little shark that's sure to bring smiles.
Crochet Shark Amigurumi
Materials Needed:
Yarn:
- Base color (Preferably not velvet yarn - Loops and Threads Sweet Snuggles Light or Chanel H Home Slim suggested)
- Belly color (White recommended)
- A small amount of black yarn for the gills
Crochet Hook:
- Size 5.5 recommended for size six yarn or adjust according to your yarn type
Other Tools:
- Scissors
- Stitch marker
- Plastic sewing needle
- 20 mm safety eyes
Crochet Instructions:
Body:
Magic Ring or Chain 2 Method:
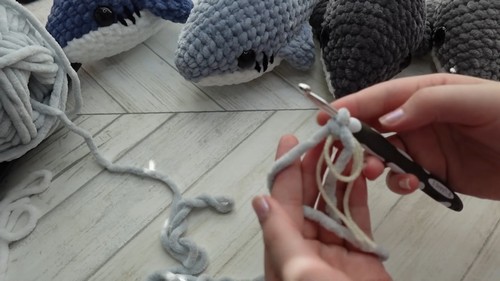
- Start with a magic ring, or chain 2 and work 6 single crochets into the first chain or ring.
Round 1-10 Increases:
Round 2:
- Increase, single crochet 1 in each stitch around (repeat 3 times).
After Round 3:
- Increase, single crochet 2 in each stitch around (repeat 3 times).
- Continue this pattern adding one more single crochet in each repetition until Round 10 which is just single crocheting around.
Round 11-13:
Round 11:
- Increase, single crochet 9 in each stitch around (repeat 3 times).
In Round 12 & 13:
- Single crochet around.
Installing Safety Eyes:
- Placed strategically across from each other on increases for even spacing.
Decrease Rounds (Round 14 onwards):
- Start decreasing in every round by reducing the number of single crochets between the decreases until you reach 6 single crochets in total.
Belly Piece:
Start:
- Chain 2, and increase in the second chain.
Increasing Rows:
- Single crochet in each for a few rows, gradually increasing at the beginning and end of rows to shape the belly piece.
Finish:
- Decrease towards the end to taper the belly, fasten off leaving a long tail for sewing.
Fins (Top, Side, and Back):
Magic Ring or Chain 2:
- Start each fin with a magic ring or chain 2, place 4 single crochets into it.
Subsequent Rounds:
- Incrementally increase in each round until desired size.
- For the top fin, add minimal stuffing to ensure it keeps shape but remains flexible.
Final Rounds:
- Decrease to sharpen the tips of the fins when necessary.
Assembly:
Sewing Fins and Belly to Body:
- Position and sew the belly first guided by the safety eyes position.
- Attach the fins symmetrically ensuring they align well with the body and belly.
Details:
- Embroider gills with black yarn.
- Lastly, ensure all parts are securely attached and trim any excess yarn.
Finishing Touches:
- Secure all ends and stuff the shark appropriately.
- Give your shark a good shake to dust off any leftover fibers and to help it settle into its final shape.




Leave a Reply