

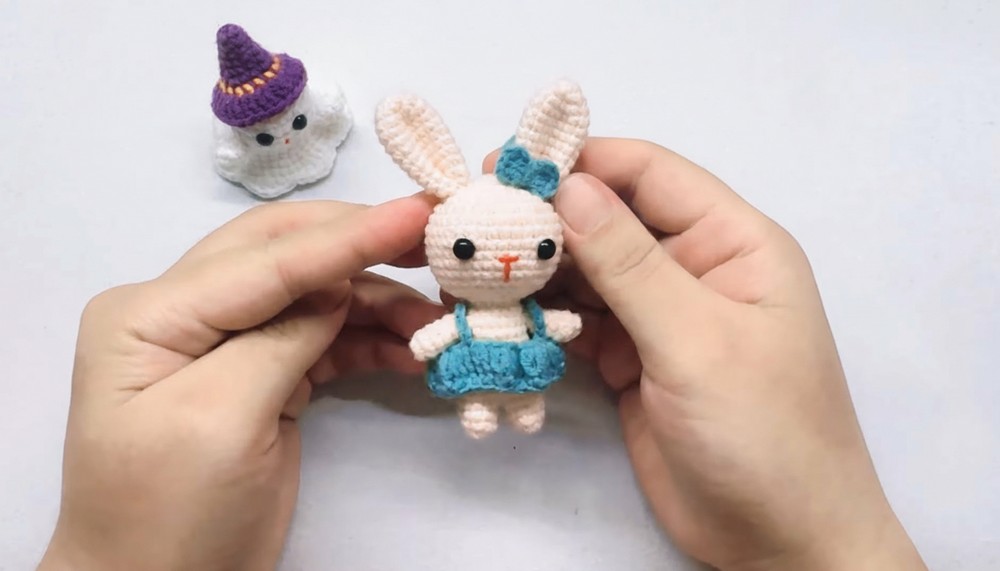
Effortlessly stitch an adorable creation with this crochet bunny pattern that perfect for gifts or charming decorations everyone will adore.
A tiny handmade bunny holds the power to brighten any space with its soft charm and thoughtful design. A crocheted bunny is much more than a crochet—it’s a little creation filled with personality and warmth. Whether placed on a shelf, tucked into a cozy corner of a nursery, or given as a heartfelt gift, it brings comfort and creativity to the world around it.
Cute Crochet Bunny Pattern That Adds Charm to Every Space
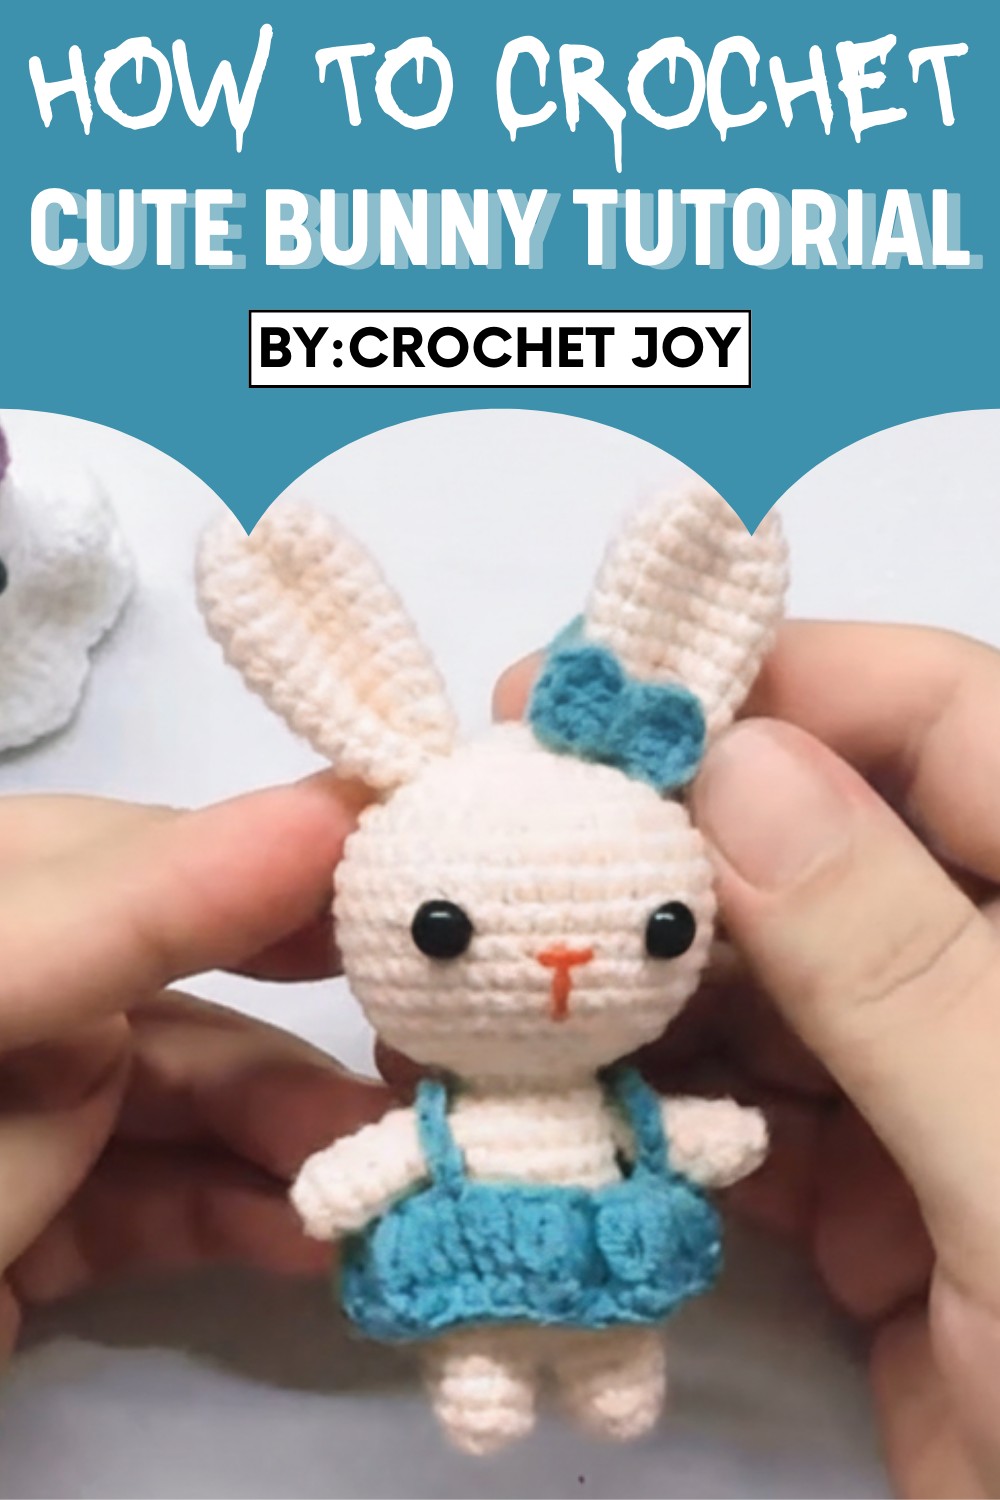
Smaller versions can be turned into charming keychains or ornaments, while a larger bunny makes for the perfect cuddly companion. With endless choices for colors and patterns, each bunny becomes a unique expression of love and care. Perfect for occasions like Easter, baby showers, or simply as a meaningful keepsake, a crocheted bunny is more than decoration—it’s a timeless treasure that spreads joy wherever it’s found.
Materials Needed
- Yarn:
- Three colors:
- Light pink (bunny body)
- Light blue (dress or overalls)
- Contrast color for the bow
- Weight: Fingering or Sport (ideal for a small bunny; adjust as needed).
- Three colors:
- Hook Size: 1.8 mm crochet hook
- Accessories:
- Polyester fiberfill
- Safety eyes (6 mm or preferred size)
- Yarn needle for weaving in ends
- Scissors
Key Abbreviations (US Terminology)
- MR – Magic Ring
- ch – Chain
- sl st – Slip Stitch
- sc – Single Crochet
- inc – Increase (2 sc in the same stitch)
- dec – Decrease (sc2tog)
- dc – Double Crochet
Special Notes
- This pattern uses continuous rounds. Use stitch markers to keep track of the first stitch in each round.
- Safety eyes should be securely attached between specified rounds. Double-check placement before stuffing the head.
- Parts are sewn together during final assembly. Leave sufficient length of yarn tails for sewing.
Step-by-Step Pattern
Bunny Arms
Step 1: Start with a magic ring (MR) using the bunny’s main color (e.g., light pink).
- Round 1: Work 6 sc into MR. Pull the ring tightly closed. (6 stitches)
- Sl st to the first sc to join the round. Ch 1.
Step 2:
- Rounds 2-5: Work 1 sc in each stitch around. (6 stitches per round)
- After Round 5, sl st to the first sc and ch 1.
Repeat the process to make two arms.
Bunny Ears
Step 1: Start with MR, using the bunny’s main color.
- Round 1: Work 5 sc into MR. Pull tight to close. (5 stitches)
- Sl st to the first sc to join the round. Ch 1.
Step 2:
- Round 2: Work 1 inc in each stitch around. (10 stitches)
Step 3:
- Round 3: Work [1 sc, 1 inc] around. (15 stitches)
Step 4:
- Rounds 4-11: Work 1 sc in each stitch for 8 rounds. (15 stitches per round)
- After Round 11, leave a long tail for shaping and assembly.
Repeat the process to make two ears.
Head
Step 1: Start with MR, using the bunny’s main color.
- Round 1: Work 6 sc into MR. Pull tight to close. (6 stitches)
- Sl st to the first sc to join the round. Ch 1.
Step 2:
- Round 2: Work 1 inc in each stitch. (12 stitches)

Step 3:
- Round 3: Work [1 sc, 1 inc] around. (18 stitches)
Step 4:
- Round 4: Work [2 sc, 1 inc] around. (24 stitches)
Step 5:
- Rounds 5-6: Work [3 sc, 1 inc]. (30 stitches at Round 6)

Step 6:
- Rounds 7-12: Work 1 sc in each stitch for 6 rounds. (36 stitches per round)
Step 7: Attach Safety Eyes:
- Place between Rounds 9 and 10, spaced 7 stitches apart, ensuring symmetry.
Step 8:
- Rounds 13-16: Begin decreasing:
- Round 13: Work [2 sc, sc2tog]. (18 stitches)
- Round 14: Work [1 sc, sc2tog]. (12 stitches)
- Round 15: Work [sc2tog] around. (6 stitches)
Stuff with polyester fiberfill firmly before closing.
Legs
Step 1: Start with MR, using the bunny’s main color.
- Round 1: Work 6 sc into MR. Pull tight to close. (6 stitches)
- Sl st to the first sc to join the round. Ch 1.
Step 2:
- Round 2: Work [1 sc, 1 inc] around. (9 stitches)
Step 3:
- Rounds 3-6: Work 1 sc in each stitch for 4 rounds. (9 stitches per round)
Step 4: After completing the second leg, do not fasten off. Slip stitch to join the two legs together with ch 1.
Body
Round 1: Starting from the connected legs, work 27 sc around:
- 9 sc from the first leg, 9 sc from the second leg, and 3 sc from chain stitches. (27 stitches)
Rounds 2-8: Work 1 sc in each stitch for 6 rounds. (27 stitches per round)
Rounds 9-12: Begin decreasing:
- Round 9: Work [3 sc, sc2tog]. (18 stitches)
- Fill the body with polyester fiberfill.
- Round 10: Work [2 sc, sc2tog]. (12 stitches)
- Round 11: Work [1 sc, sc2tog]. (6 stitches)
Fasten off securely and weave in.

Crochet Dress
Start with 25 chain stitches.
- Join the chain using sl st to form a circle.
- Round 1: Work [2 dc in each stitch] around. (50 stitches)
- Round 2: Work [1 sc, sc2tog] around to shape the waist. (25 stitches)
Fasten off and sew straps using 12 ch stitches.
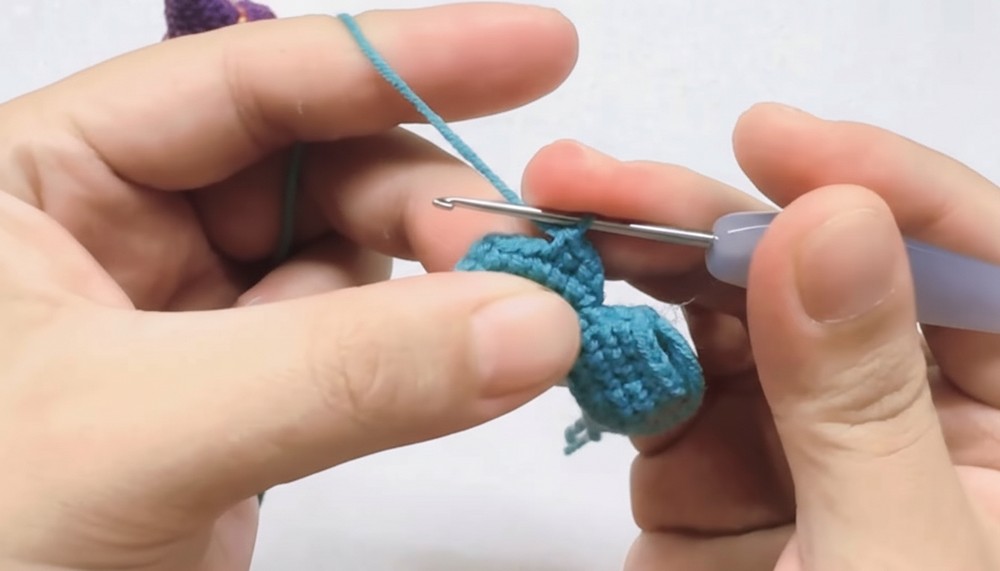
Bow
Start with MR, using the bow yarn color.
- Work [3 dc, ch 2, sl st] into MR.
- Repeat this step on the opposite side to form a bow.
- Sew onto the bunny’s head.
Assembly
- Attach the Arms: Sew the arms firmly at the shoulder position (between Rounds 4-5 of the body).
- Attach the Ears: Sew the ears on top of the head, evenly spaced.
- Embroider Nose and Mouth: Use a contrasting color to embroider small features below the eyes.
Conclusion
Congratulations! Your adorable bunny is complete. With its customizable dress, bow, and soft body, this project makes a perfect gift or decoration.
Pattern Corrections
- Ensure the connection between the legs and body stitches is smooth without gaps; adjust chain stitches as necessary.
- If the safety eyes are misaligned, reposition them before stuffing the head.
Tips
- Use a small yarn tail (left from sewing) to strengthen stitches when attaching arms and ears.
- Block the dress and bow gently for a neater appearance.

Leave a Reply