

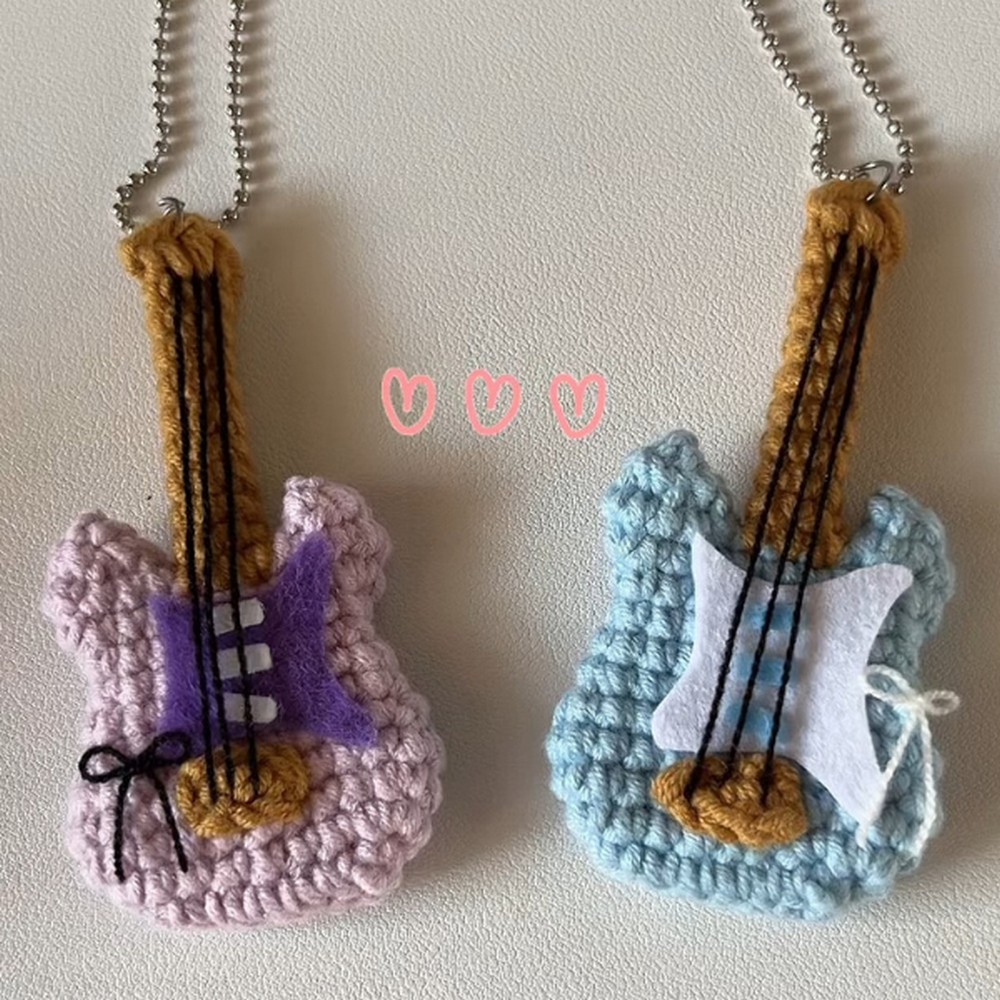
Imagine having a tiny, adorable guitar right on your keychain, made by you with colorful yarn and a bit of crochet magic! This crochet guitar keychain is the perfect little project for music lovers and crochet enthusiasts alike. With simple stitches, you can bring this cute accessory to life, adding a personal touch to your keys or giving it as a thoughtful, handmade gift to someone special.

How To Crochet Guitar Keychain
Materials Needed:
- Crochet yarn (colors of your choice)
- Crochet hook
- Stitch marker
- Yarn needle
- Scissors
- Felt in white and blue for decorations
- Glue for attaching felt and strings
Abbreviations:
- ch: chain
- sc: single crochet
- inc: increase (2 sc in the same stitch)
- dec: decrease (sc 2 together)
- sl st: slip stitch
Step by step Pattern
Body of the Guitar:
Round 1:
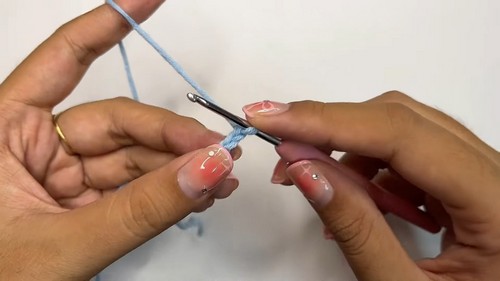
- Create a slip knot.
- Chain 8.
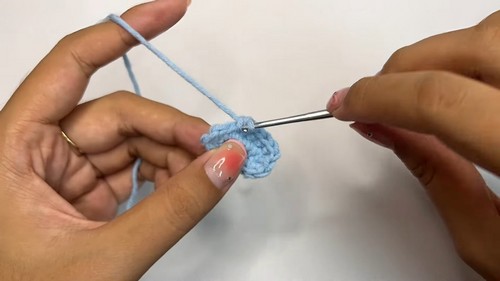
- Starting from the 2nd chain from the hook, make 1 sc.
- Make 5 more sc along the chain.
- In the last chain, make 1 increase.
- Crochet along the bottom of the chain, make 1 sc in the bottom next to the increase.
- Continue with 4 more sc.
- Make 1 increase in the last stitch.
- You should have 15 sc at the end of this round.
- Join with a sl st to the first sc.
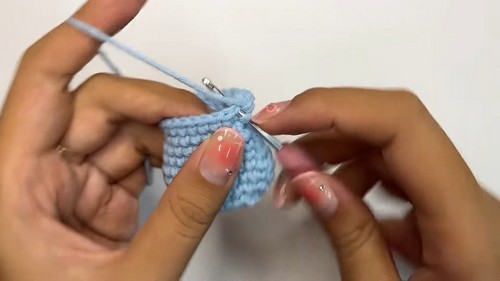
Round 2:
- Ch 1, sc in the same stitch.
- Sc 6, then make 3 sc in the next stitch (this will form the curve of the guitar).
- Sc 6, then 3 sc in the last stitch.
- Sl st to the first sc of this round.
After Round 3:
- Ch 1, sc 7.
- Make 2 increases consecutively.
- Repeat sc 7, then make 2 more increases.
- Sl st to join the round.
Round 4:
- Sc in each stitch around (23 sc total).
- Close the round with a sl st.
Round 5:
- Ch 1, sc, then dec.
- Sc 10, then dec.
- Sc in the last stitch.
- Sl st to close the round.
- Continue shaping the body with similar increments and decrements as described, ensuring each round is joined with a sl st.
Neck of the Guitar:
From Round 1 to Round 10 for the Neck:
- Start by marking out where the neck will begin on the body, ideally choosing a central position.
- Use a different color yarn, attach it with a sl st and ch 1.
- Sc in each marked stitch around (total 6 sc each round).
- This creates a cylinder for the neck, continue for 10 rounds.
Closing the Neck:
- Use sc to attach the opposite sides of the crochet to give structure to the neck.
Additional Details:
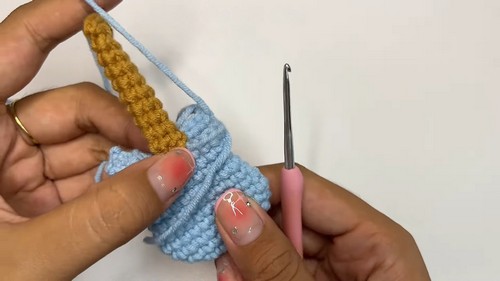
Bridge and Strings:
- Create a small bridge piece by chaining 4, starting with a slip knot.
- Start sc from the 2nd chain, sc across.
- Attach this piece to the body of the guitar.
- Use separate strands of yarn to represent guitar strings, attaching them from the bridge upwards.
- Add felt pieces cut in shapes of pickguards and pickups for details, gluing them as needed.
Finishing:
Final Touches:
- Weave in all ends neatly with a yarn needle.
- Add keychain attachments as desired.
- Finalize the decorations and ensure everything is secure.
https://youtu.be/pzAM5zNcDYI


Leave a Reply