

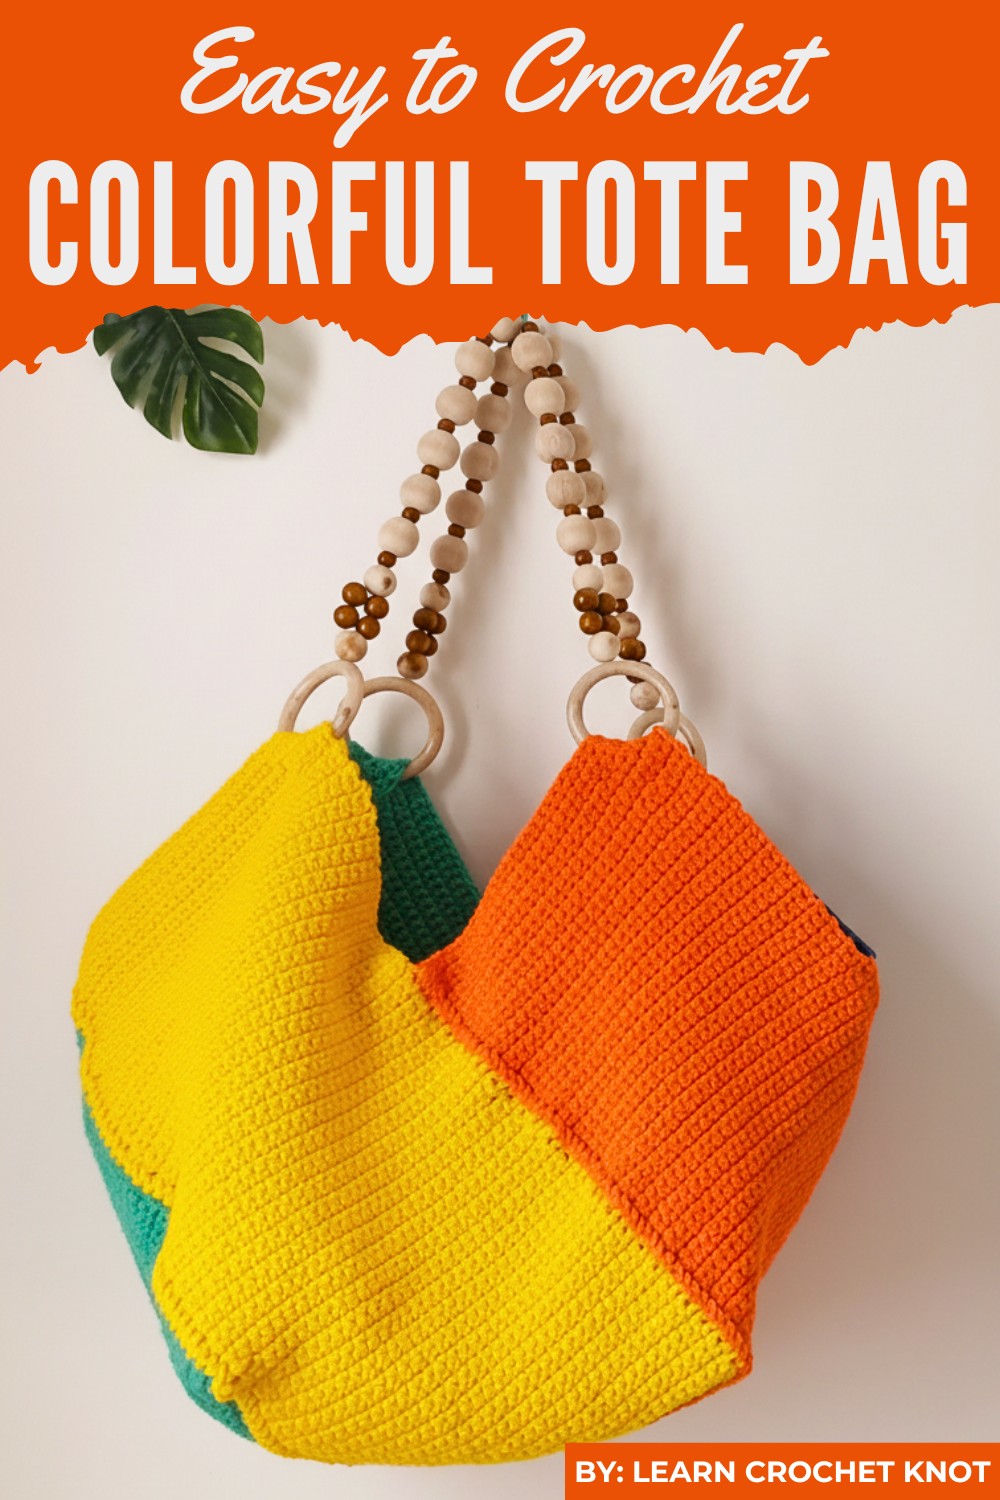
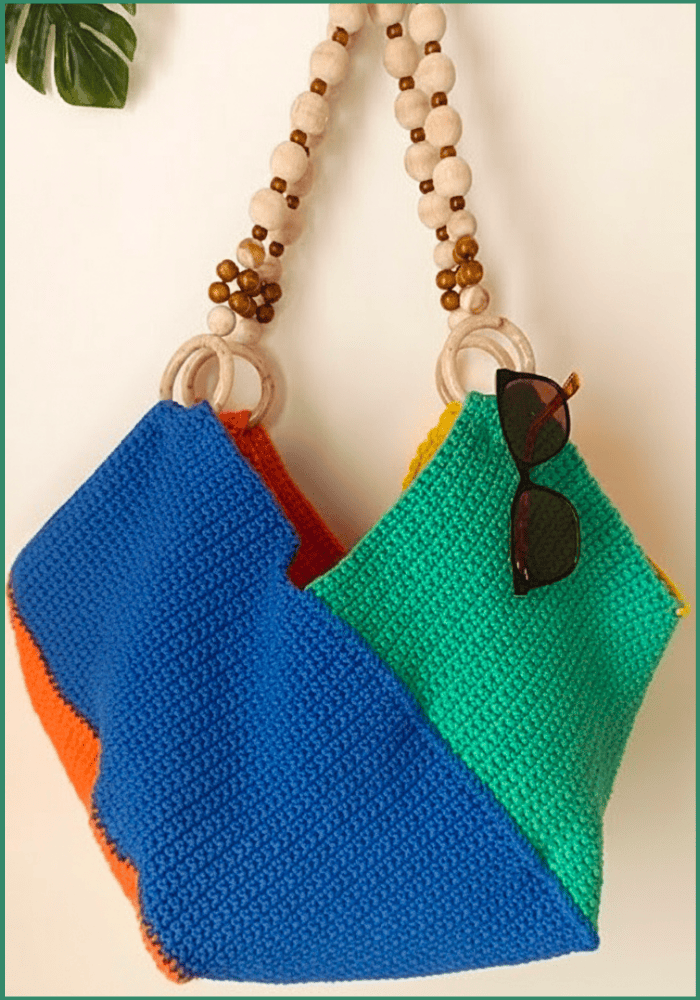
This bag is not just a practical accessory for carrying groceries, books, or everyday essentials, but it’s also a statement piece that reflects your creativity.
The process involves starting with a sturdy base, working up the sides using basic crochet techniques, and adding finishing touches like handles and decorative elements.
With its bold, colorful design, this tote bag stands out and brings joy to both the maker and the user.
Whether you’re a beginner or an experienced crocheter, this project is rewarding, relaxing, and great for sustainable crafting. Pro tip: Choose contrasting colors to make your tote visually striking and truly one of a kind.
Uses and Materials
Materials You Need
Gather these supplies to begin your project:
-
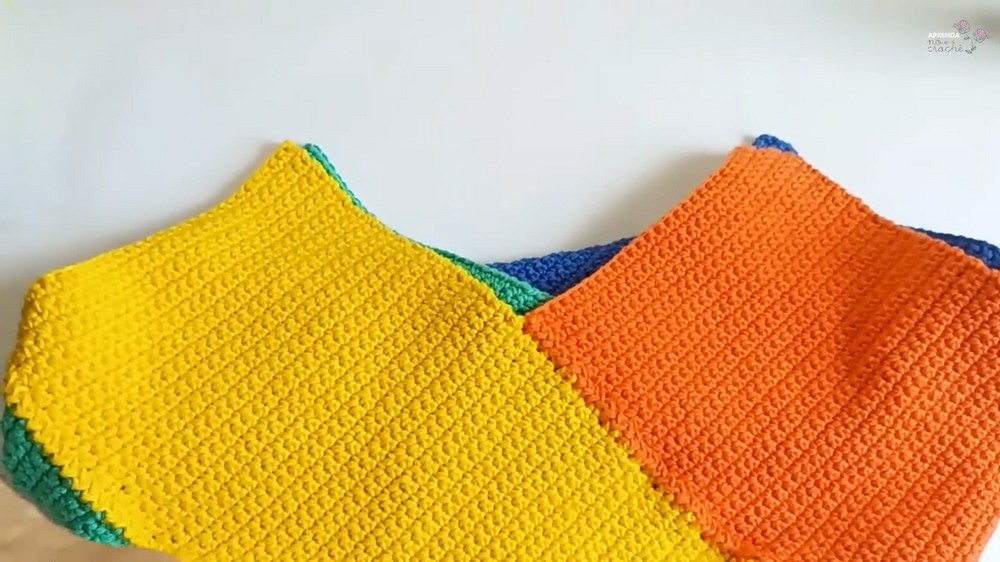
Yarn: Use Barroco Barbante Number 6 yarn (Tess 885) for the main body. The tutor uses four colors as a suggestion:
-
Orange (4456)
-
Canary Yellow (1289)
-
Tiffany Blue (5669)
-
Bic Blue (2829)
-
You can choose a single color or any color combination you desire.
-
-
Crochet Hooks:
-
A 4.0 mm hook is necessary only for crocheting the initial foundation chain to prevent the edges from tightening or curling.
-
A 3.5 mm hook is essential for all subsequent rows of single crochet.
-
-
Notions: You will need stitch markers (to maintain straight sides), a tapestry needle (for weaving ends and sewing), a tape measure, and scissors.
-
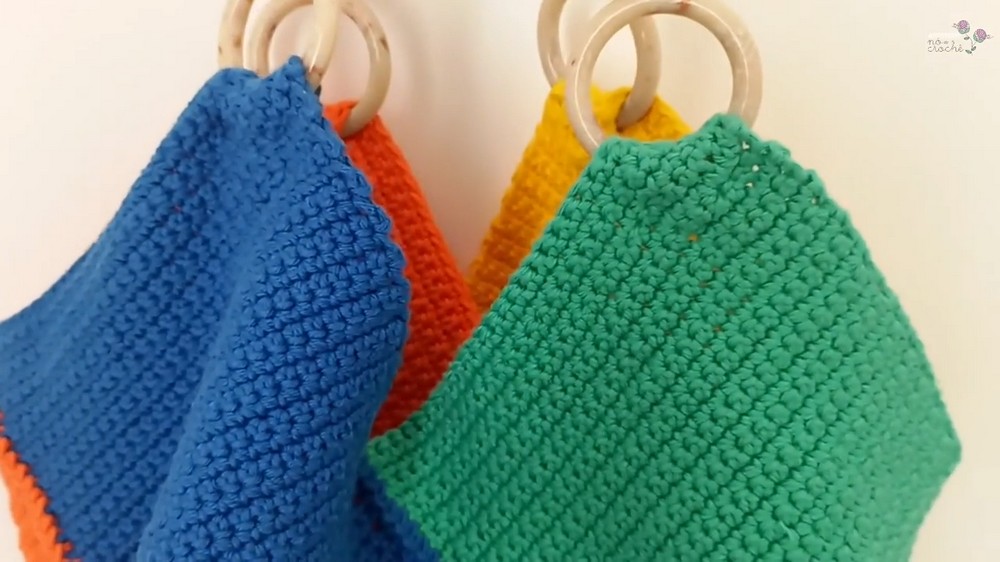
Handle: The bag design is best complemented by a separate, crocheted handle (the link for this handle tutorial is provided in the video's original description). Alternatively, you can use a leather strap, chain, or another crocheted handle of your choice.
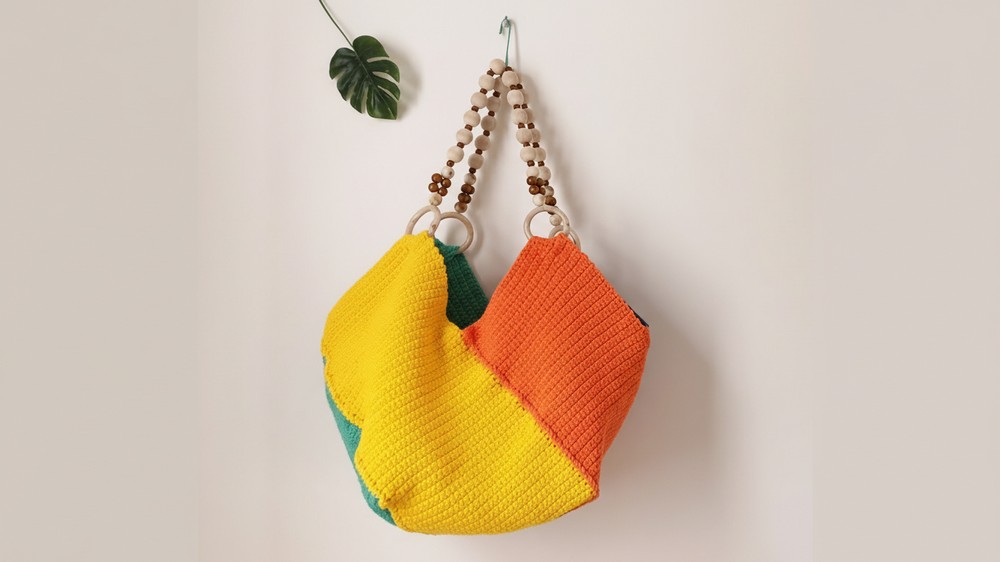
Uses of the Finished Bag
This finished bag serves as a fantastic summer accessory. You can use it to:
-
Combine with summer outfits due to its bright, cheerful colors.
-
Carry personal belongings such as a wallet, phone, and keys.
-
Transport larger items like a book or tablet.
Special Features
This pattern incorporates clever techniques for a high-quality finish:
-
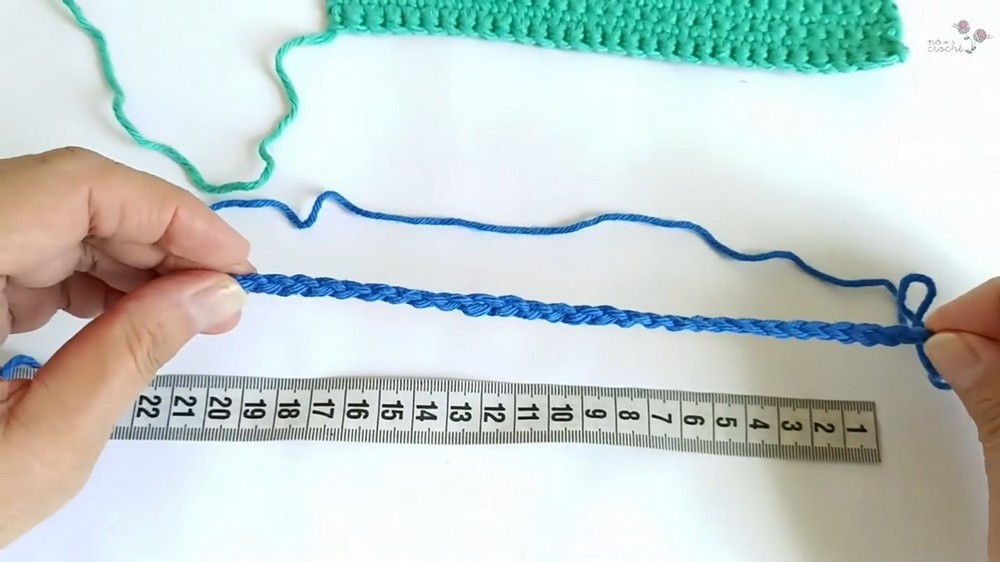
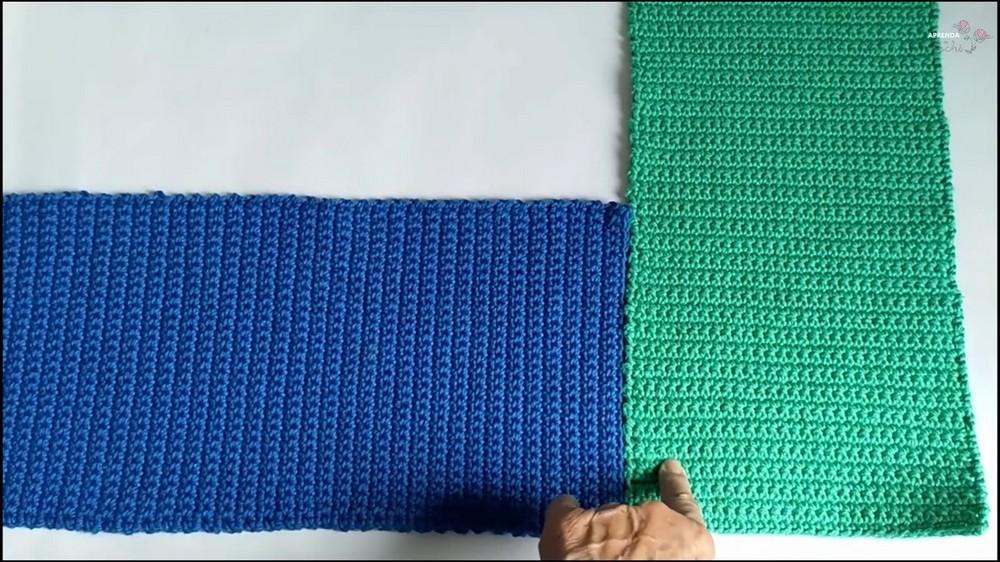
Four-Panel Assembly: You construct the bag from four separate, equal-sized rectangles (19 cm wide by 45 cm long). This modular approach makes the project easier to handle and allows for beautiful color blocking.
-
Non-Curling Foundation: You use a larger, 4.0 mm hook only for the starting chain, which ensures the dense single crochet work does not pull in and cause the base of the panel to curl.
-
Decorative Zig-Zag Seam: You join the panels using a slip stitch technique, which creates a prominent, textured zig-zag line on the right side of the fabric, adding a decorative element to the structure.
-
Invisible Finishing: The final process for attaching the handle involves working single crochet around the opening and securing the base of the handle with a nearly invisible slip stitch border, resulting in a clean finish.
Level of Difficulty
The level of difficulty for this project is Intermediate. While the main body uses only the single crochet stitch, the requirement to work with multiple panels, maintain precise tension for straight edges, and execute the final assembly with the decorative seam elevates the complexity beyond a beginner level.
Tutor's Suggestions
The tutor provides helpful guidance to ensure a perfect result:
-
Check Your Measurements: When using a different yarn or gauge, always measure to ensure your panels are the correct size: 19 cm wide (width) by 45 cm long (length).
-
Count Your Stitches: Count the stitches at the end of every row to maintain a perfectly straight edge. This prevents the sides from slanting or becoming uneven.
-
Use Stitch Markers: Place stitch markers at the beginning and end of each row. This is crucial for beginners and helps you identify the last working stitch, ensuring you do not accidentally increase or decrease.
-
Handle Tension: Use loose tension when making the initial chain with the larger hook. This ensures the foundation remains flexible and matches the width of the main body rows.
-
Handle Placement: Position the handle carefully, using the fold of the bag to determine placement. Measure approximately the width of one finger from the side seam to secure the handle base evenly.
Step-by-Step Details
Create a stunning, multi-colored tote bag, perfect for summer fashion! This tutorial guides you through constructing a large, durable bag by crocheting four rectangular panels and joining them with a decorative, firm seam. You will learn how to create a flat, even base and securely attach a stylish handle to complete this modern accessory.
Conclusion
You have successfully crocheted a vibrant and contemporary color-block tote bag! The combination of four panels, the sharp filet seam, and the clean finish ensures your bag is durable and stylish, ready to complement your summer wardrobe.
Tip
Prevent Yarn Visibility During Joining: When working the slip stitch joining seam, always ensure the working yarn for the slip stitch comes from behind the fabric. This keeps the colored yarn hidden on the reverse side of the panel and ensures only the decorative zig-zag stitching shows on the front.
Leave a Reply