

Imagine the fun of crochet your very own string of pearl vines! This project is a cozy way to add a splash of green to your home, without worrying about watering plants. By following a simple pattern, you'll make adorable pearls that dangle like real vines.
Crochet String Of Pearl Vines

Materials Needed:
- Big Twist Acrylic Yarn (or similar)
- 5mm hook (Size H)
Pattern Steps:
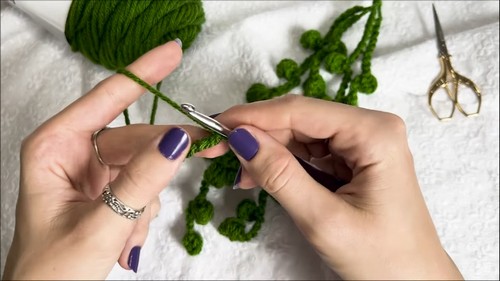
Start With a Slip Knot:
- Begin by making a slip knot.
Chain 8:
- Chain eight stitches to start the foundation chain.
First Pearl Creation:
Work into the second chain from the hook:
- Insert the hook into the second chain. Preferably, insert through the back and the outer loop for better definition.
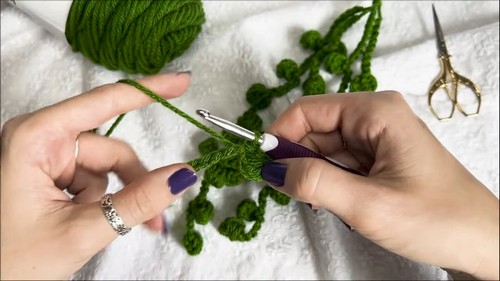
Yarn over and pull through:
- Do this once and then repeat for a total of four loops on the hook from the same space.
- After gathering four loops, yarn over and pull through all the loops on the hook.
Chain two:
- This is done to secure the pearl.
Slip Stitch to Form the Pearl:
- Insert into the same space and complete a slip stitch. This creates your first pearl.
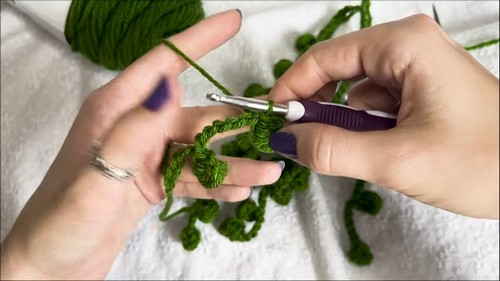
Next Pearls (Repeat Pattern):
- Chain 8: For spacing between pearls. You can adjust the number of chains based on desired spacing.
- Repeat the process (as described in steps 3 and 4) to create each pearl.
- Insert into the second chain from the hook, create four loops in the same space, pull through, chain two, and slip stitch in the same space.
Creating Varied Lengths:
- To give the string of pearls a naturally varied look, you can change the length of the starting chain between pearls, e.g., use fewer or more than eight chains.
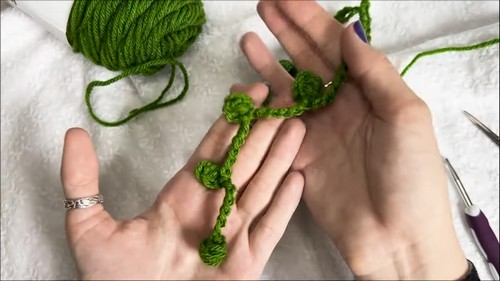
Finishing:
- After the last pearl, chain one and pull tight to secure the end.
- Weave in the ends by finding an optimal entry point through the back of the pearls, pull the tail through to the other side, and cut close to the pearl to hide it.
Tips:
- Make sure to maintain consistent tension for an even look.
- The number of pearls can be adjusted based on the desired length of your string.
Customization:
- The starting chain length can be varied to alter how the pearls sit relative to each other, avoiding a monotonous look and creating a more natural appearance.
https://youtu.be/bhi3bBinsjk
Leave a Reply