

Upgrade your outfit with this Crochet Vest Top Pattern that gives a breezy, comfy style great for summer wear, layering options, or a chic handmade look.
A simple handmade top can change how an outfit feels, making it more relaxed and personal. It becomes even more special when you shape it with your own hands using yarn and basic stitches. The Crochet Vest Top Pattern shows how to make a lightweight and stylish top that is perfect for warm days and easy layering.
Fun Free Crochet Vest Top Pattern for Beach Looks
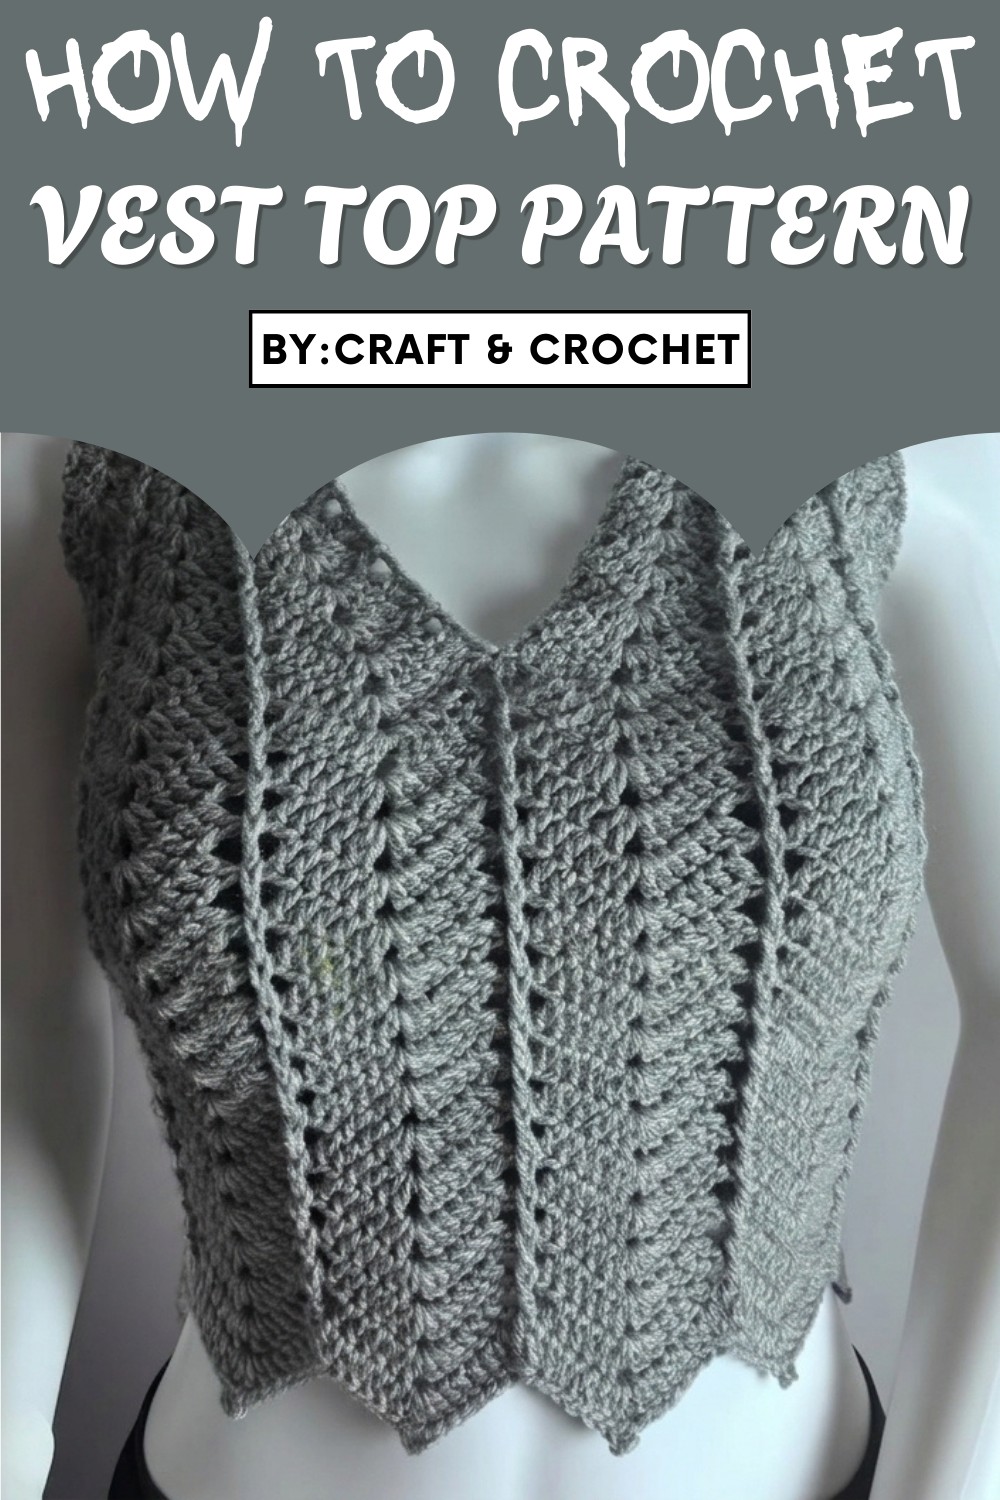
This crochet top can be worn over a shirt, paired with jeans, or styled with a skirt for a casual look. Its breathable design keeps it comfortable, while the neat stitches give it a clean handmade finish.
Step-by-Step Crochet Vest Top Pattern
Materials List
- Yarn:
- Double Knitting Yarn (approximately 330m per 100g skein)
- For small size: 1 skein
- For medium size: 2 skeins
- For large size: slightly over 2 skeins
- Example: Yarn Color Code CE083 (Gray)
- Hook:
- 4mm crochet hook (recommended size as per yarn).
- Accessories:
- Yarn needle (weaving ends and sewing panels).
- Stitch markers.
- Scissors.
Skill Level
Intermediate to Advanced.
Key Abbreviations (US Terminology)
- ch: chain
- dc: double crochet
- fpdc: front post double crochet
- bpdc: back post double crochet
- sc: single crochet
- sl st: slip stitch
- tch: turning chain
- st(s): stitch(es)
- yo: yarn over
Special Notes
- Foundation Chain: Use a multiple of 2 + 4 depending on desired width.
- Gauge: 18 rows of pattern panel ≈ 16 inches (40 cm) in length (unblocked).
- Sizing: Customize length by adding or reducing rows. Customize width by changing the foundation chain.
- Repetition Rows: Rows 7 onwards feature designs alternating front/back post stitches; attention to detail is key.
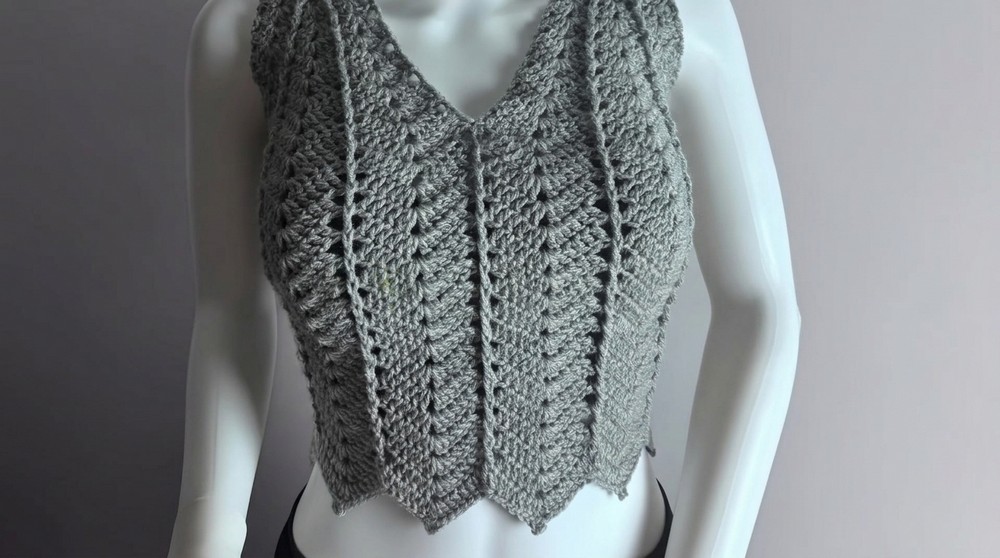
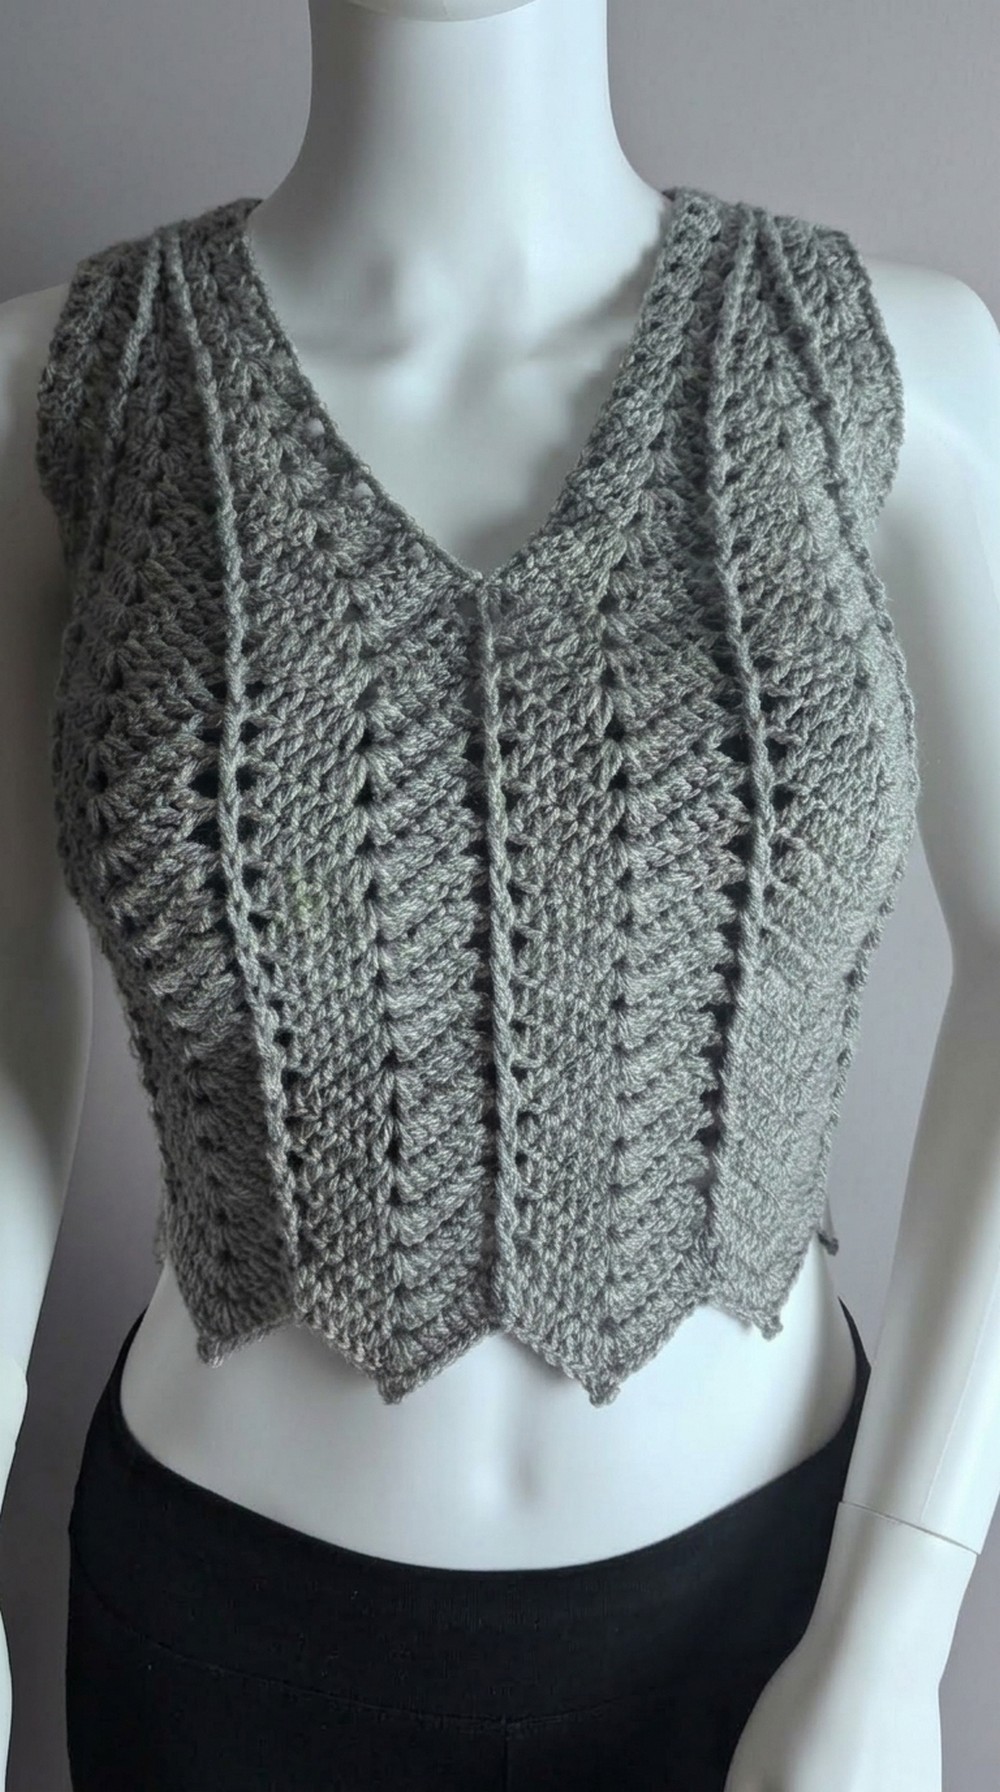
Finished Measurements
- Small (S): Front Width - 15.5 inches (30 inches total circumference). Armholes measure 7 inches.
- Medium (M): Front Width - 16 inches (32 inches total circumference). Armholes measure 8 inches.
- Large (L): Front Width - 17 inches (34 inches total circumference). Armholes measure 9 inches.
Step-by-Step Instructions
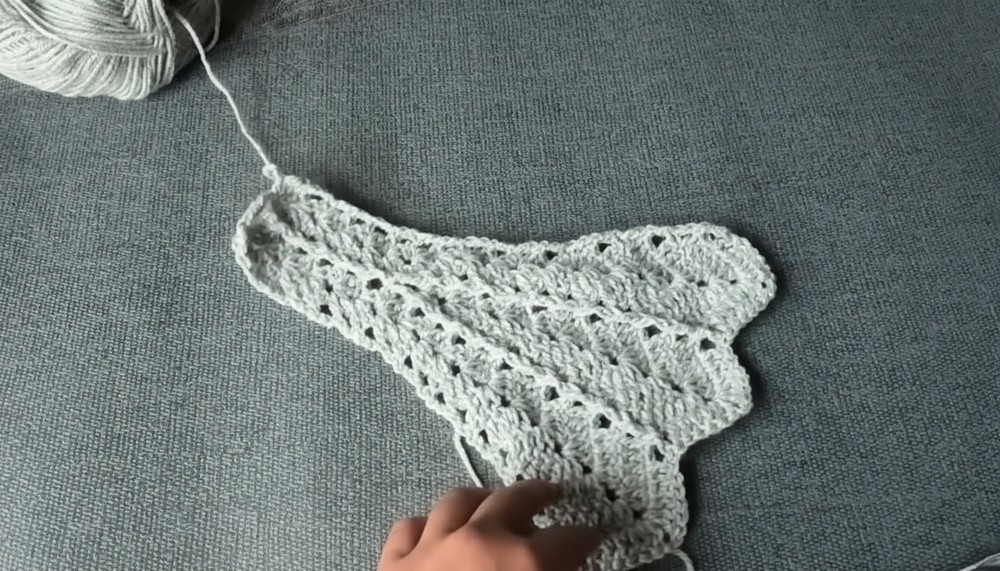
Front Panel
Foundation Chain:
- Work a slip knot. Chain 146 for large size, 142 for medium, or 136 for small.
- Turn to the back bumps of the chain to start Row 1.
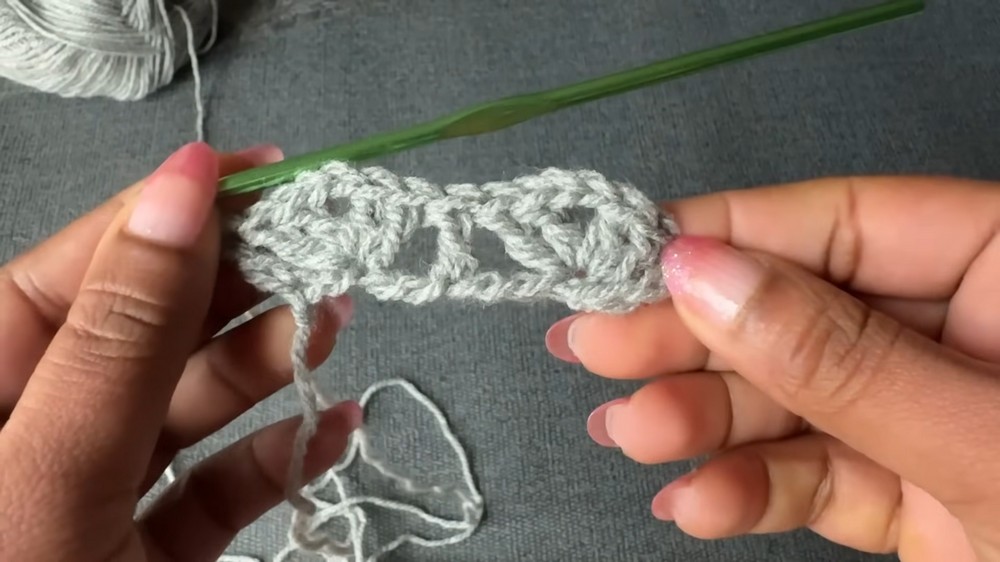
Row 1 - Shell Stitch Base Setup (dc shells):
- Skip the first 4 ch, work 2 dc into the 5th ch, ch-2, then another 2 dc into the same space (shell created).
- Skip the next 2 ch, and then work 1 dc into the third ch.
- Skip another 2 ch, and repeat: 2 dc, ch-2, 2 dc into the next ch.
- Continue this pattern across the row, ending with 1 dc in the last ch.
- Row ends with evenly distributed shell stitches.
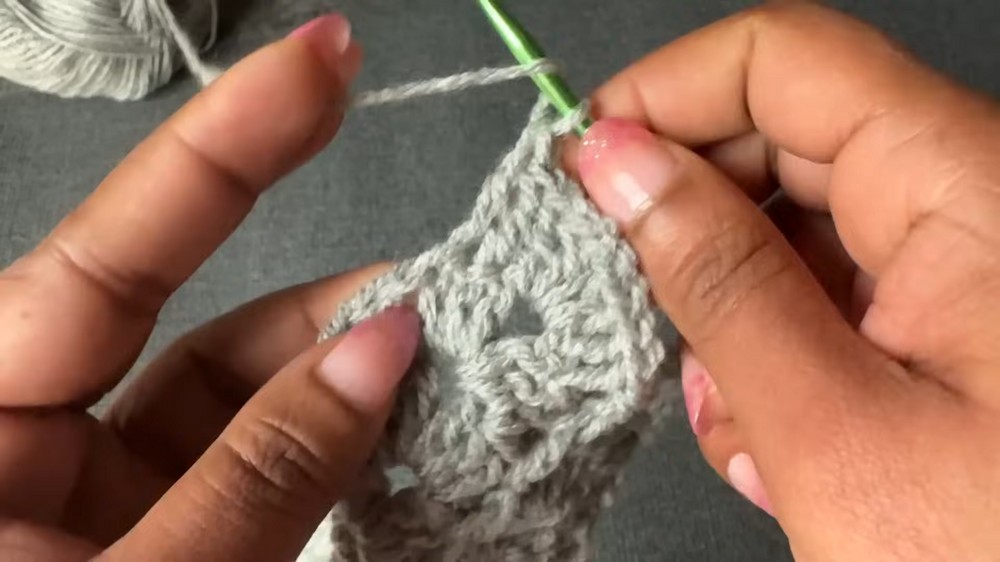
Row 2 - Shell Stitch with Back Post Double Crochet (bpdc):
- Tch: Ch 3, turn your work.
- Skip the two dc from the previous row and work in the ch-2 space: 2 dc, ch-2, 2 dc.
- Skip the next two dc, work bpdc around the single dc from the previous row.
- Repeat this sequence:
- Shell (2 dc, ch-2, 2 dc) into each ch-2 space.
- bpdc (back post double crochet) around the single dc from previous row.
- End the row with 1 dc in the last stitch.
Row 3 - Shell Stitch with Front Post Double Crochet (fpdc):
- Tch: Ch 3, turn your work.
- Work 2 dc, ch-2, 2 dc into each ch-2 space as usual.
- Instead of bpdc, now work fpdc around the single dc from the previous row.
Repeat the sequence:
- Shell into the ch-2 spaces.
- fpdc around the single dc.
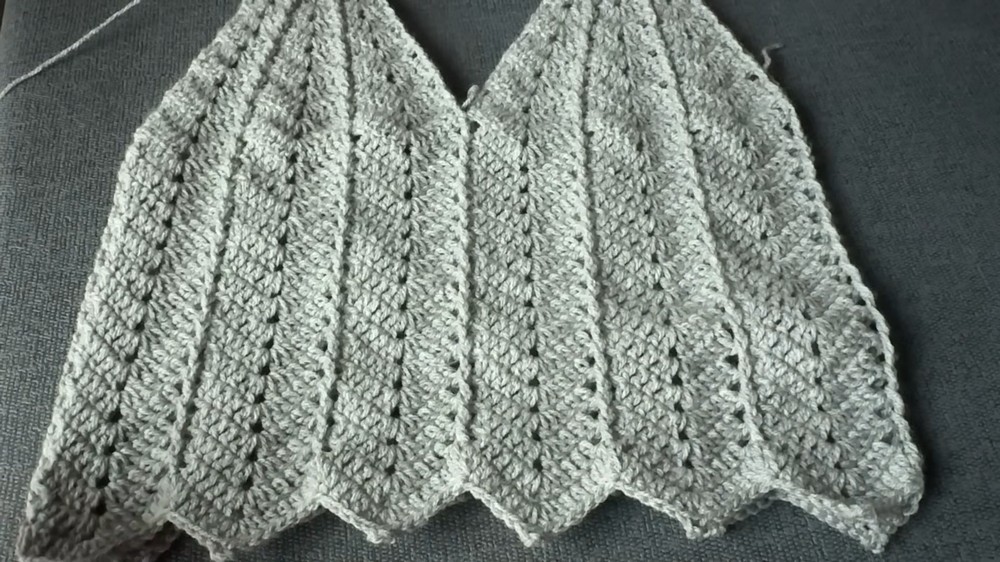
Row 4–18:
- Alternate Row 2 and Row 3 with shell stitches and post stitches (fpdc or bpdc) for transition rows.
- Increase rows: Rows are worked by lightly increasing the number of stitches in each shell. For example:
- Start Row 7 with 4 dc per shell, transition to 5 dc per shell by Row 11.
- Ultimately, widen shells to 6 dc per shell by Row 17-18.
Back Panel
- Follow the exact same pattern used for the front panel.
- Crochet identical rows until both panels measure the same width and height.
Seaming Panels
- Position panels so the stitching aligns symmetrically. Ensure armholes are evenly left open.
- For Medium: Armholes should measure 8 inches.
- Adjust length depending on the size.
- Use a whip stitch or sl st seam using back loops only for clean finishing.
Final Touches
Edging – Neckline and Armholes
- For neckline:
- Work sc rounds around the neckline, decreasing at corners to avoid puckering.
- Add additional rounds for reinforcement (typically 2–3 rounds).
- For armholes:
- Crochet 1–2 rounds of sc to create a smooth edge.
Customization Options
- Crop Top: Reduce the total rounds of the body section to create shorter tops.
- Tunic Style: Extend rows beyond Row 18 for longer tops/dress-length garments.
- Add Details: Incorporate picot edging or other decorative stitches for texture.
Conclusion
The finished crochet top is versatile, lightweight, and stylish. It works well for casual wear or layering. Adjustments to the design (length, width, shell size) allow easy sizing customization.
Pattern Correction
- Stitch Counting: Always verify shell stitches across rows for balance. Miscounting could result in uneven size or tension issues.
- Joining Panels: Align sides properly to avoid offset during seaming.
Important Tips
- Gauge Swatch: Always crochet a test swatch to confirm tension before starting project.
- Blocking: Light blocking improves the drape and shape.
- Consistency: Attentively alternate front and back post stitches while maintaining the shell structure.
Leave a Reply