

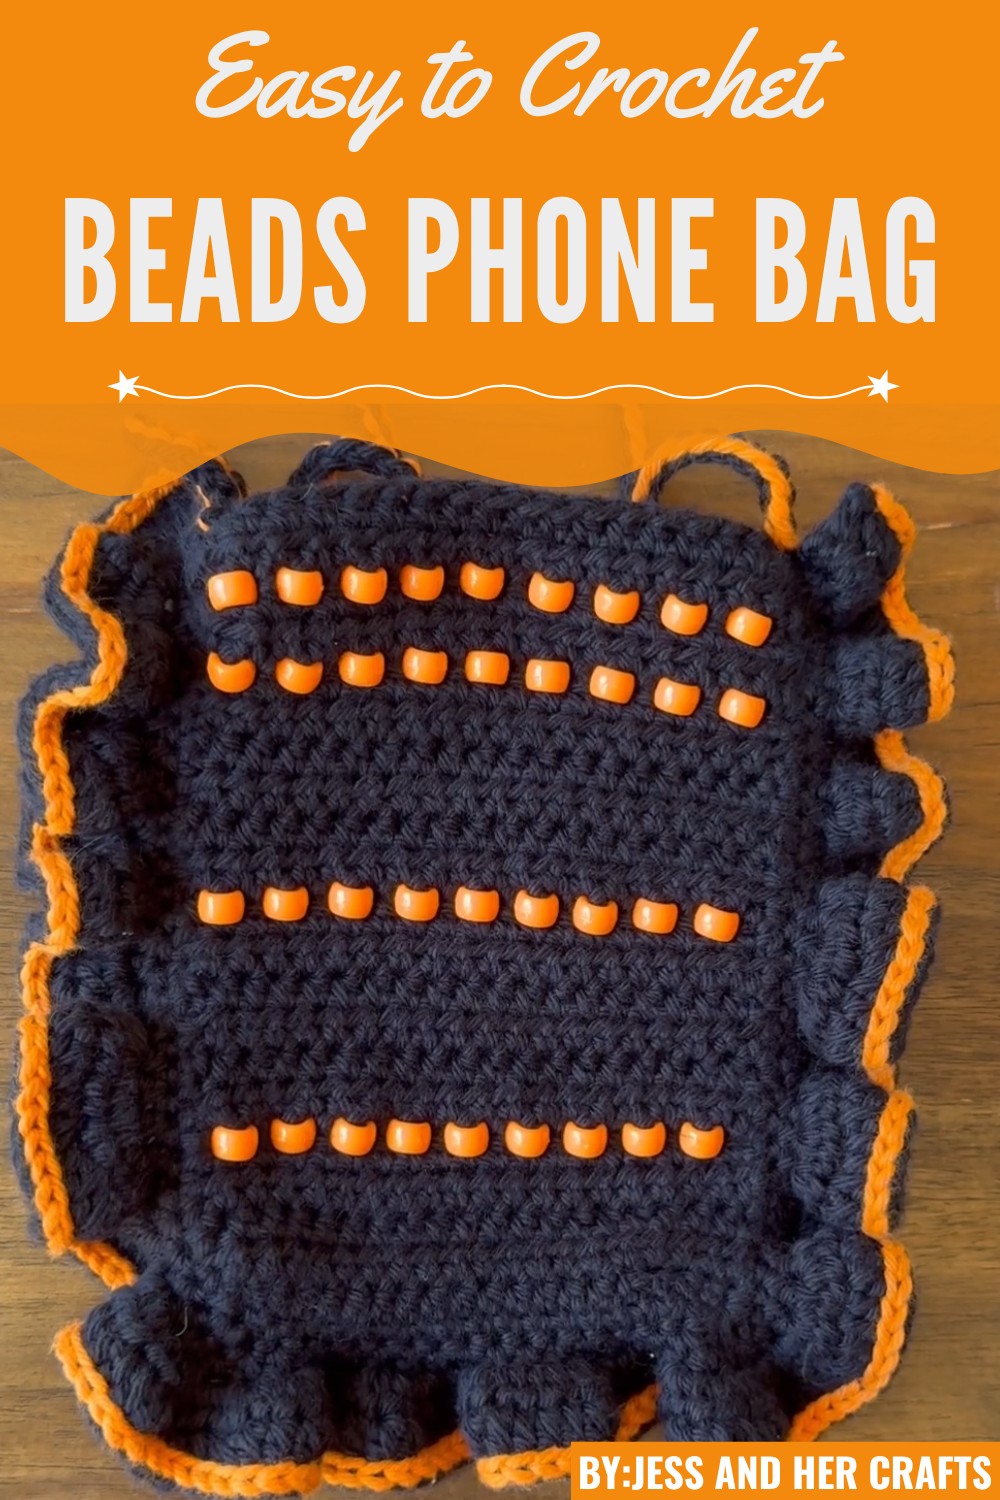
Easy Steps to Crochet Beads Phone Bag Pattern for Practical Good Looks
Beyond its aesthetics, this reusable bag pattern promotes sustainability, serving as an eco-conscious alternative to traditional handbags or disposable carriers. For beginners, the Beads Phone Bag Pattern offers a gradual learning curve, teaching techniques such as bead incorporation and decorative finishes.
Meanwhile, experienced crocheters can apply their skills to crochet a unique design that reflects their creativity. Perfect for personal use or as a thoughtful gift, this crochet pattern balances practicality with modern style, promising a fun, fulfilling addition to your accessory collection.
Materials Needed
- Yarn:
- One skein of black worsted-weight yarn (light worsted also works).
- A small amount of orange yarn (for edges, ruffles, and straps).
- Pony Beads: Light beads with holes wide enough to fit your smaller crochet hook.
- Crochet Hooks:
- 4mm hook (for the main body).
- 3.75mm or smaller hook (to ensure it fits through the pony beads).
- Scissors
- Yarn Needle: For weaving loose ends.
Special Features
- Festive Halloween Colors: Uses a black base with orange accents and decorative ruffles for a spooky yet stylish touch.
- Bead Detailing: Incorporates pony beads for texture, weight, and visual appeal.
- Durable and Lightweight: Resilient enough to carry essentials like a phone but light to wear for long durations.
- Customizable: Easily modified for a different color palette, size, or strap length.
Step-by-Step Instructions
1. Setting up the Foundation
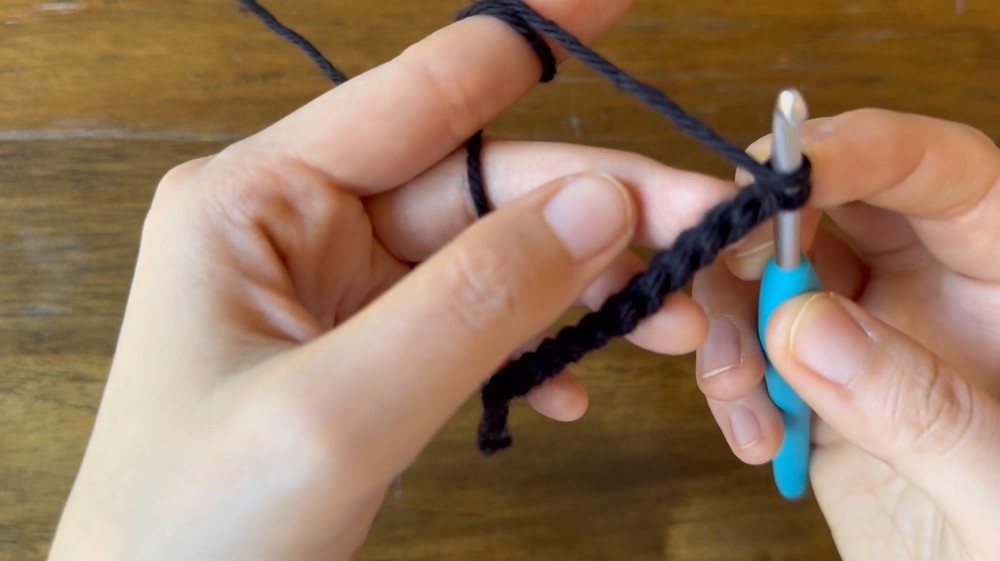
- Start with the 4mm hook and the black yarn. Create a slip knot, then chain 20 stitches.
- Turn and work half-double crochets (HDC) into the back bumps of the chain (skip the first bump). This should create 19 HDCs for the first row.
- Chain one, turn, and repeat one HDC in each stitch for four rows to complete the foundation.
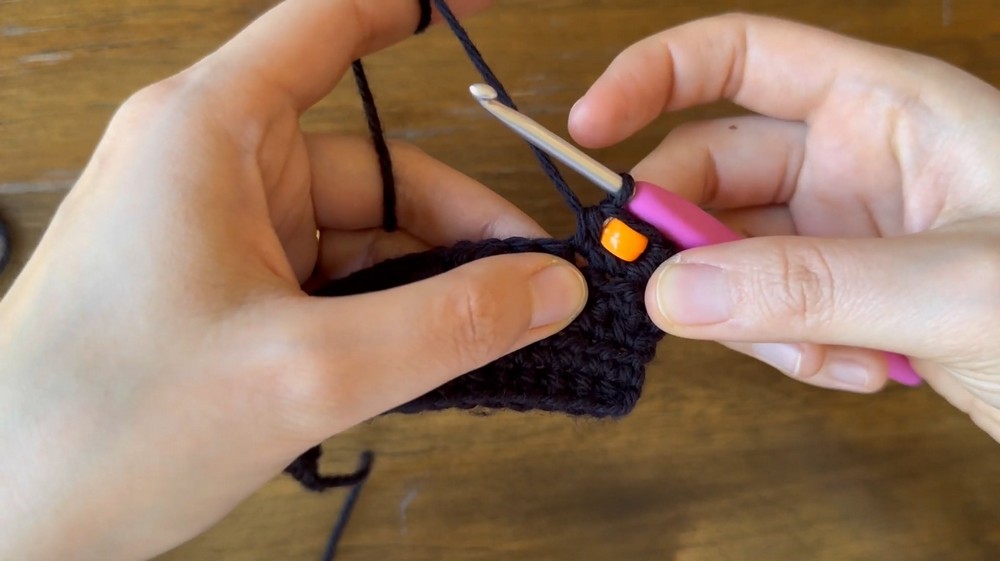
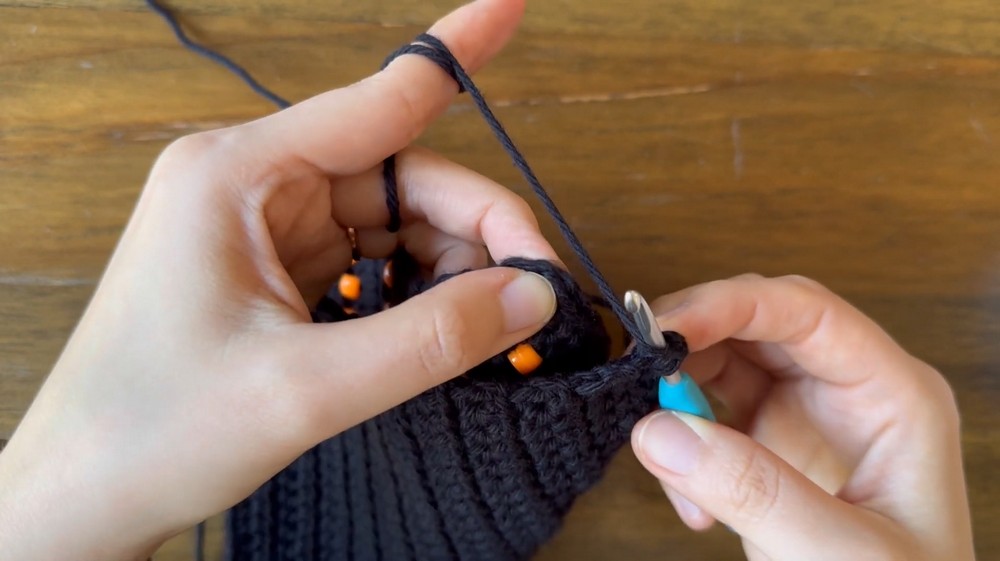
2. Adding Beads
- Switch to the smaller hook (3.75mm or as appropriate for your beads).
- Row 5: Chain one, turn. For this bead row:
- Start with an HDC in the first stitch.
- Slide a bead onto the hook, then single crochet (SC) in the next stitch. Alternate this pattern:
- One HDC.
- Add a bead, then SC into the next stitch.
- Finish the row with an HDC.
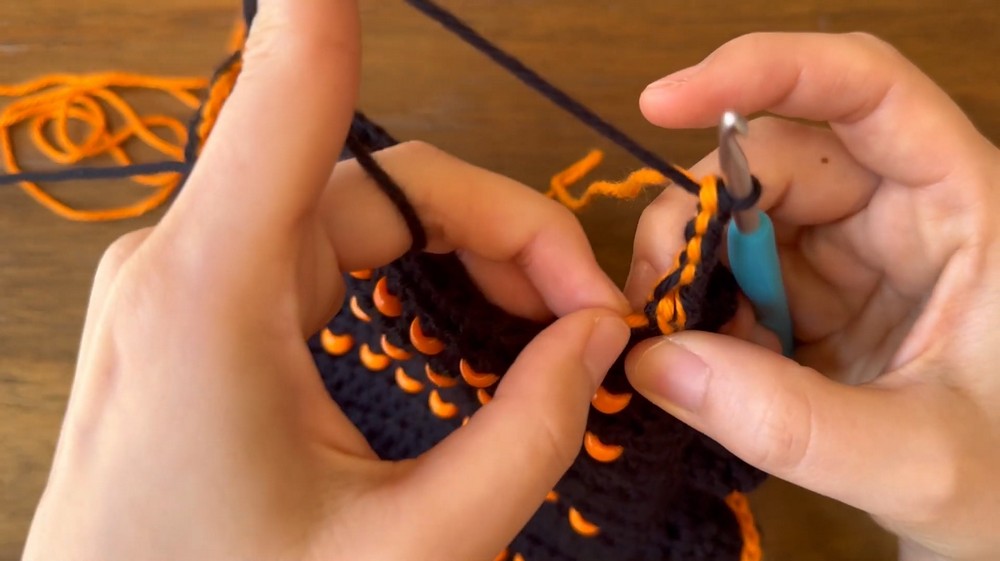
3. Working Post-Bead Rows
- Switch back to the larger hook. For Row 6, chain one and turn.
- Work HDCs by inserting into the gaps on each side of the beads: a right-side gap stitch followed by a left-side gap stitch.
- End the row with an HDC in the final stitch.
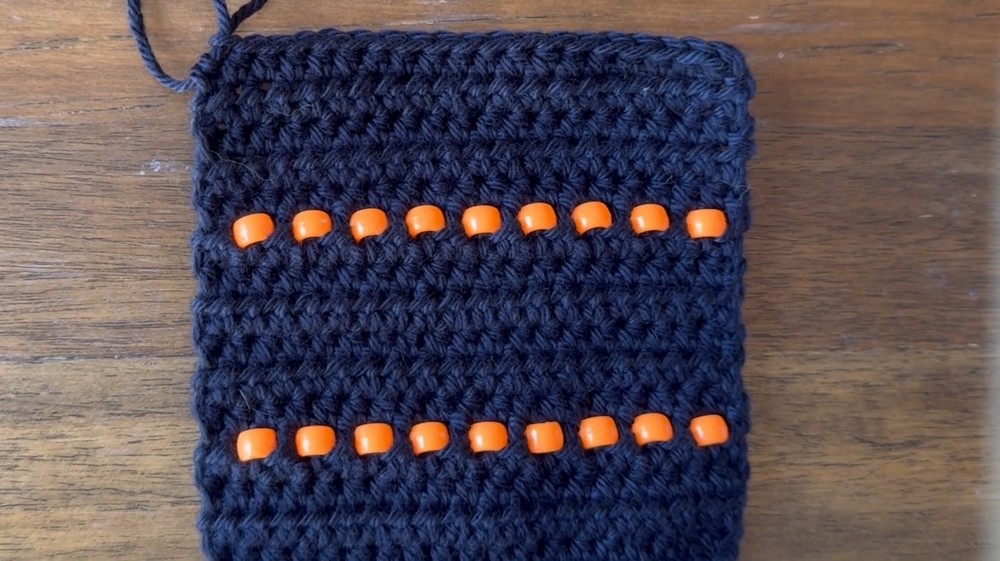
4. Repeating the Pattern
- Alternate between HDC-only rows and bead rows until your piece reaches 21 rows or the desired length.
- The final row should consist of HDC stitches only.
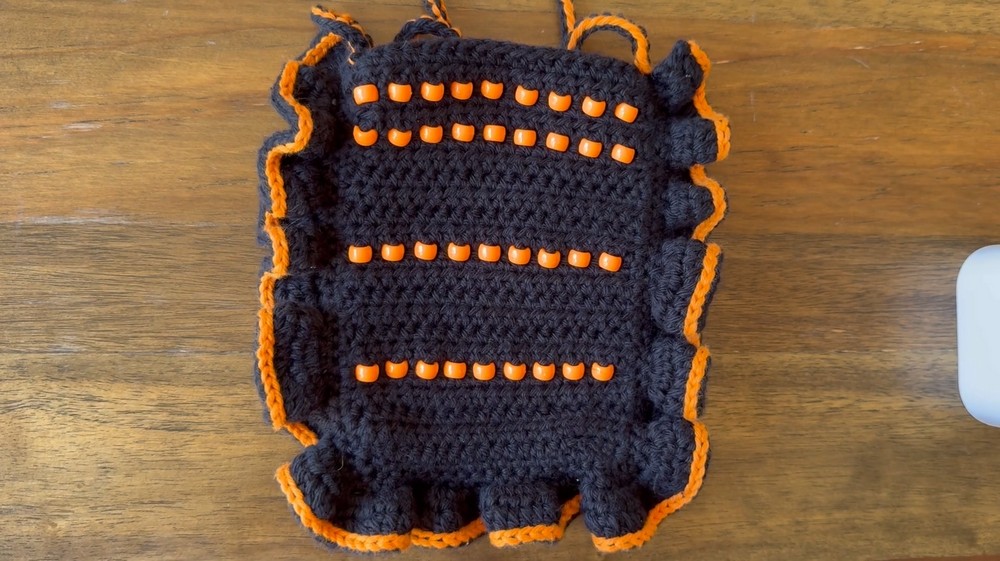
5. Creating the Back Panel
- Option 1: Follow the same steps from the front panel (including the beads).
- Option 2: Make a plain back panel, consisting of 21 rows of HDC stitches without beads, to keep it lighter.
6. Joining the Panels
- Align the wrong sides of the front and back panels together. Use black yarn and SC stitches to join along the edges.
- Work one SC per row edge (21 stitches), inserting 2 SC stitches at each corner for even transitions.
- For the bottom, make one SC per foundation stitch across.
7. Adding the Ruffles
- Flip your work, chain one, and HDC in each stitch near the edge to create a base for the ruffles.
- Start the ruffle row: Chain one, turn, and place 3 HDC stitches in the same stitch. Repeat this increase pattern for a wavy, ruffled edge.
- Optional: Use orange yarn to add a decorative final edge to the ruffles.
8. Creating the Strap
- To make a sturdy shoulder strap, combine black and orange yarn.
- With both colors, chain to the desired length (consider making it slightly shorter than needed since the strap will stretch).
- Go back through your chain stitches with standard SC or double-chain stitching to thicken the strap.
- Attach the strap to both ends of the bag using a slip stitch, finishing with a secure knot and weaving the loose ends.
Level of Difficulty
This project is beginner-to-intermediate friendly. While basic stitches (HDC, SC) and methods are used, the inclusion of beads and ruffles may require additional focus. Beginners can follow along closely, while experienced crocheters can complete it comfortably.
Tutor’s Suggestions
- Bead Management: Choose the right-sized hook for the pony beads. If the hook doesn’t pass through the bead's hole easily, opt for a smaller size.
- Tension: When using the smaller hook, loosen your tension slightly to prevent the bead row from becoming overly tight.
- Customization: For a lighter bag, omit the beads entirely or use fewer bead rows.
Uses
This Halloween crossbody bag is perfect for carrying small essentials like a phone, keys, or cash. Its festive pattern makes it an ideal accessory for spooky-themed events, but it’s versatile enough to be used year-round by simply adjusting the colors and bead design.
Pro Tip
Always check the length of the strap once the bag is weighted with items. Beads and contents can stretch the crochet strap over time, so consider making it slightly shorter than your preferred length.
Conclusion
This Halloween crochet beads crossbody bag is a fun and delightful project that blends practicality with charm. With its versatile design, you can adapt the pattern to suit your style or event. Whether you’re adding a festive flair to your accessories or developing your crochet skills, this stylish bag promises a satisfying and creative experience.
Leave a Reply