

Try this cozy collection of Crochet Teddy Bear Amigurumi patterns to make adorable bears that are perfect for crafters of any skill level looking to create a cuddly friend or a heartfelt gift. Each pattern offers step-by-step instructions to guide you through crafting your very own teddy bear, complete with unique accessories and cute features.
Crochet Teddy Bear Amigurumi Patterns
From tiny bears that fit in your palm to larger, huggable friends, there's something for every bear-lover. Whether you're a beginner or a seasoned crocheter, these teddy bears are sure to bring a smile to your face and warmth to your heart.
Crochet Plush Teddy Bear

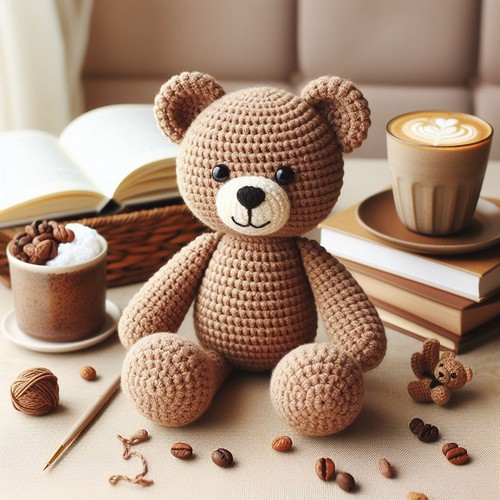
Here's a simplified guide to crafting an Easy Crochet Plush Teddy Bear. This pattern is beginner-friendly, allowing anyone to create their adorable plush teddy bear using plush yarn. The pattern uses bulky yarn, enabling you to craft a sizable plushie without too many complex stitches. It's a quick project that delivers a classic, cuddly teddy bear perfect for gifting.
Materials Needed:
- Plush yarn
- Crochet hook compatible with the yarn weight
- Fiberfill stuffing
- Stitch marker
- Yarn needle
Abbreviations Used:
- SC = Single Crochet
- INC = Increase
- DEC = Decrease
- F/O = Fasten Off
Pattern Process:
- Note: This pattern involves crocheting in rounds.
- Start with the legs, crochet in rounds with the plush yarn using the SC stitch.
- Continue crocheting the body and head in rounds, incorporating the INC and DEC stitches at certain points as specified in the pattern.
- After the main body, proceed to crochet additional components like the ears and arms.
- Once all components are ready, stuff each part with fiberfill except for the ears.
- Sew all the components together using a yarn needle to form the teddy bear. Remember to position the parts properly for a great result.
- Once the bear is assembled, F/O and weave in all loose ends.
It's recommended to follow the pattern accurately and to keep count of your stitches for a symmetrical result. The result will be a delightful plush teddy bear made by you!
Tiny Teddy Bear

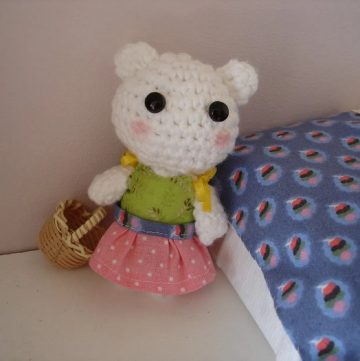
Let us help you make a delightful Tiny Crochet Teddy Bear that stands a mere 3.5 inches tall and wide. The project is manageable even for those with some basic crochet experience and takes about two hours or less to complete. The bear's endearing qualities are emphasized through the use of plastic eyes and a nose, ensuring a perfectly cute face every time.
Materials Needed:
- Worsted acrylic yarn in ivory, cedarwood, and cocoa colors
- 4.0 mm crochet hook
- Two tiny 6mm plastic eyes and one black nose
- Scissors
- Tapestry needle
- Stuffing/Polyfill
Abbreviations Used:
- st/sts = stitch/stitches
- ch = chain
- sc = single crochet
- inc = increase
- dec = decrease
- inv = invisible (through front loops only)
- sl st = slip stitch
Pattern Process:
- Begin with the muzzle, creating a magic ring and working 7 sc, followed by rounds increasing stitches.
- The head and body are also started with a magic ring, working in the round. Increases and single crochets shape the head, with added facial details before closing.
- As you reach the base of the head, you'll switch to creating the body, with a combination of single crochets and decreases to form the bear's shape.
- The arms and legs are made through a similar process, adding a small amount of stuffing before attaching them to the body.
- For the ears, create them flat and then attach them, giving them a C shape on the bear's head.
- The small tail is made and sewn to the back to complete the adorableness of this tiny creature.
- Throughout the process, make sure to stuff your bear appropriately and sew any loose ends for a neat finish.
This tiny teddy can be a fantastic gift for someone special or an adorable addition to your collection. Happy crocheting!
Teddy Grizzly Bear Amigurumi

A fantastic project for crochet enthusiasts is the Crochet Teddy Grizzly Bear Amigurumi Pattern. This endearing bear is a unique take on the classic teddy bear pattern, namely its scarf, mittens, and hat make it adorable and distinctive. The pattern is simple enough for anyone who has a good understanding of basic crochet techniques, producing a bear around 10 inches tall.
Materials Needed:
- Organic Cotton DK (Light Worsted) Yarn in colors Wood, Indigo Wash, Citronelle, Bone, Iron.
- 3.00 mm Crochet Hook
- Stitch Markers
- Scissors
- Tapestry needle
- Safety Eyes - 8mm
- Stuffing
Abbreviations Used:
- st = stitch
- hk = hook
- ch = chain
- sl st = slip stitch
- sc = single crochet
- hdc = half double crochet
- dc = double crochet
- fhdc = foundation half double crochet
- fdc = foundation double crochet
- DcBo = double crochet bobble stitch
- BLO = back loop only
- inc = increase
- dec = decrease
- (…) x = repeat instructions indicated number of times
- […] = number of stitches in row/round
Pattern Process:
- Begin with the ears, create them in continuous rounds, fasten, and leave a tail for sewing.
- Similarly work on the snout, introducing back loop stitches for shaping. Post completion, embroider the nose and mouth.
- The head and body are crocheted in continuous rounds, expanding and decreasing for the appropriate shape. Once the snout is attached and safety eyes inserted, the ears can be affixed.
- The legs are split from the body, each worked individually in rounds and then filled according to your preference.
- The arms, feet, and tail follow a similar procedure, with each part sewn into the corresponding place on the body.
- The end includes a hat, scarf, and mittens. Follow the pattern for each part and attach them to the body.
Don't forget to keep stuffing the elements as per requirement in the process and weave in loose ends neatly to finish.
You can also customize these Teddy Bear Amigurumi to your desire. You Can Follow These AI-Generated images also.


Leave a Reply