

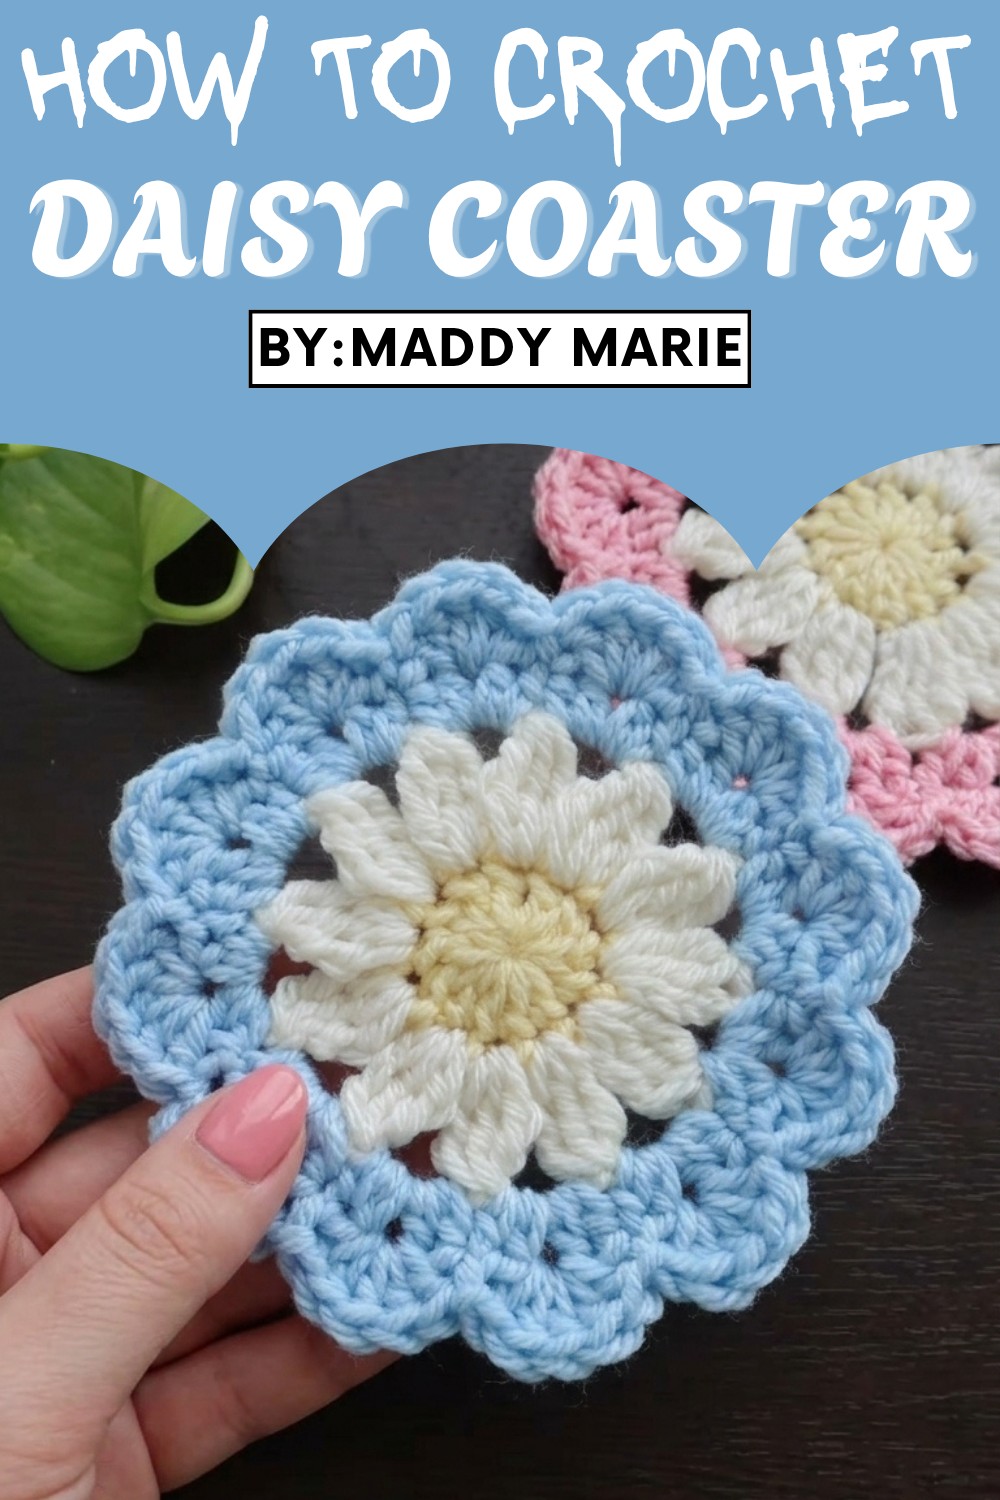
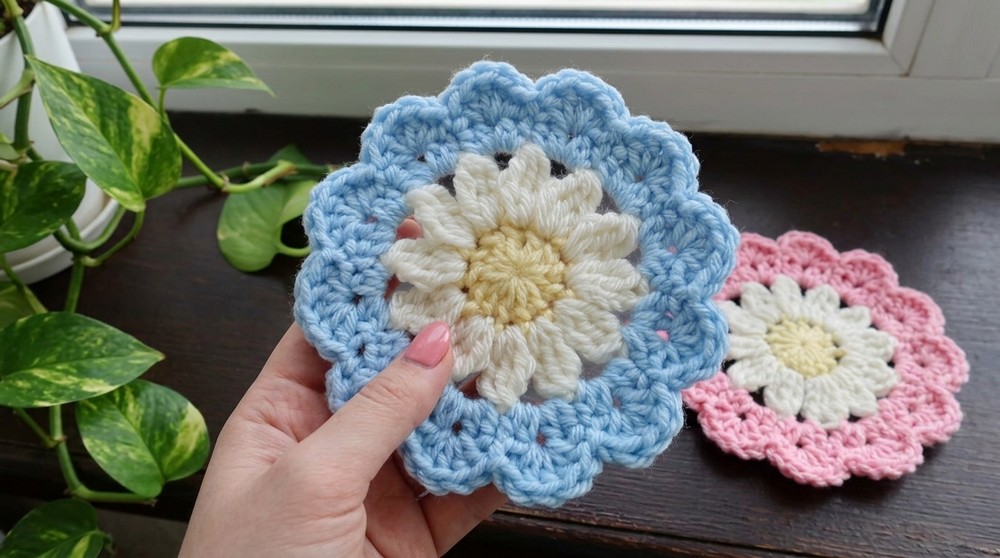
Brighten your table setting with this Free Crochet Daisy Coaster Pattern, a beginner-friendly project perfect for gifts & vibrant home décor.
Adventure into the delightful realm of handmade décor with a project that combines simplicity with charm. This delightful daisy coaster pattern offers a quick and fun way to infuse your home with a touch of nature and personalized style. Featuring a daisy design that's perfect for spring, this pattern is not just a feast for the eyes but also a practical addition to any table setting. It's just right for protecting surfaces from stains and drips, showcasing both beauty and function.
Free Crochet Daisy Coaster Pattern You’ll Love to Try at Home
Whether you’re a newbie or a seasoned crocheter, this pattern is a wonderful opportunity to practice foundational skills like the magic ring and crochet in the round. It's manageable, enjoyable, and a valuable way to utilize yarn scraps.
You could even pair it with matching daisy granny squares for a charming set. With minimal materials required, it’s a perfect stash‑buster that transforms small threads of yarn into a blooming, functional art piece for everyday use.
Special Features
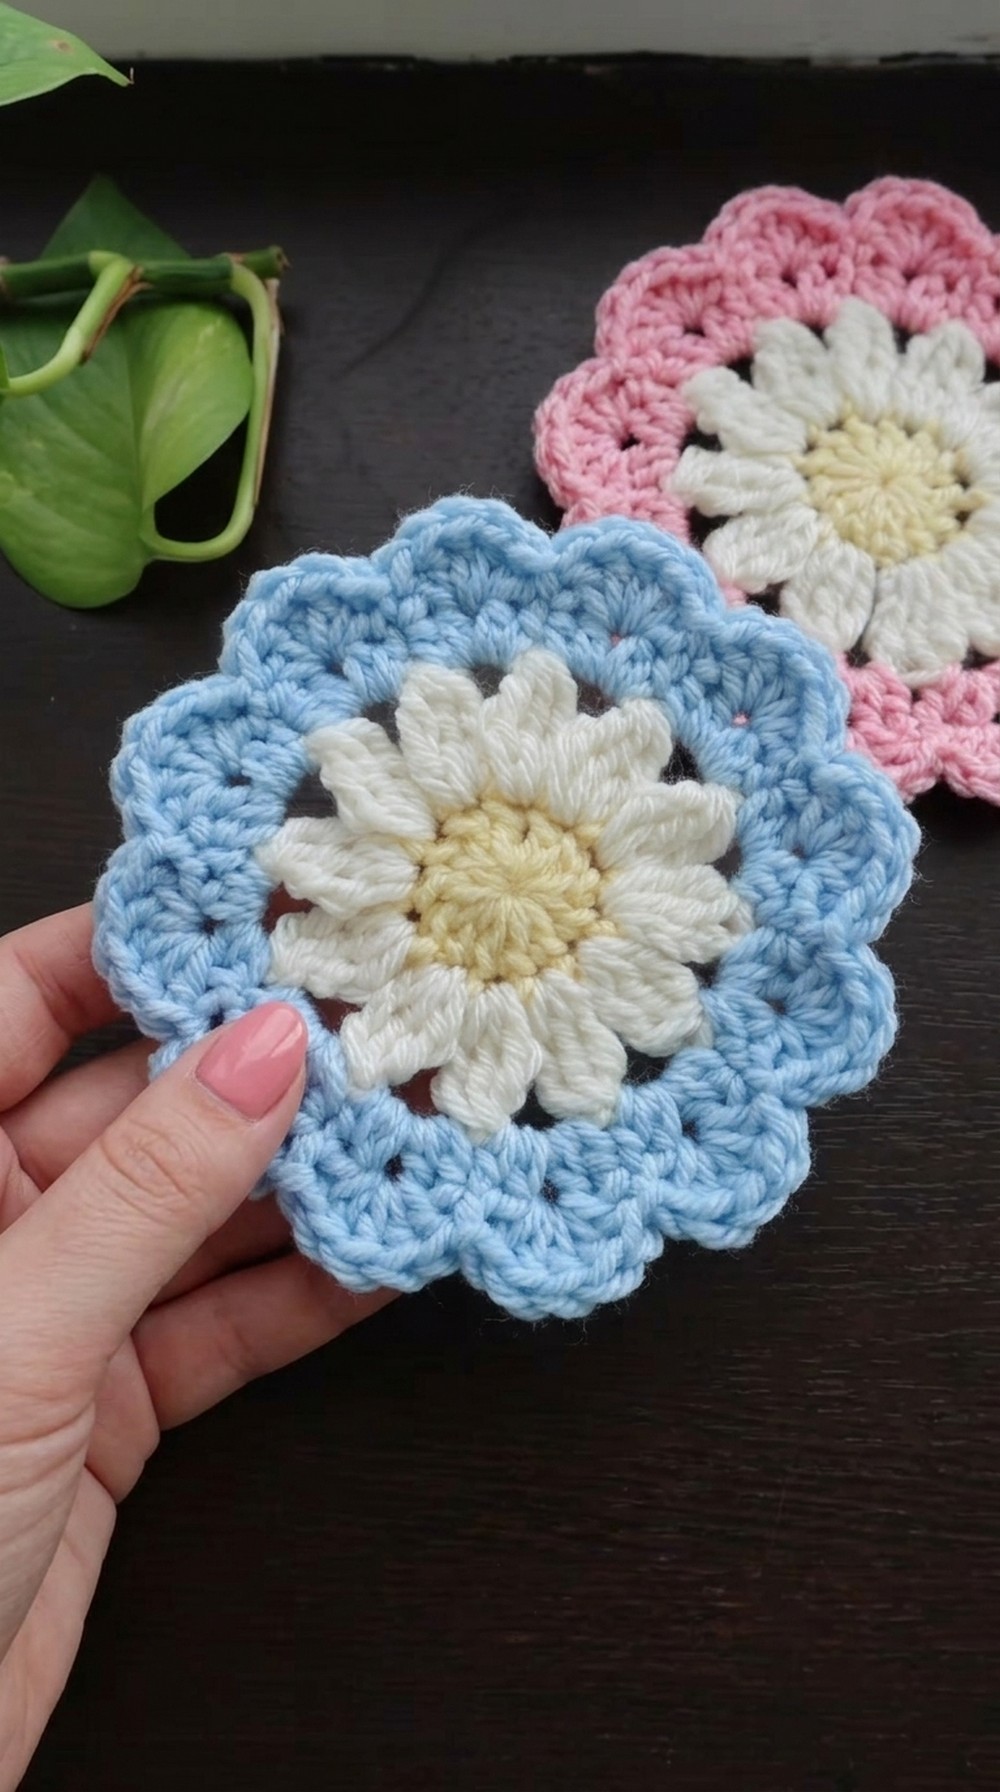
- Pretty daisy center with 12 petals
- Textured scalloped edge for a finished look
- Beginner‑friendly construction
- Works well in cotton (structured) or acrylic (softer)
- Great stash‑buster and gift idea
Difficulty Level: Beginner–friendly (comfortable with basic stitches and willing to learn the magic ring)
Materials
- Yarn: Medium weight (Category 4) yarn
- Center: Yellow
- Petals: White or cream
- Outer edge: Any color (blue in the tutorial)
- Tutor suggests:
- Acrylic (e.g., I Love This Yarn from Hobby Lobby) for soft coasters
- Cotton for more structure and better heat resistance
- Hook: 5 mm crochet hook
- Notions: Yarn needle, scissors
- Gauge: Not critical for this project
Stitches & Abbreviations (US Terms)
- MR – Magic Ring
- ch – chain
- sl st – slip stitch
- dc – double crochet
- tr – triple (treble) crochet
- tr2tog – two triple crochets together
- tr3tog – three triple crochets together
- hdc – half double crochet
Step‑by‑Step Pattern
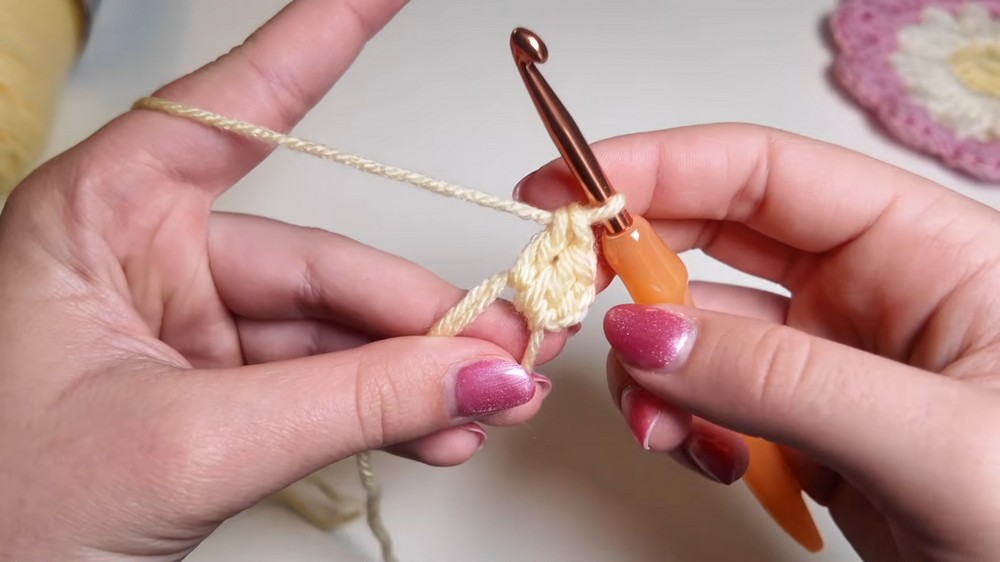
Center (Round 1 – Yellow)
- Magic Ring
- Make a magic ring (MR) with the yellow yarn.
-
Form the Round
- Ch 2 (these chains do NOT count as a stitch; they just bring the yarn up).
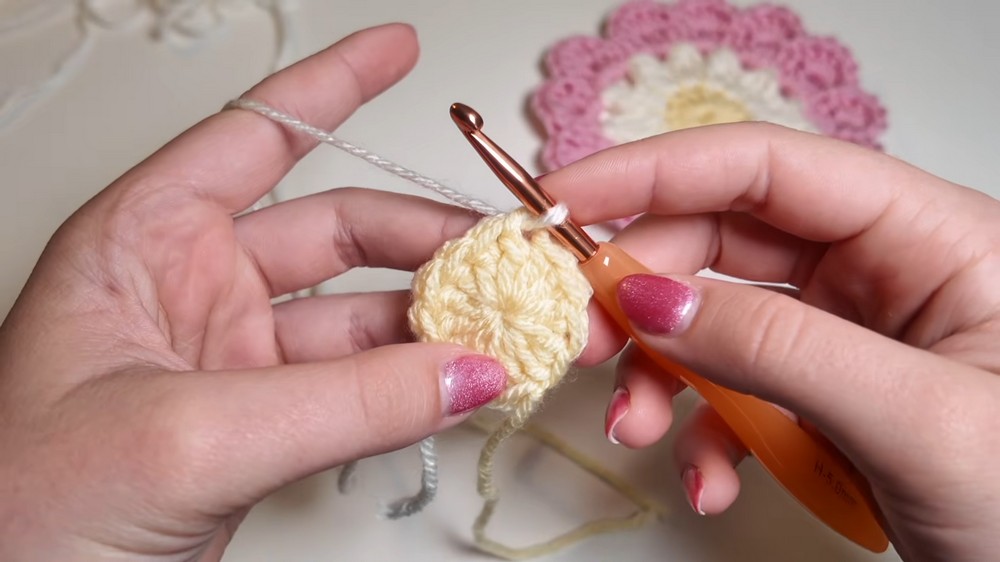
- Work 12 dc into the magic ring.
- Pull the tail of the magic ring to tighten the center fully.
- Move the tail to the back.
- Join
- Join with a sl st to the top of the first dc (not into the chains).
- Fasten off the yellow, leaving a tail for weaving in later.
You now have a small yellow circle with 12 double crochets.
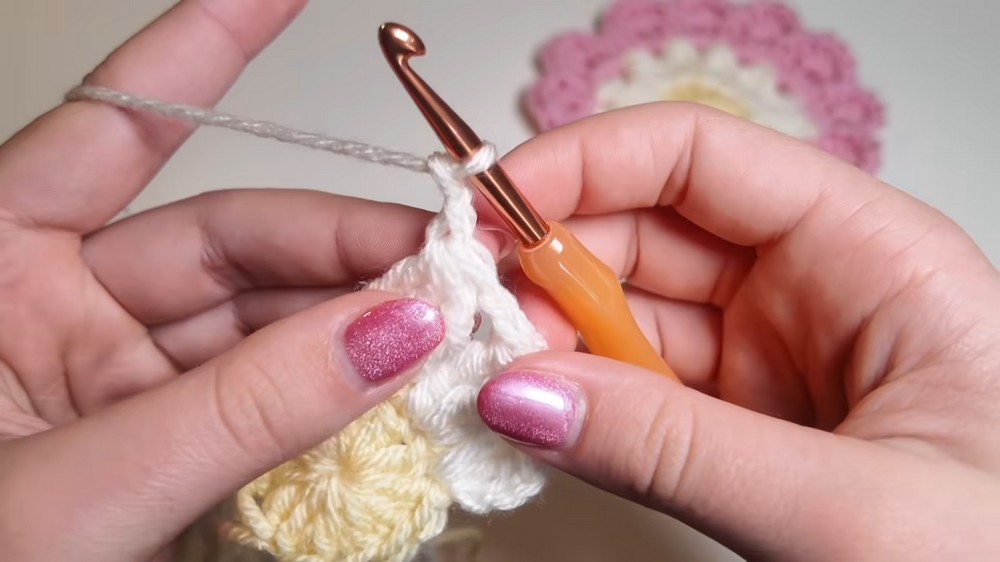
Petals (Round 2 – White/Cream)
Attach your petal color (white/cream):
-
Attach Yarn
- Insert hook into the top of any dc from Round 1.
- Place the new yarn on your hook, pull it through the stitch.
- Tie a small knot to secure the new color.
- Insert hook back into that same stitch, yarn over, and pull up a loop to start working.
-
First Petal – Modified Start
- Ch 3.
- Work tr2tog in the same stitch:
- Yarn over twice, insert into the same dc, yarn over, pull up a loop (4 loops on hook).
- Yarn over, pull through 2 loops; yarn over, pull through 2 loops (2 loops left on hook).
- Yarn over twice again, insert into the same stitch, yarn over, pull up a loop (5 loops on hook).
- Yarn over, pull through 2 loops, yarn over, pull through 2 more loops (3 loops on hook).
- Yarn over, pull through all 3 loops.
- This forms your first petal (a ch‑3 plus tr2tog).
- Between Petals
- Ch 2.
-
All Remaining Petals – tr3tog in each dc
For each next dc around (one petal per dc):- Yarn over twice, insert hook into the next dc, yarn over, pull up a loop.
- Yarn over, pull through 2 loops.
- Yarn over, pull through 2 loops. (first partial tr made; 2 loops on hook)
- Yarn over twice, insert into the same dc, yarn over, pull up a loop.
- Yarn over, pull through 2 loops, yarn over, pull through 2 loops.
- Yarn over twice, insert into the same dc again, yarn over, pull up a loop.
- Yarn over, pull through 2 loops, yarn over, pull through 2 loops.
- You now have 4 loops on your hook (from 3 partial trebles).
- Yarn over and pull through all 4 loops to complete tr3tog.
- Ch 2 and move to the next dc.
- Yarn over twice, insert hook into the next dc, yarn over, pull up a loop.
- Repeat
- Repeat [tr3tog in next dc, ch 2] around until you have 12 petals (including the first one).
- Join & Fasten Off
- After your last ch 2, join with a sl st into the top of the tr2tog of the first petal (where the three chains and the trebles meet).
- Fasten off the white/cream, leaving a tail.
You now have a complete daisy with 12 petals and chain‑2 spaces between them.
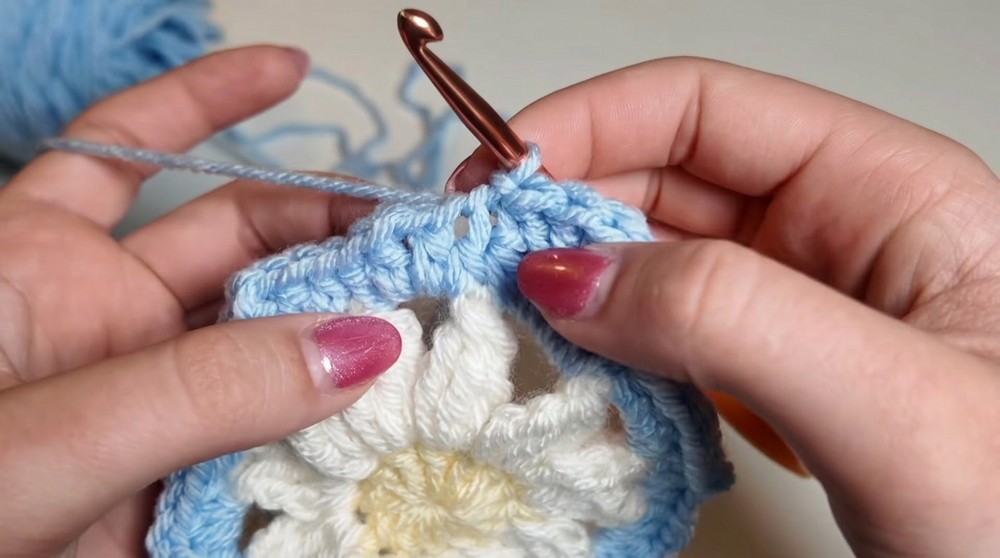
R- 3 – Blue (or Outer Color): Framing the Daisy
-
Attach Yarn
- Insert hook into any ch‑2 space between petals.
- Place blue yarn on the hook and pull it through the space.
- Pull tail through so it’s on the back and tie a small knot to secure.
- Insert hook back into the same space, yarn over, and pull up a loop.
-
Start Round 3
- Ch 1.
- In the Same ch‑2 Space
- Work 2 hdc in the ch‑2 space.
- Ch 1.
- Work 2 more hdc in the same ch‑2 space.
You now have: 2 hdc, ch 1, 2 hdc all in the same space.
- Repeat Around
For each ch‑2 space around:- Work 2 hdc, ch 1, 2 hdc into the space.
-
Join
- When you’ve completed all the way around, join with a sl st into the first hdc you made in this round.
- Do not fasten off yet—this color continues to the final round.
You now have a rounded frame around your daisy with small ch‑1 spaces between groups of hdc.
R- 4 – Blue: Scalloped Edge
This round creates the decorative loops around the coaster.
- Identify the ch‑1 Spaces
- Each group you made in Round 3 is: 2 hdc, ch 1, 2 hdc.
- You will work into the ch‑1 space between those hdc groups.
- First Scallop
- In the first ch‑1 space, work 5 dc.
-
Anchor the Scallop
- Skip the next stitch after that ch‑1 space.
- In the following stitch (2nd stitch after the ch‑1 space), make a sl st.
- This anchors the scallop and helps it curve nicely.
-
Repeat Around
For each ch‑1 space around:- Work 5 dc into the ch‑1 space.
- Skip 1 stitch.
- Make a sl st in the next stitch.
You should end up with 12 scallops/loops around the coaster.
- Final Join
- After your last scallop and anchoring sl st, join with a sl st into the first dc of the first scallop (or into the nearest clean point that keeps the edge smooth).
- Pull tight.
- Fasten Off
- Cut yarn, leaving a tail.
- Pull the tail through the last loop to secure.
Your daisy coaster is now fully crocheted.
Finishing
-
Weave in Ends
- Thread each tail onto a yarn needle.
- Tutor suggests weaving tails along the bottom of stitches, where it’s tighter and less likely to come loose.
- Weave back and forth several times in different directions.
- Trim excess yarn.
-
Shape (Optional)
- Gently flatten the coaster with your hands.
- If needed, lightly steam block or dampen and lay flat to dry to help it keep its shape.
Uses
- Everyday drink coasters for mugs, glasses, and cups
- Seasonal spring décor or color‑coordinated sets for different times of year
- Cute gift sets tied with ribbon
- Matching accents with daisy granny squares, as the tutor mentions she loves daisy square projects and likes having coasters to match
- Perfect stash‑busting project using small amounts of leftover yarn
Tutor’s Suggestions & Notes
- Coasters are one of her favorite quick projects because they work up fast and are very cute.
- It mentions that different yarn types give different feels:
- Cotton = more structure and better for coasters
- Acrylic = softer and nice to work with (her favorite, especially I Love This Yarn).
- Encourages beginners not to stress over the magic ring, as it may take several attempts.
- Notes that she has tutorials for other fun coasters (chicken, Christmas, sunflower, lily pad) and recommends coordinating colors for different seasons or tastes.
Conclusion
This daisy coaster pattern is an easy and rewarding pattern that’s great for building confidence with basic stitches while producing something genuinely useful and adorable. With a simple crochet—center, petals, framed round, and scalloped border—you can quickly work up sets in any color scheme.
Final Tip
For a neat, professional look, tighten your magic ring fully and weave in tails very securely—especially on coasters that will be handled and washed. A well‑closed center and hidden ends make your daisy coaster last longer and look much more polished.

Leave a Reply