

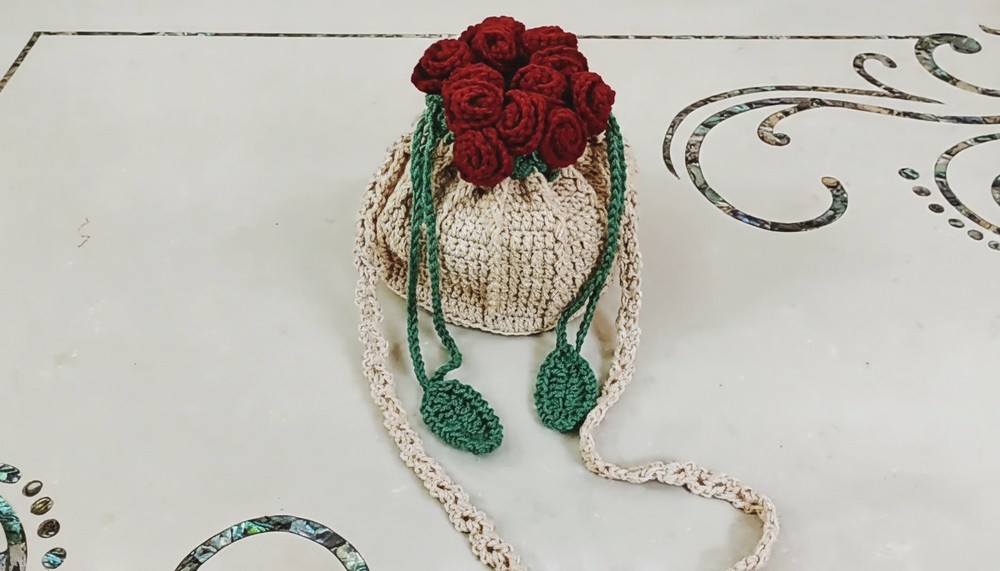
Enhance your collection with this Crochet Rose Bouquet Bag Pattern, combining intricate floral design and practicality for special occasions.
A bag that looks as beautiful as a bouquet of roses can add charm to your everyday life. Carrying something with its delicate rose details and soft style instantly makes you stand out. Perfect for a casual outing, a visit to a friend, or even a grocery run, this Crochet Rose Bouquet Bag pattern brings beauty and practicality together. The soft floral design gives it a unique and elegant look, making it more than just a bag; it’s a stunning accessory you’ll love to show off.
Chic Crochet Rose Bouquet Bag Pattern with a Gorgeous Floral Twist
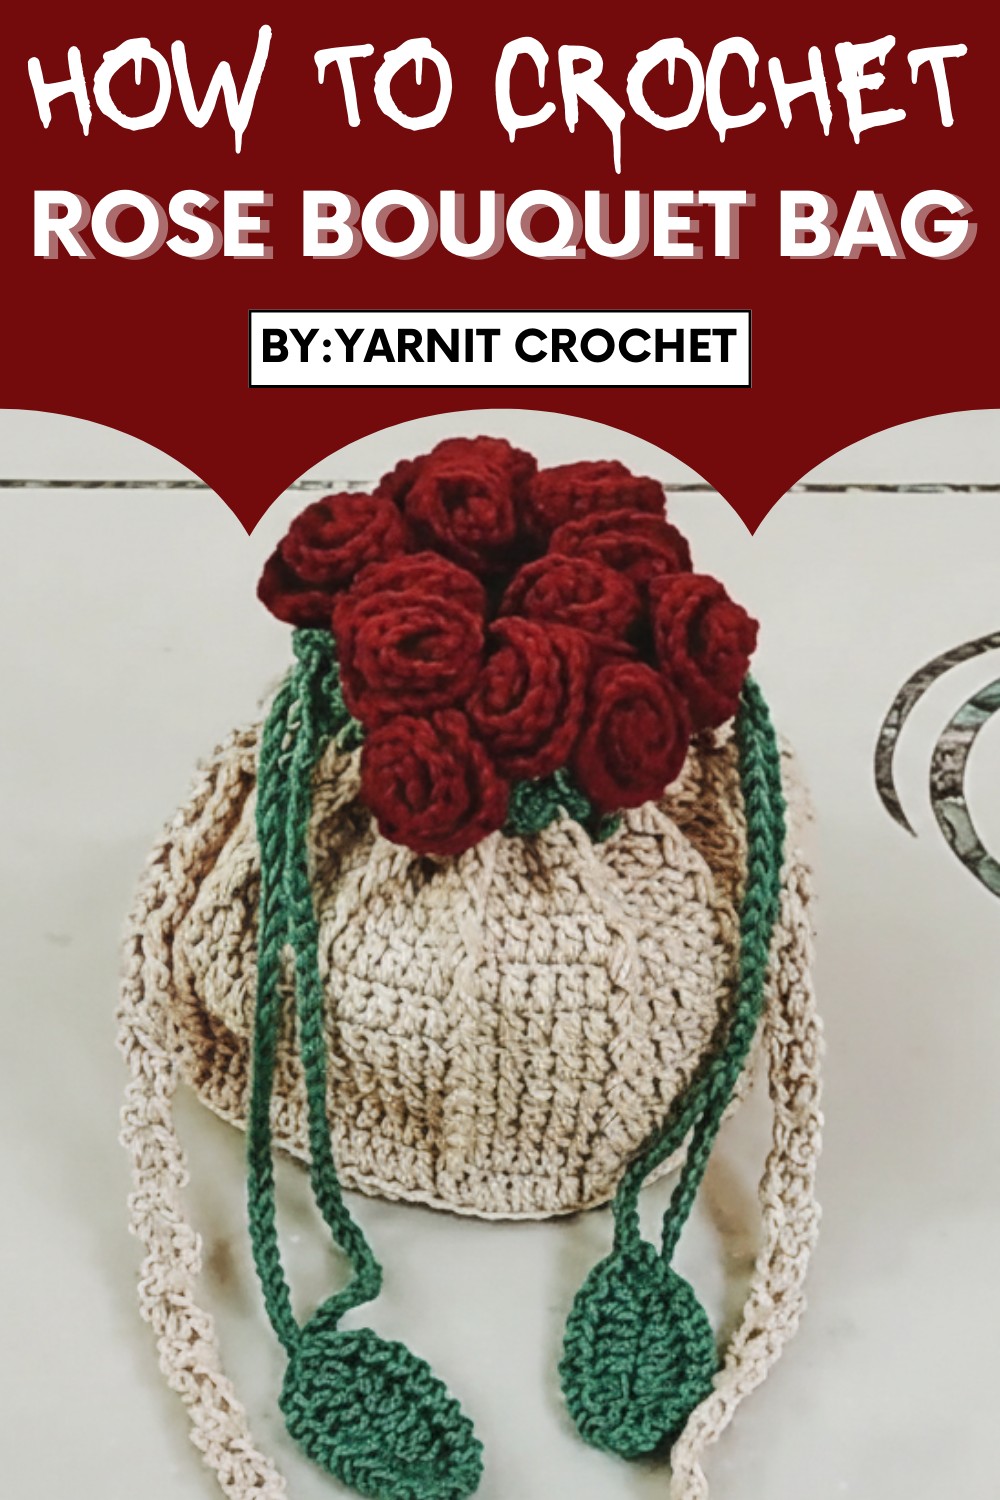
It’s lightweight, stylish, and versatile enough to use for any occasion. Whether you’re heading to the market or going for an evening stroll, this bag fits right in. With its lovely rose-inspired design, it also makes a thoughtful gift for someone special. Turn simple moments into something memorable with a bag that feels personal and reflects the creativity and charm of handmade designs.
Materials List
Yarn:
- Medium weight (size 4) yarn, in three shades:
- Beige: For the bag body (use 2 strands for extra sturdiness or a thicker yarn).
- Red: For roses.
- Green: For leaves and drawstrings.
Crochet Hook:
- 4 mm hook
Other Tools:
- Yarn Needle: For sewing and weaving in ends.
- Scissors: For cutting yarn.
Key Abbreviations
- MR: Magic Ring
- ch: Chain
- sl st: Slip Stitch
- sc: Single Crochet
- hdc: Half Double Crochet
- dc: Double Crochet
- inc: Increase (two stitches in the same stitch)
- flo: Front Loop Only
- blo: Back Loop Only
Special Notes
- Customization: The bag base size, height, and strap length are adjustable. Follow additional rounds or chains as per your needs.
- Use two strands for the bag base for sturdiness unless your yarn is thick.
- Remember to fasten off and weave in all loose ends neatly to ensure a polished final look.
- Helpful Tip: Use stitch markers to track the first stitch of each round, especially for beginners.
Step-by-Step Crochet Pattern
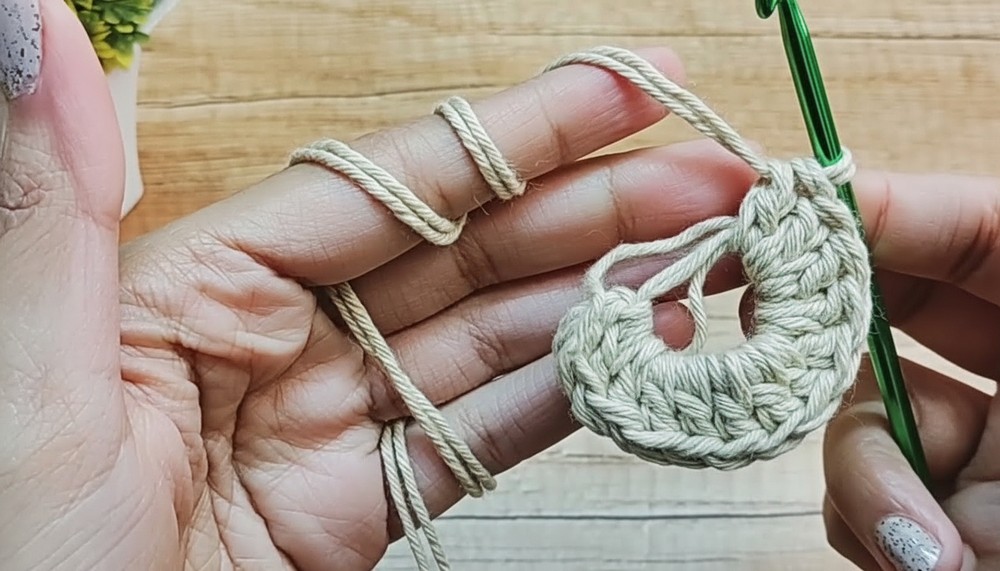
Step 1: The Bag Base (Beige Yarn)
Rounds for Base
- Round 1:
- Create a Magic Ring (MR).
- Ch 2 (does not count as a stitch). Work 12 dc into the MR. Pull tight to close the ring. (12 sts)
- Join with sl st to the first dc.
- Round 2:
- Ch 2. 2 dc in each stitch around (increase in all stitches). (24 sts)
- Join with sl st to the first dc.
- Round 3:
- Ch 2. Alternate 1 dc in first st, 2 dc in next st around. (36 sts)
- Join with sl st to the first dc.
- Round 4:
- Ch 2. Alternate 1 dc in first 2 stitches, 2 dc in next st around. (48 sts)
- Join with sl st to the first dc.
- Round 5:
- Ch 2. Alternate 1 dc in first 3 stitches, 2 dc in next st around. (60 sts)
- Join with sl st to the first dc.
- Round 6:
- Ch 2. Alternate 1 dc in first 4 stitches, 2 dc in next st around. (72 sts)
- Join with sl st to the first dc.
- Round 7:
- Ch 2. Alternate 1 dc in first 5 stitches, 2 dc in next st around. (84 sts)
- Join with sl st to the first dc.
Optional: To adjust the size of the bag base, continue increasing rounds using the same pattern: e.g., 6 dc + inc in Round 8, 7 dc + inc in Round 9, etc. The base can be customized larger or smaller as needed.
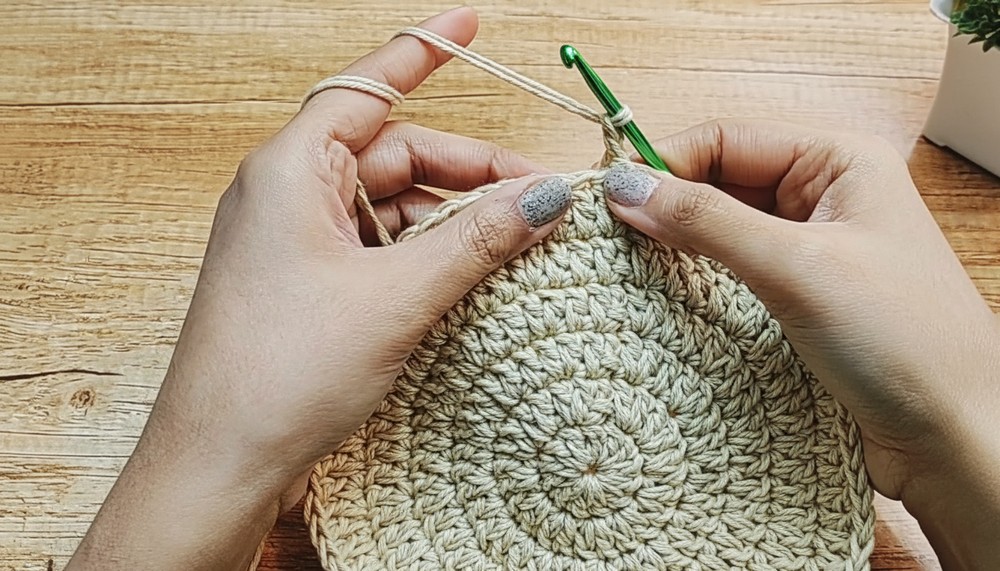
Step 2: The Bag Height
- Round 8 (Back Loops Only):
- Ch 2. Work 1 dc in blo of each stitch around. (84 sts)
- This creates a clean edge for the base of the bag. Join with sl st to the first dc.
- Round 9 (Pattern Setup):
- Ch 2. Work 5 dc in first 5 stitches, followed by 1 front post dc (fpdc) around the post from the previous round. Repeat 5 dc, 1 fpdc around. (84 sts)
- Rounds 10–19:
- Repeat Round 9 pattern (5 dc + 1 fpdc). You can adjust the number of rounds depending on how tall you want the bag to be.
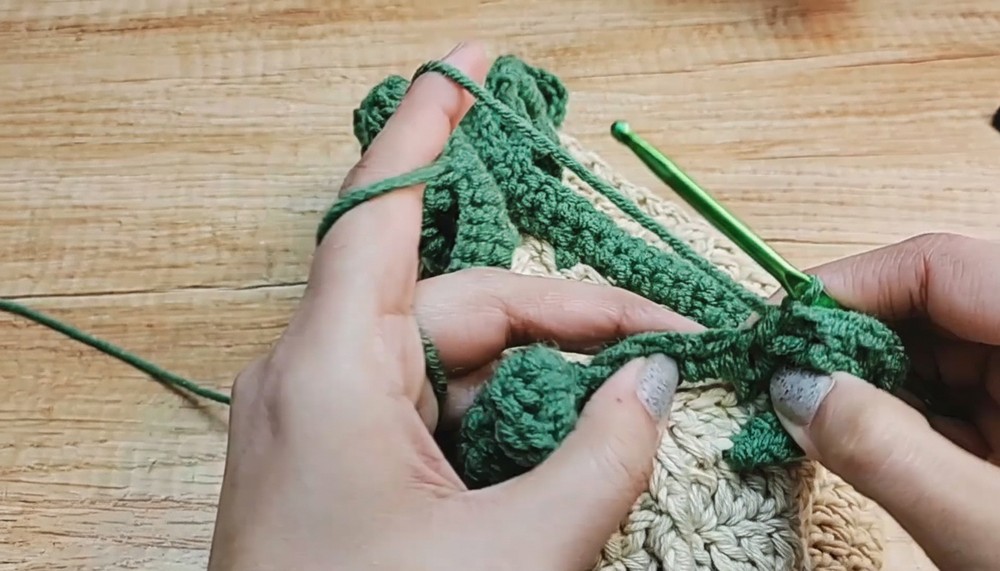
Step 3: The Leaf Border (Green Yarn)
- Attach Green Yarn:
- Fasten off beige yarn and attach green yarn with a sl st into any stitch.
- Round 1 (Chains and Spaces):
- Work in rounds to create loops for leaves:
- Sc in the first stitch, ch 2, skip 2 stitches, sc in the next stitch.
- Repeat this pattern all around.
- Join with sl st to the first sc.
- Work in rounds to create loops for leaves:
- Round 2 (Single Crochet Fills):
- Work 1 sc in the sc stitches and 2 sc in each chain-2 space all around.
- Join with sl st to the first sc.

Step 4: Roses (Red Yarn)
For each rose:
- Start:
- Ch 13. Work into the chains from the fourth chain (skipping 3 chains).
- Flat Rose Strip:
- Work 2 dc in the first chain (3 chains + dc count as 2 dc).
- In the next chain, 3 dc. Repeat 3 dc in each chain until the end.
- Create Rose Shape:
- Ch 4. Sl st into the last chain (from previous step). Spiral the strip into a rose shape and secure with sl sts by stitching through all the layers at the bottom.
- Attach Roses:
- Sew the roses between leaf sets using the ends of the red yarn.
Step 5: Drawstrings (Green Yarn)
- Slip Knot and Chain:
- Ch 90 for each drawstring.
- Finish Ends:
- Secure with sl st into the beginning chain.
- Weave Through:
- Using a yarn needle, weave the drawstrings through the loops created in Round 1 of the Leaf Border. Repeat for the second drawstring from the opposite end.
Step 6: Straps/Handles (Optional)
- I-Cord Strap:
- Ch 4. Work a dc into the 4th chain from the hook.
- Ch 3, turn, work 1 dc in the loop created. Repeat to desired length.
- Attach to the bag by sewing to opposite ends.
Conclusion
Your Crochet Rose Bouquet Drawstring Bag is complete! This stunning project is perfect for gifting or personal use and is sure to impress with its intricate details and elegant design. With customization options available at every step, you can create various sizes and styles to suit your preferences.
Pattern Corrections
- Ensure consistent tension to maintain the shape of the bag, especially during decreasing rounds or when creating decorative elements (like roses or leaves).
- If the base curls, ensure the correct number of increases in each round.
Tips
- Rose Attachment: Plan your rose placement ahead of sewing for an even and symmetrical look.
- Bag Sturdiness: Use a lining for additional durability and customization.
- Experiment: Try different colors for roses, leaves, or the base for seasonal variations!

Leave a Reply