

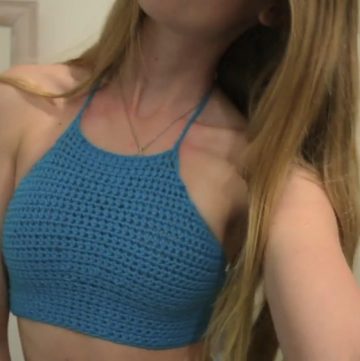
Update your summer wardrobe with a stylish and functional addition perfect for beach days, festivals, and casual outings. This crochet bikini crop top pattern offers a customizable design that ensures a perfect fit for all body types. Lightweight and airy, it's the ultimate go-to garment for warm weather, providing breathability and comfort. The pattern is beginner-friendly yet versatile enough for crocheters of all skill levels. Adjustable straps and customizable size options let you tailor the top to your specific measurements.
Step-by-Step Crochet Bikini Crop Top Pattern for Radiant Summer Looks
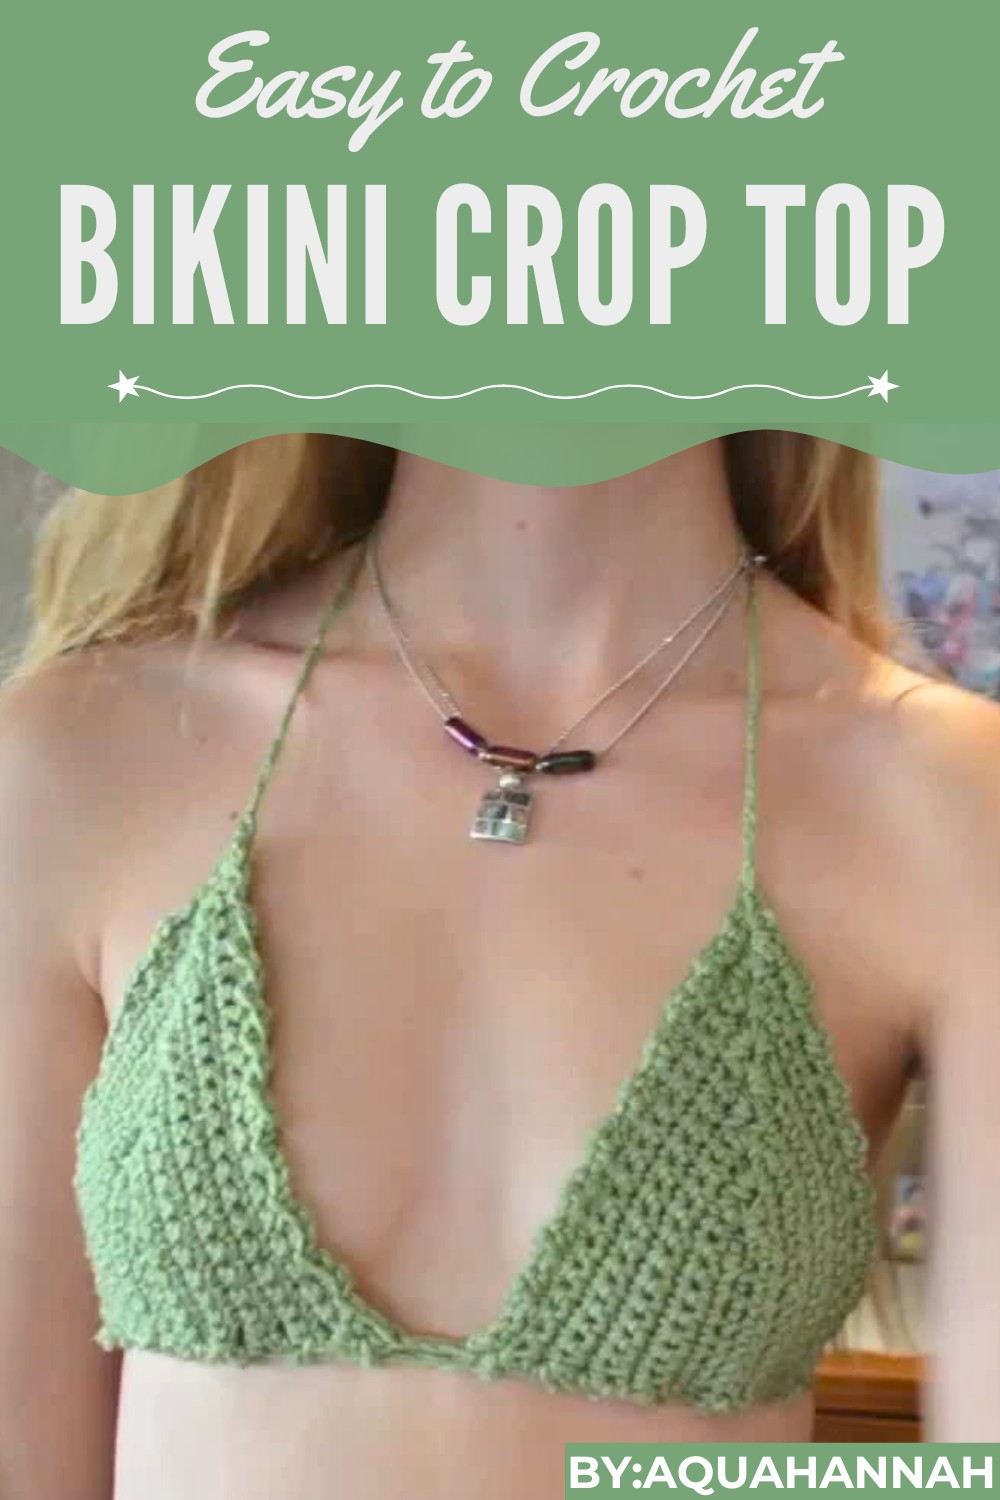
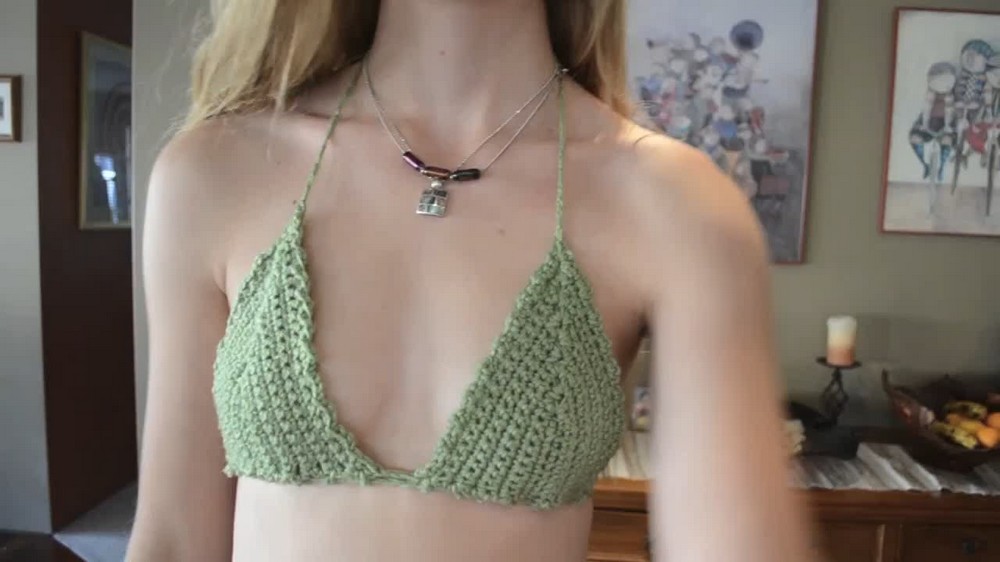
The delicate ribbing detail adds a touch of elegance, making this piece versatile enough to transition from daytime casual to evening chic. Paired with high-waisted shorts, a flowy skirt, or layered under a sheer blouse, this crochet top adds a touch of handmade charm to any outfit.
Using affordable and easy-to-find materials like lightweight yarn and a crochet hook, you can create a fashionable top without breaking the bank. Plus, the satisfaction of wearing or gifting something handmade adds immense personal value. Overall, this crochet bikini crop top pattern is a fantastic way to engage in a fulfilling pastime while enhancing your wardrobe with unique, versatile fashion.
Materials Required
- Yarn: Lightweight yarn (choose a color of your preference).
- Hook: A crochet hook suitable for the yarn size (refer, 4 mm).
- Other Tools: Scissors, tapestry needle for weaving ends.
Step-by-Step Instructions
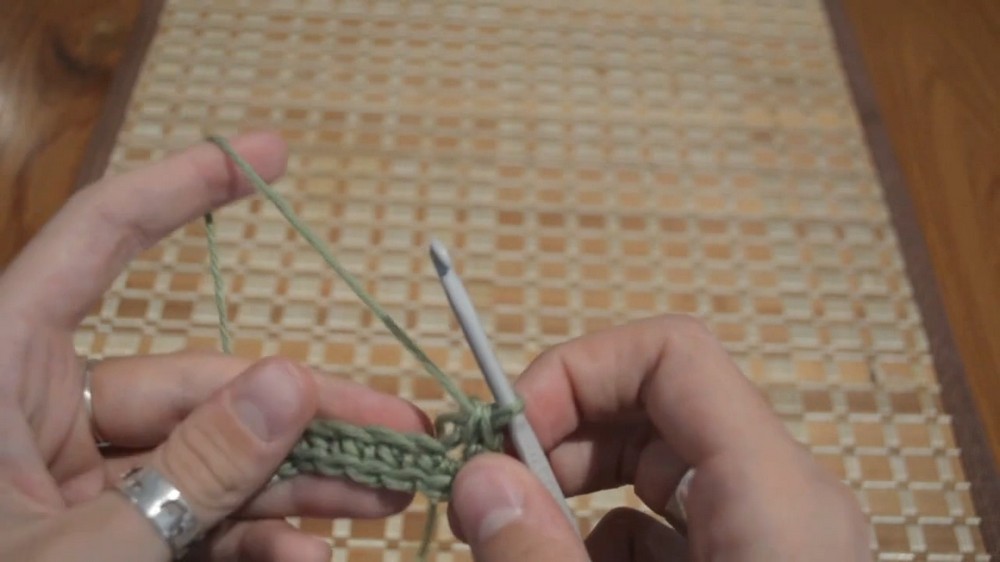
Step 1: Start the Base of the Bikini Cup
- Begin by making a slip knot and chaining 9 stitches.
- Perform 8 single crochets across, starting with the second chain from the hook.
- When you reach the last stitch, make 1 single crochet, then add 2 more single crochets in the same hole, creating a curve at the tip of the cup.
- Chain 1, and perform 2 more single crochets in the same space. This forms the rounded edge at the top of the cup.
- Work single crochets back across the other side of the chain to create the base of your cup.
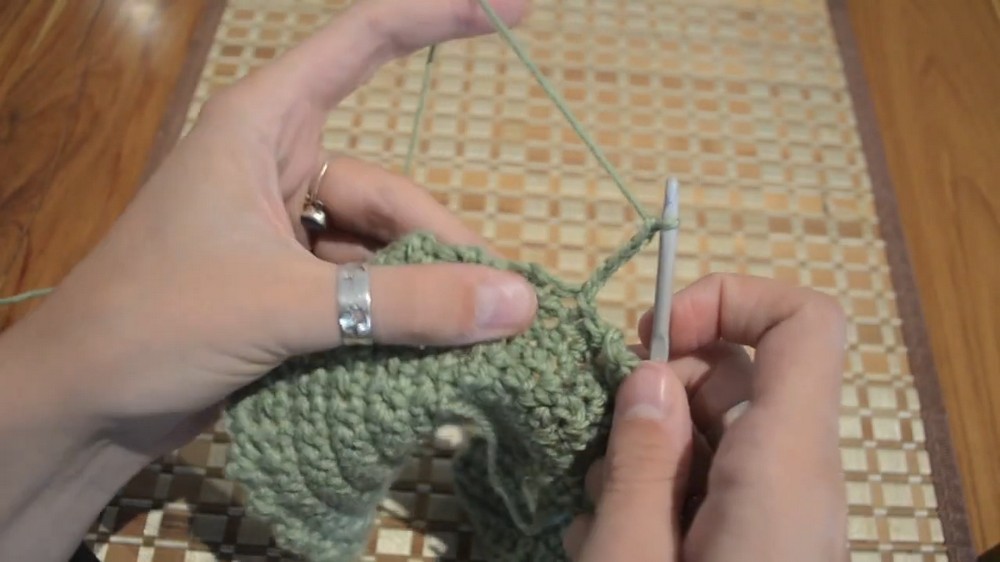
Build the Bikini Cup
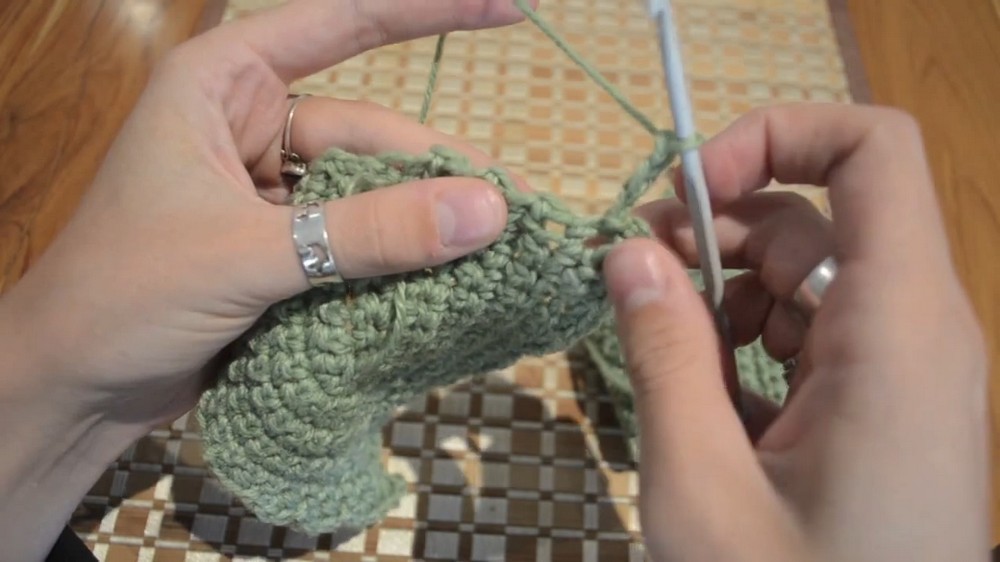
- Turn the piece around, chain 2 stitches, and single crochet along every stitch until you reach the top point of the cup.
- At the top, add 2 single crochets in the same hole as before, chain 1, and then add 2 more single crochets into the same stitch. This keeps the triangular shape of the cup.
- Repeat this process—crocheting single stitches on the sides while increasing at the top—until the bikini cup is large enough for your desired size.
Add Ribbed Detailing to the Edges
- To finish the last row around the cup, chain 2 and single crochet into the first hole.
- In the next stitch, work a slip stitch.
- In the following stitch, do 3 single crochets.
- Alternate between a slip stitch and 3 single crochets along the edge of the cup to create a ribbed, lacy effect.
- At the top of the cup, continue your regular increase pattern: 2 single crochets in the same stitch, chain 1, and 2 more single crochets in the same stitch.
- Repeat the alternating slip stitch and 3 single crochet pattern down the other side.
- Tip: This step adds decorative ribbing to the edges. You can skip this step if a smooth edge is preferred.
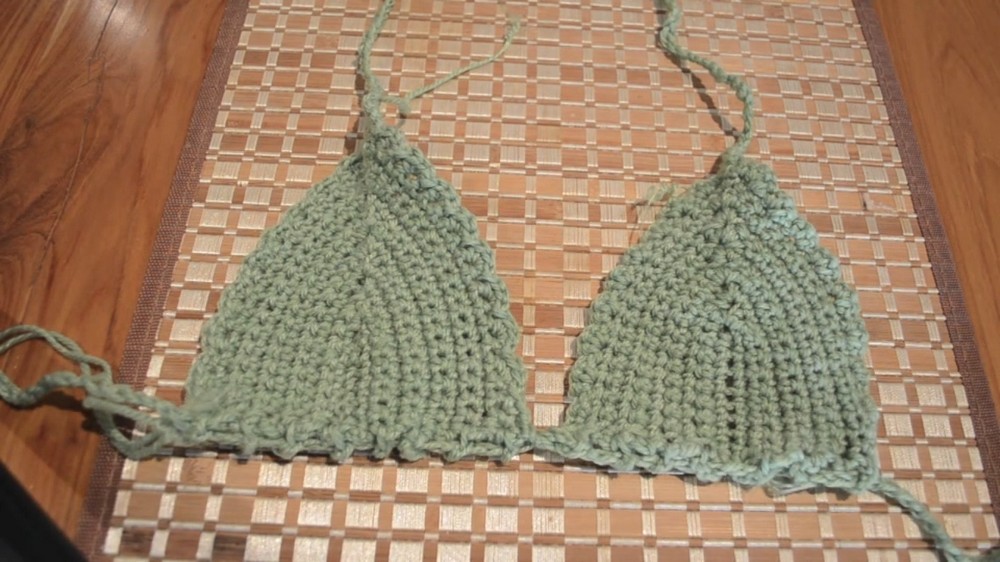
Make a Second Cup
- Create a second cup using the same process as the first cup.
- Once finished, do not fasten off the yarn from the second cup.
Join the Cups and Create the Bottom Edge
- Line up both cups side by side.
- From the second cup, chain 2 and join it to the first cup using a slip stitch or single crochet.
- Working along the bottom edge of both cups, create small spaces for the tie:
- Chain 3, slip stitch into the next stitch.
- Repeat this pattern (chain 3, slip stitch) across the entire bottom edge of both cups.
Make the Back Tie
- Once the bottom edge is complete, create a long chain that wraps around your body and ties securely into a bow.
- Ensure the chain length is enough for a snug but comfortable fit.
- Thread this chain through the spaces you created along the bottom edge of the cups.
Add the Neck Ties
- Attach yarn to the upper corner of one cup by making a slip knot.
- Chain a tie long enough to go around your neck, then fasten off the yarn.
- Repeat the process on the other upper corner to create the second neck strap.
Special Features
- Adjustable: Both the neck and back ties are fully customizable for a perfect fit.
- Decorative Ribbing: The optional lacy edge adds a unique and elegant flair to your bikini top.
- Size Versatility: The top can be made to fit any size by simply continuing the rounds on the cups until the desired coverage is reached.
Level of Difficulty
This project is classified as beginner-friendly, suitable for those who are comfortable with basic stitches (single crochet, chain, and slip stitch). The repetitive nature of the pattern makes it an excellent introduction to making wearable crochet pieces.
Tutor’s Suggestions
- Check Sizing Frequently: Try the bikini top on as you go to ensure it fits comfortably.
- Neat Edges Matter: Keep tension consistent, especially around the ribbing, to avoid an uneven look.
- Use a Soft Yarn: For comfort, particularly since the top will be in direct contact with your skin.
Crochet Tip
When threading the back tie through the bottom spaces, ensure the chain is evenly pulled through for a balanced and polished finish. This step not only affects the look but also how evenly the top adjusts to your body.
Conclusion
The crochet bikini top is a rewarding project that combines simplicity with beauty. Its adjustable fit, stylish details, and versatile use make it a wardrobe essential for summer. Whether you’re lounging by the pool or heading to a festival, this top ensures you’ll look chic and comfortable. With its step-by-step pattern, you can enjoy a stress-free crochet experience while crocheting something fashionable and unique.
Leave a Reply