

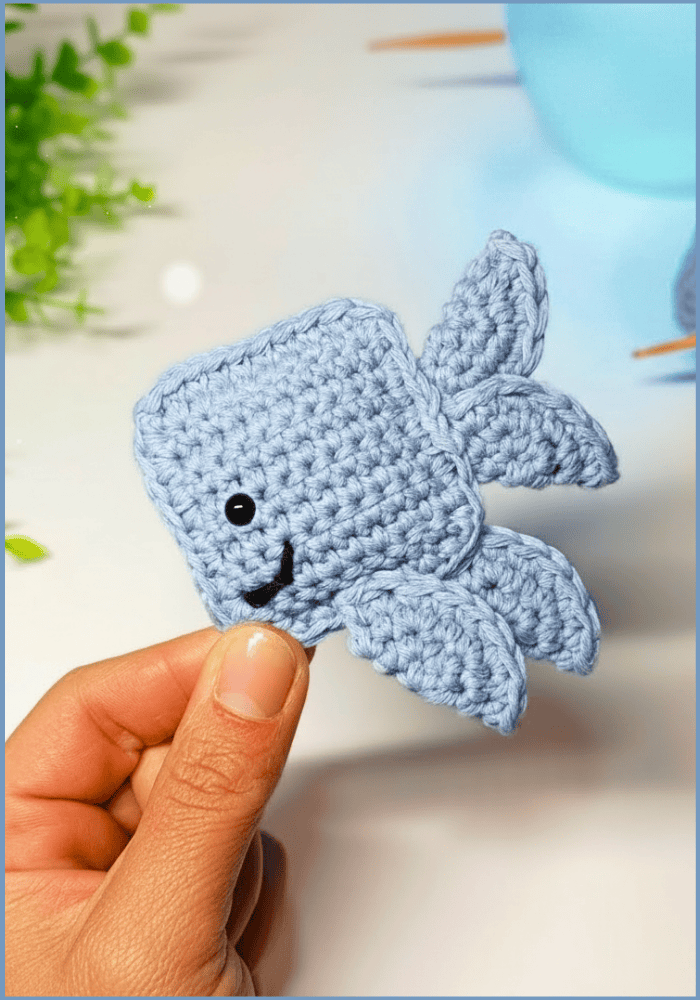
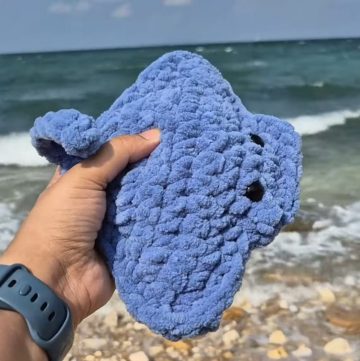
Carry a cute crochet Pocket Whale with this free pattern, perfect for adding a playful handmade touch to gifts, décor, or daily fun.
There’s something special about making something with your own hands, especially when it’s as adorable as a tiny whale. This fun and simple-to-follow project lets you design a palm-sized whale that’s perfect for brightening someone’s day. The Crochet Pocket Whale Pattern, shared through a detailed tutorial, features eco-friendly materials and straightforward techniques accessible to beginners and experts alike.
Create Your Own Crochet Pocket Whale in No Time
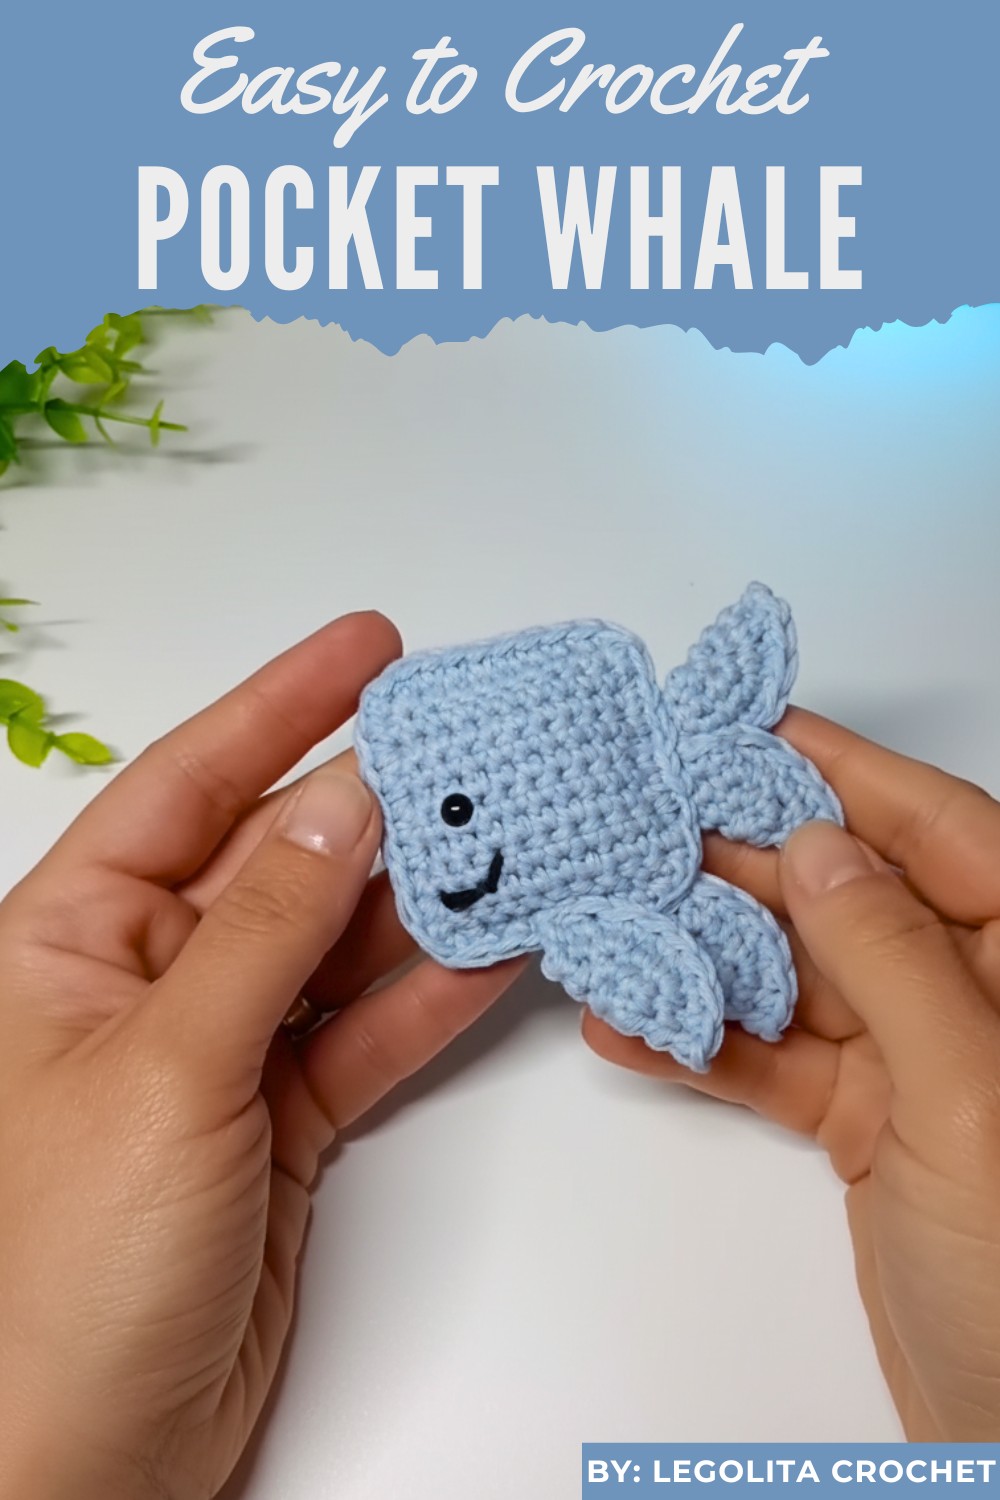
Whether it’s for a gift, a decorative piece, or even a playful keychain, this pattern blends practicality and charm. The process starts by forming two identical panels for the whale’s body, followed by attaching safety eyes and adding an optional smile for extra personality.
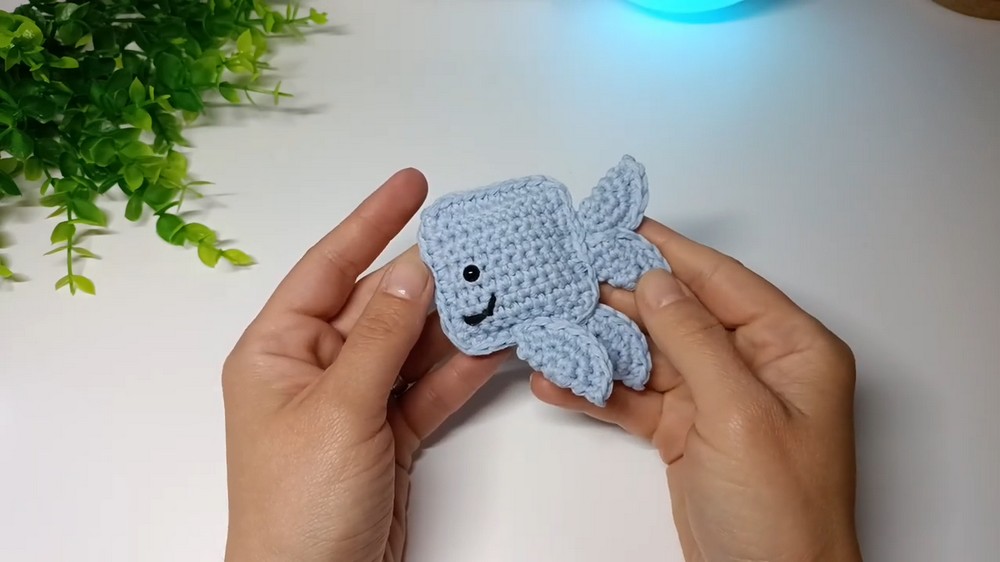
Fins and a tail are shaped from folded circular pieces and sewn securely onto the body. Compact, customizable, and easy to learn, this pattern offers a wonderful way to relax, hone new skills, and create an item that’s unique and heartfelt.
Step-by-Step Instructions
1. Materials Used
- Recycled cotton yarn (Vintage Cotton Brand)
- 3.5 mm crochet hook
- Safety eyes
- Black yarn (for the smile)
- Stuffing material
- Yarn needle
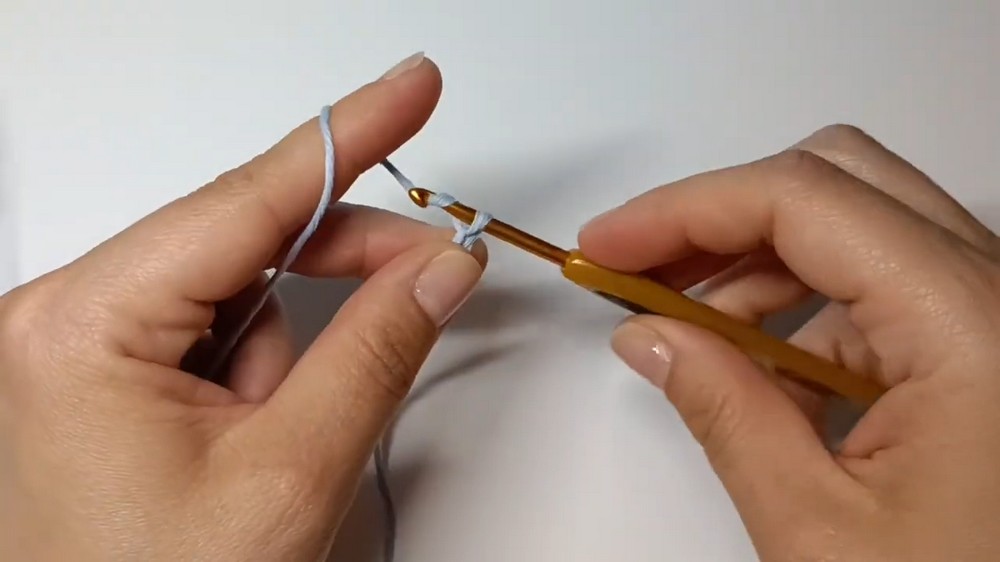
2. Creating the Whale’s Body
- Start with the Base Panels:
- Chain 10 stitches.
- Single crochet into each stitch starting from the second chain.
- Perform single crochet for 10 rows to create one panel.
- Repeat to create a second, identical panel.
- For the second panel, don’t fasten the yarn; leave it to crochet the edges together later.
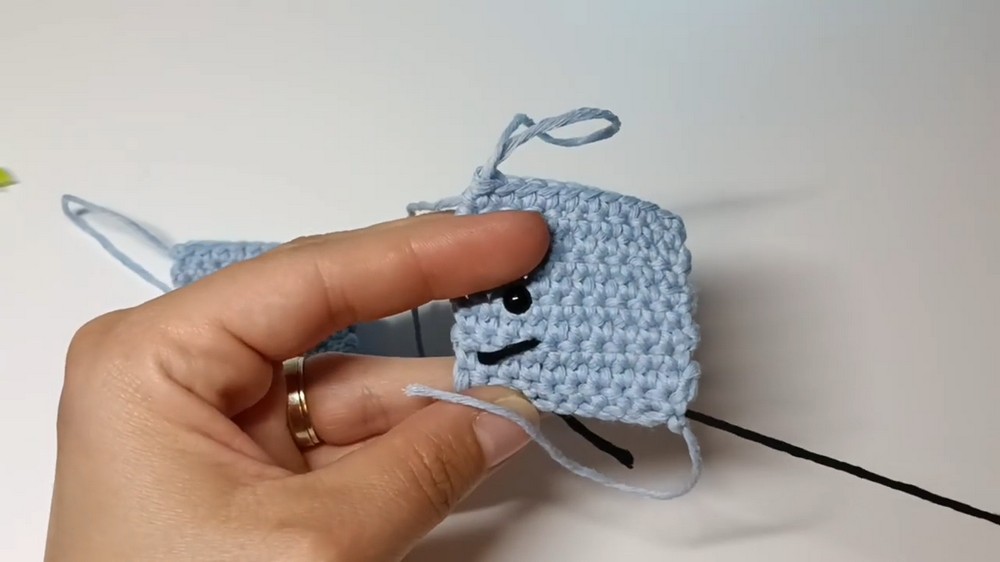
- Insert Safety Eyes:
- Count six rows from the top of one panel. Place the safety eyes between the 5th and 6th rows, spacing them three stitches apart on either side.
- Add a Smile (Optional):
- Using black yarn, position the smile two rows beneath the eyes.
- Count four stitches across, inserting the yarn needle at the edges and curving it downward slightly for a simple smile. Weave in the ends to secure.
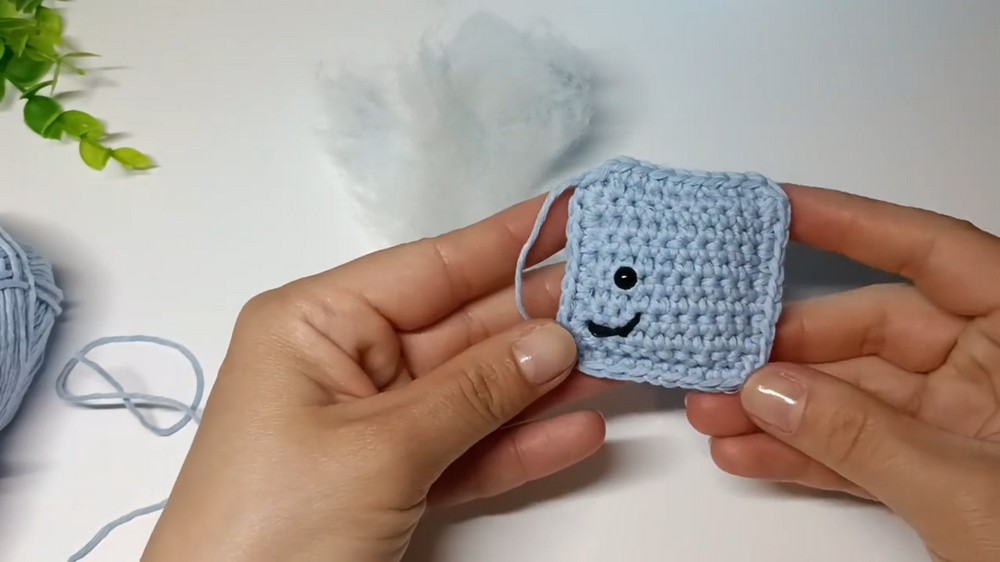
- Join the Panels and Add Stuffing:
- Use single crochet to close three edges of the panels.
- Add stuffing material before closing the final side.
- Fasten with two slip stitches, weave in the yarn end, and trim excess.
3. Making the Fins and Tail
- Create Circular Pieces for Fins:
- Chain 2 and single crochet six times into the first chain.
- Pull the yarn tail to tighten the circle.
- In the next round:
- Add 2 single crochets in each stitch to reach 12 stitches.
- In the following round:
- Alternate between 1 single crochet and an increase (2 single crochets in the same stitch). End with 18 stitches.
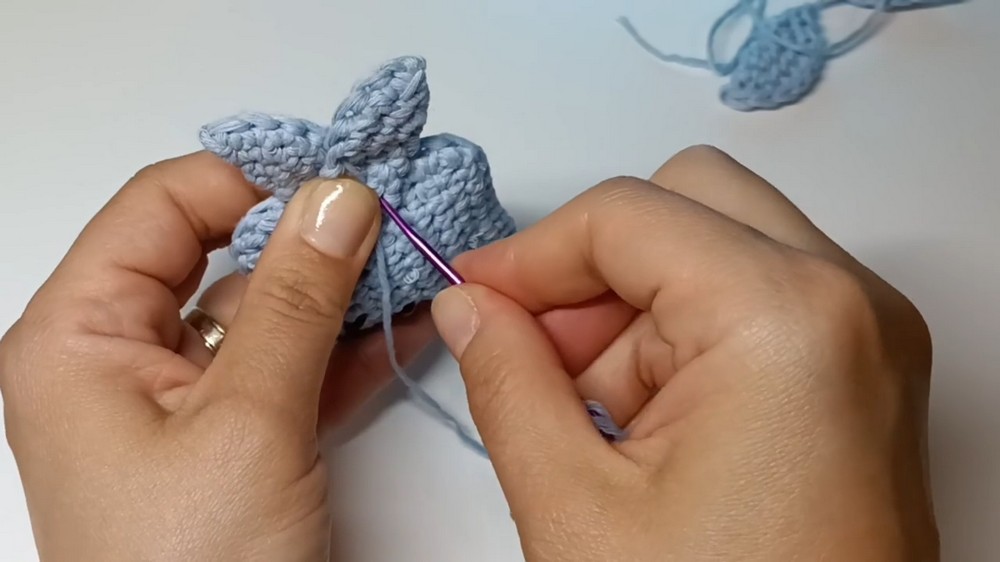
- Shape the Fins:
- Fold the circular piece, then crochet single stitches into the visible portions to create fin shapes.
- Fasten the yarn and leave excess length for sewing.
- Assemble the Tail:
- Create two circular pieces (as described above).
- Position them side-by-side and sew them together along one edge.
- Attach the tail shape securely to the back of the whale’s body.
- Sew the Fins:
- Attach the fins on opposite sides of the body.
- Position one closer to the mouth and the other slightly farther back for a balanced appearance.
Special Features
- Eco-Friendly Materials: The use of recycled cotton yarn makes this project environmentally friendly.
- Personalization Options: You can customize the whale with different colors or facial expressions (adding or omitting the smile).
- Compact Size: The design is ideal for small gifts, keychains, or whimsical toys for children.
Level of Difficulty
This project is suitable for beginners with basic knowledge of crochet techniques, such as single crochet, chaining, and working in rounds. The instructor breaks down each step into manageable portions, making it accessible for those new to crochet.
Tutor's Suggestions
The tutor encourages creativity by offering the option to modify facial features or leave them off entirely. She also highlights the versatility of the base pattern, which can be used for multiple toy designs by following the same steps for creating the body.
Uses
-
- Make a cute gift for friends or children.
- Use it as a decorative desk toy, keychain, or plushie.
- Excellent practice project for honing foundational crochet skills.
Tip to Enhance Your Work
Experiment with different yarn textures and colors to give your whale a unique personality. If you’re aiming for durability or using it as a keychain, consider using synthetic yarn that holds shape better over time.
Conclusion
This crochet whale tutorial provides a straightforward approach to creating an adorable and eco-friendly toy. Perfect for beginners, this project allows you to practice essential skills while creating something fun and functional.


Leave a Reply