

Enjoy this free crochet hanging plant pattern to bring elegant, eco-friendly greenery into your space with a touch of handmade charm and simplicity.
Handmade home decor pieces have an undeniable charm, bringing warmth and individuality to any space. A crochet hanging plant pattern embodies this beauty, offering the perfect combination of creativity and functionality.
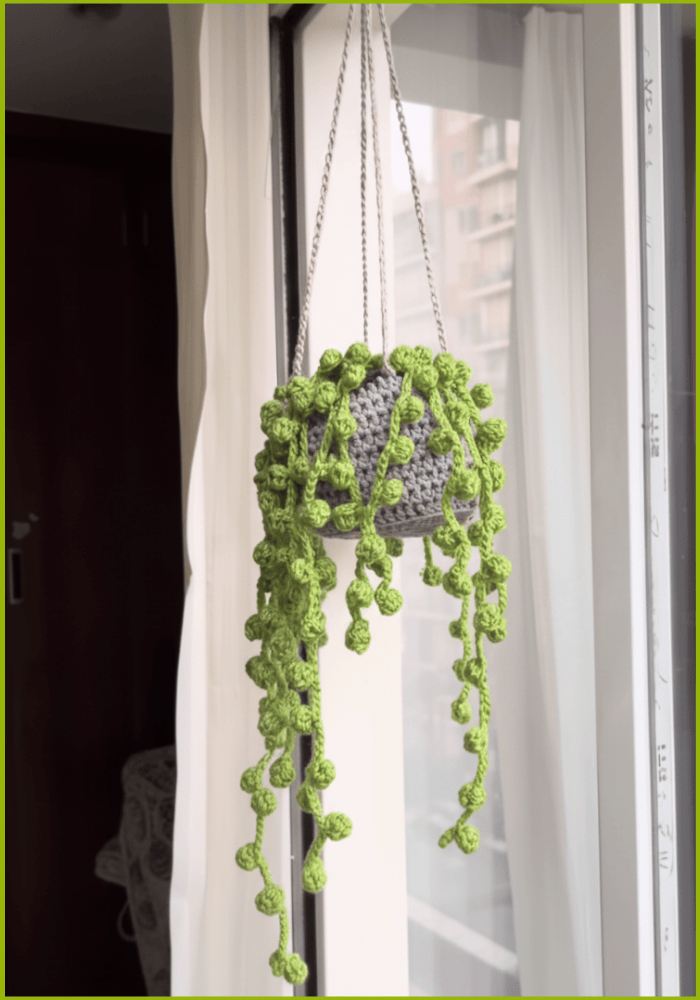
Elegant Crochet Hanging Plant Pattern For Modern Decor

Whether hung by a window or styled on a gallery wall, these handmade touches bring vibrancy to any setting. They’re thoughtful projects for beginners and experienced crocheters alike, and with their practical yet artistic appeal, they’re perfect for gifting, displaying, or even selling.
Designed to replicate the natural elegance of dangling greenery, these crafted plants are unique accents that enhance any corner of a room. From intricate leaf designs to cozy crocheted pots, they effortlessly add texture, color, and life to modern or minimalist interiors.

These patterns make it easy to create lifelike greenery without the maintenance of real plants. Using techniques such as puff stitches and single crochets, crafters can design loops of vibrant yarn leaves, soil disks, and sturdy pots.
The versatility of a crochet hanging plant pattern allows makers to customize every aspect, from the size and color of the leaves to the type of yarn for the pot. These eco-conscious creations also often incorporate recycled fillers, making them sustainable and purposeful decor ideas.
Crochet hanging plant
Special Features
- Realistic Appearance: The puff stitch leaves and crocheted soil give the plant pot a natural, detailed look.
- Customizable Design: You can vary the sizes of the leaves and the pot to suit your preference or space needs.
- Eco-Friendly Concept: The project incorporates fillers made of reused materials like old pillows, promoting sustainability.
- Optional Hanging Feature: You can turn the plant pot into a hanging piece by adding a crocheted hanger.
Level of Difficulty
This project is beginner to intermediate level, as it requires basic crochet techniques like slip knots, chains, puff stitches, and single crochets. While beginners can follow the detailed steps, those already familiar with crochet will likely move through the tutorial more quickly.
Step-by-Step Details
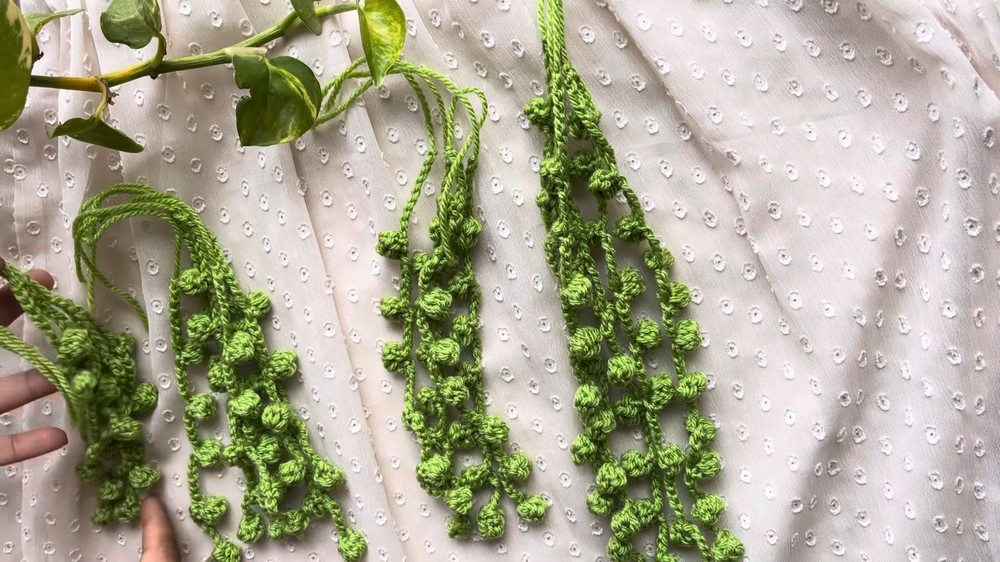
1. Crochet the Leaves
- Choose a green yarn for the leaves. Tie a slip knot, leaving enough yarn to tie off later.
- Make chains (recommended 8 chains), which determine the distance from the pot to the start of the leaves.
- To create puff stitches:
- Yarn over, insert your hook, pull through two loops. Repeat until five loops are on your hook.
- Pull through all five loops to finish the puff stitch.
- Chain five before making the next puff stitch for gaps between leaves.
- Continue alternating puff stitches and chains to create longer strands. Make several strands of varying lengths (some short with 4 puff stitches; others long with up to 10 puffs).
- Secure and hide the yarn once finished.

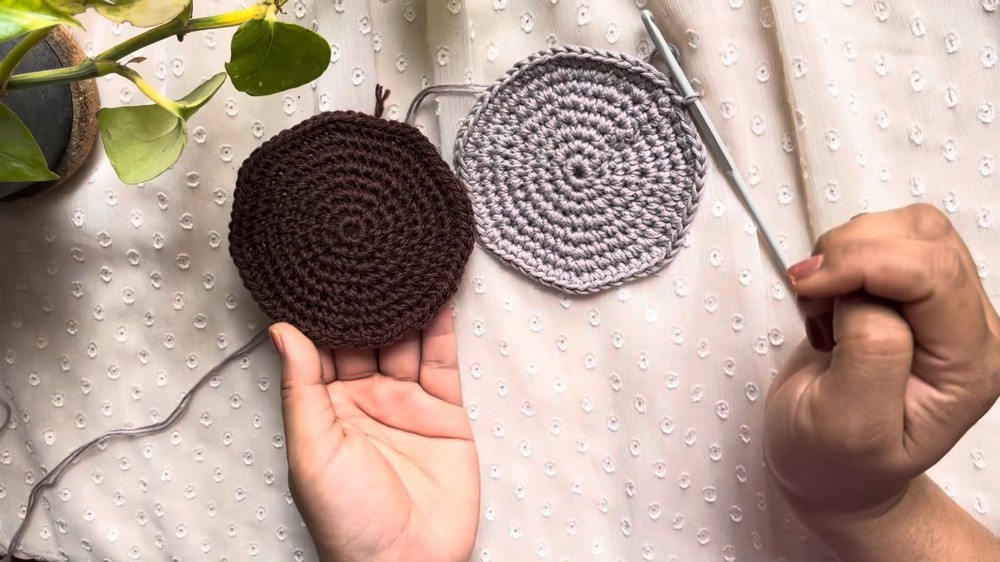
2. Crochet the Pot
- Use yarn in a different color for the pot (e.g., brown or terracotta). If the yarn is thin, double it up for a thicker texture.
- Start with a magic ring, make 8 chains around the ring, and close with a slip stitch to create the first circle row.
- Build the pot by increasing stitches row by row:
- Second row: Add two single crochets on each chain (16 chains total).
- Third row: Alternate between two single crochets and one single crochet.
- Subsequent rows: Follow patterns such as 1-2-1 (increase on every third stitch).
- Continue for eight rows, following increases to determine the pot's width.
- For height, use single crochet across each stitch without increases until you reach the desired length. Close each row with a slip stitch.
3. Crochet the Soil
- Use a darker brown yarn for the soil. Create a circle identical to the pot’s base using single crochet stitches.
- Do not increase stitches; continue single crochet rounds until it resembles a flat disk.
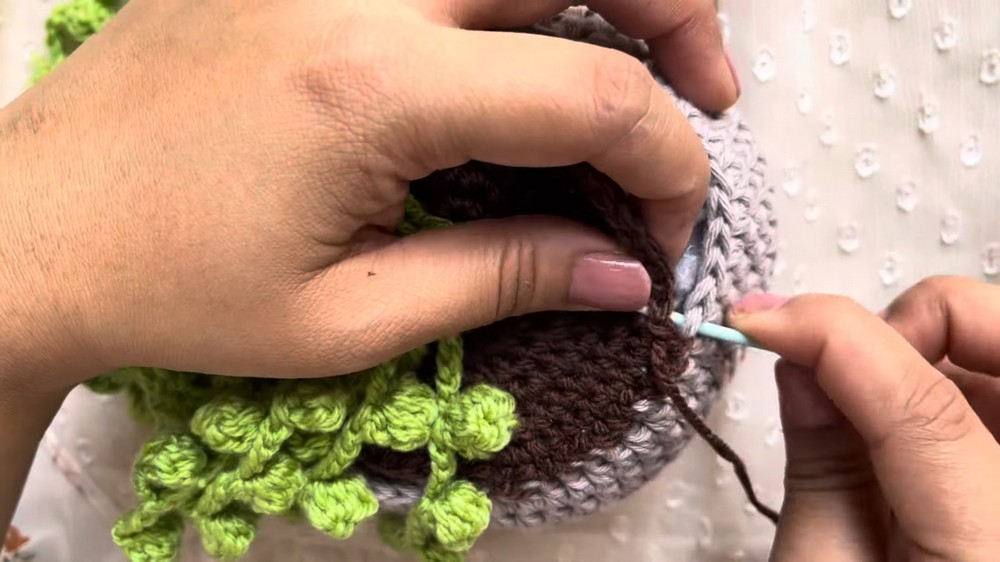
4. Assemble the Plant Pot
- Fill the crocheted pot with stuffing (e.g., reused filler material like old pillow stuffing) to create firmness.
- Position the soil disk inside the pot and secure it with single stitches along the edges.
- Take the crocheted leaves and pass the strands through the center of the soil disk randomly.
- Divide the leaves into groups (2-3 sections) and tie knots at the base to secure them. Sew the knots firmly from underneath the soil.
5. Optional: Add a Hanger
- To crochet a hanger, use the same color yarn as the pot.
- Create 4 long chains (20-25 chains each) and attach them to the pot's rim evenly.
- Tie all 4 strands together at the top with a knot to complete the hanger.
Tutor’s Suggestions
- Experiment with variations in leaf length and puff stitch count for unique designs.
- The pot's thickness can be adjusted by doubling up thinner yarn strands.
- For additional guidance, check the video description and use the links to clarify crochet abbreviations.
Uses and Materials
Uses:
- Perfect as home decor for adding greenery without maintenance.
- Great gifting option for plant enthusiasts or crochet lovers.
- A unique handmade piece for office desks, shelves, or as a charming wall hanging.
Materials:
- Green yarn for leaves (choose different shades for added realism).
- Brown yarn for the soil and pot.
- Crochet hook (appropriate for the chosen yarn thickness).
- Stuffing material (old pillows or any filling substance).
- Needle for sewing.
Tip
To enhance the visual appeal, mix yarn colors for leaves (e.g., different shades of green) and experiment with adding beads or embroidery to the pot for decorative flair.
Conclusion
This crochet hanging plant pot not only brings creativity and craftsmanship into your space but serves as a lasting, hassle-free alternative to real plants. From crocheting puff stitch leaves to constructing the beautifully detailed pot, this project is truly satisfying.


Leave a Reply