

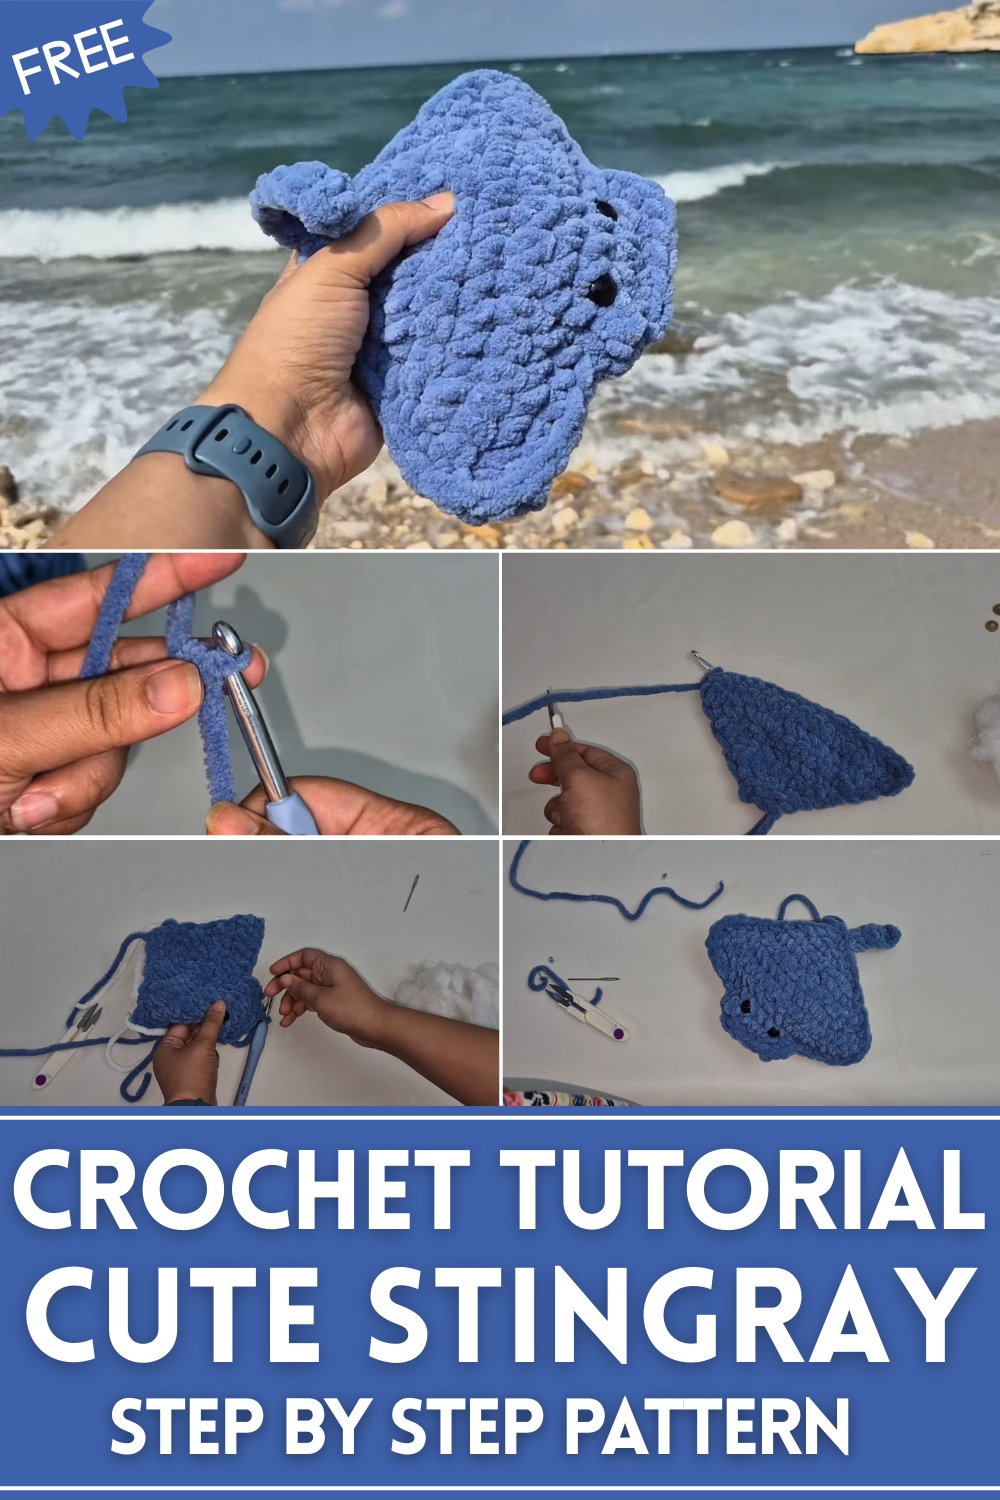
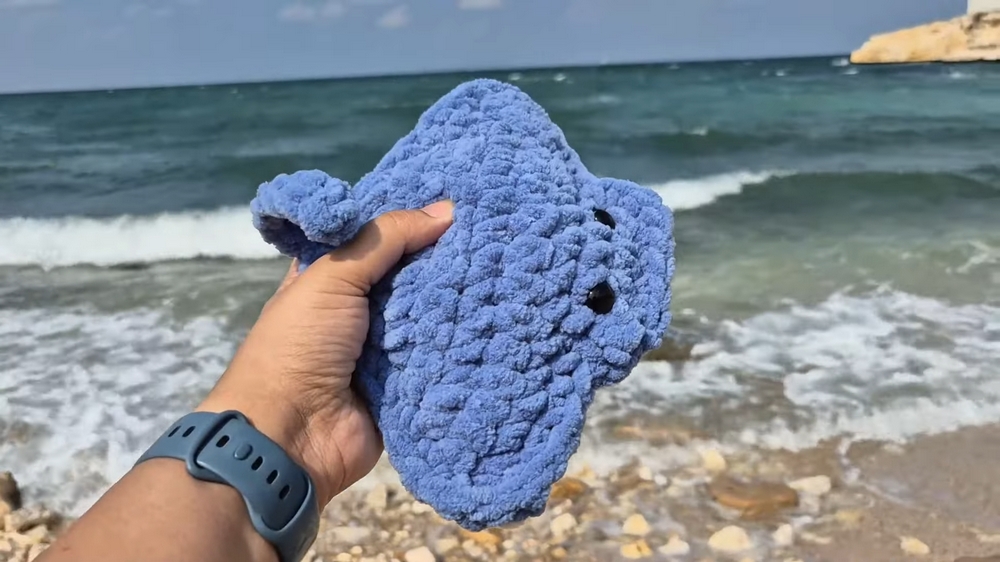
Bring the ocean home with the Free Crochet Stingray Pattern, a soft, handmade marine creature perfect for décor, toys, or thoughtful gifts.
Oceans have fascinated humans for centuries, not only for their vastness but also for the remarkable creatures that glide beneath the waves. The Free Crochet Stingray pattern brings one of these graceful sea animals into a charming, handcrafted form, capturing the sleek shape and gentle curves that make stingrays so captivating. Its soft texture and fluid silhouette make it a delightful decorative piece, perfect for shelves, desks, or marine-themed displays, while also doubling as a playful toy for children who enjoy imaginative underwater adventures.
Easy Crochet Stingray Pattern for Quick Handmade Fun
Durable yet lightweight yarn ensures that each stingray retains its shape while remaining safe for handling, allowing it to be used in classrooms, playrooms, or as a thoughtful handmade gift for marine enthusiasts. Crafters can experiment with different yarn colors to mimic real-life varieties or create whimsical versions that add personality and charm to collections.
Beyond its decorative appeal, the Free Crochet Stingray pattern provides a fulfilling crafting experience, offering both beginners and experienced makers a manageable project that hones focus and patience. Combining creativity, functionality, and the wonder of ocean life, this stingray brings a touch of underwater magic to any space, sparking curiosity and delight for both makers and recipients alike.
Special Features
- No-Sew Design: Minimal sewing is required, and yarn ends can even be tucked in using a crochet hook.
- Fast to Complete: The stingray works up very quickly, making it practical for crochet markets or last-minute gift making.
- Beginner-Friendly: Simple patterns (single crochet, increases, slip stitches) make this project accessible to novices.
- Customizable Colors: Use any color combinations for the top and belly to create a unique design.
- Soft and Squishy: Using super bulky yarn ensures the stingray is plush and cozy.
Level of Difficulty
This project is classified as beginner-friendly:
- Basic Techniques: Single crochet, increases, slip stitch, attaching pieces, and reattaching yarn.
- Challenges for Beginners: Working with bulky yarn may make stitches harder to see initially, but feeling for stitches and using stitch markers will help.
Materials Needed
- Yarn:
- Super bulky yarn in two colors for the stingray's top and belly (e.g., blue for the top, white for the belly).
- Crochet Hook: 7mm hook (smaller than recommended for bulky yarn to make tighter stitches).
- Safety Eyes: 10mm safety eyes for the stingray's face.
- Stuffing: Polyfill, fiberfill, or yarn scraps for the stingray's body.
- Scissors: For cutting yarn.
- Yarn Needle: For tucking in yarn ends.
- Optional: Stitch markers to mark stitches when working with bulky yarn.
Step-by-Step Instructions for Crocheting a Stingray
Part 1: Crocheting the Top Part of the Stingray
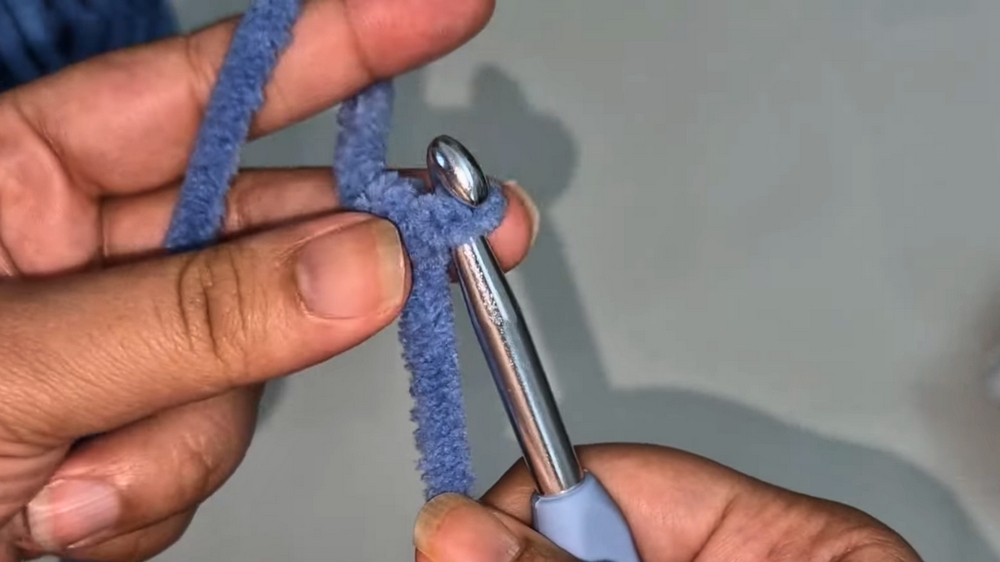
- Create the Slip Knot:
- Begin with a slip knot and insert your crochet hook.
- Start with a Foundation Chain:
- Chain 4 stitches and tighten.
- Row 1 – Begin Single Crochets:
- Skip the first stitch.
- Insert one single crochet into the second stitch, then place two single crochets (increase) into the next stitch.
- Place one final single crochet into the last stitch. You should have a total of 4 stitches.
- Chain 1 and turn your work.
- Row 2 – Increase:
- Place 2 single crochets (increase) into each stitch across the row, bringing the total stitch count to 8 stitches.
- Chain 1 and turn your work.
- Row 3:
- Start with 2 single crochets (increase) in the first stitch. Then, single crochet across the row until the last stitch, where you’ll crochet another increase (2 single crochets).
- Total stitches for this row: 10 stitches.
- Rows 4-7:
- Follow the same pattern:
- Chain 1, turn, increase in the first and last stitches of each row, and single crochet across.
- Add 2 stitches per row, ending with 18 stitches by row 7.
- Follow the same pattern:
- Row 8 – No Increases:
- Place 1 single crochet into each stitch (18 stitches total).
- Finish the Top:
- Snip the yarn and pull through. Set aside.
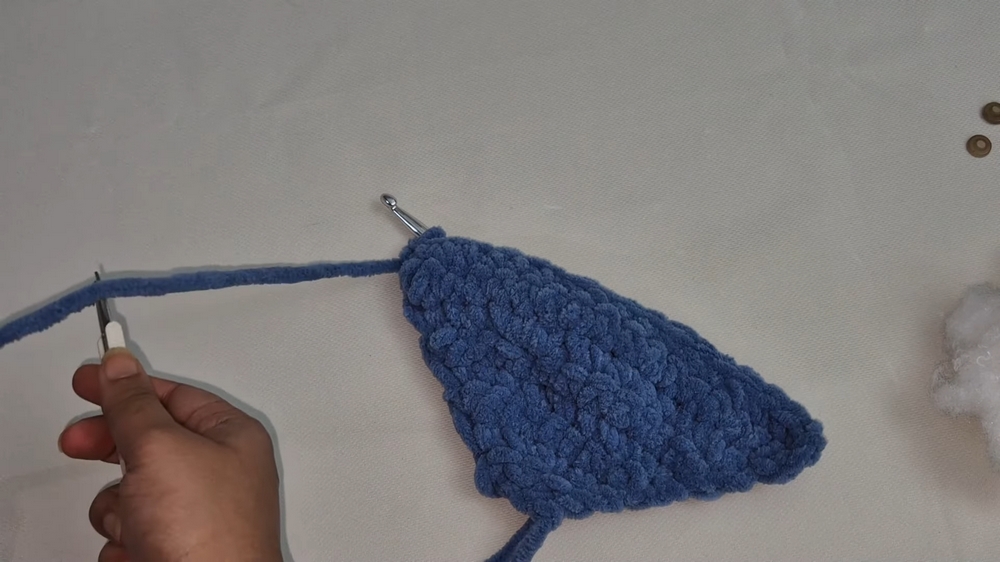
Part 2: Crocheting the Belly (White Side)
- Repeat all steps from Part 1 to create the belly using white yarn (or your chosen color for the underside).
Part 3: Making the Head of the Stingray
- Divide the Top into Three Sections:
- With 18 stitches, divide them into three sections of 6 stitches each.
- Attach Yarn to the Center Section:
- Count down 6 stitches from one side and attach the yarn to the 7th stitch.
- Crochet the Head:
- Work 6 single crochets across this section.
- Turn your work and crochet back across the same 6 stitches. Repeat once more, then leave the yarn attached to join later.
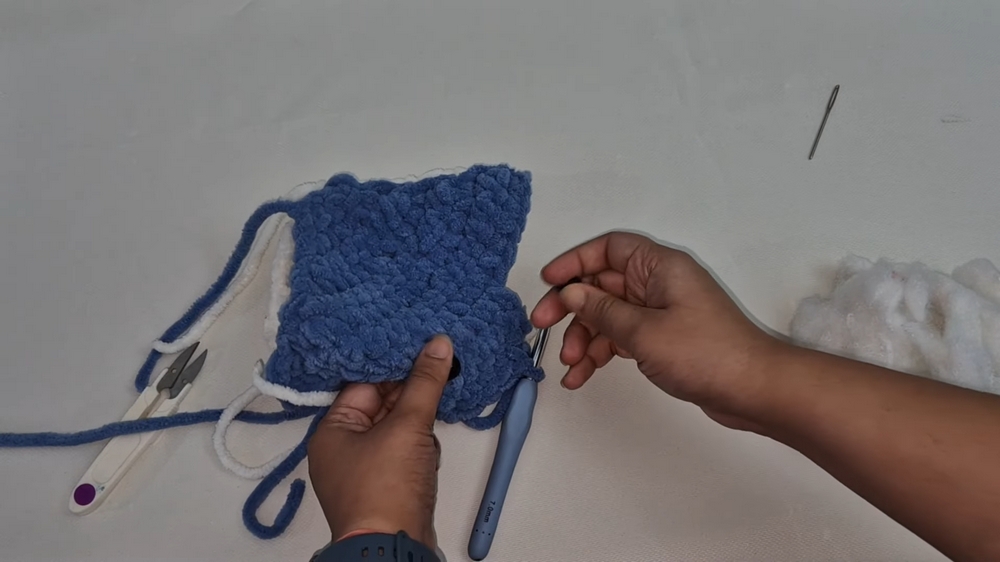
Part 4: Attaching the Top and Belly
- Align the Pieces:
- Place the top and belly together, ensuring edges are aligned.
- Join the Pieces:
- Insert the crochet hook into the first stitch of both pieces and perform single crochets around the edges.
- Be sure to crochet through both layers to securely join them.
- Attach Safety Eyes:
- Place eyes on the top section (head area) before completely sealing the pieces. Attach safety backings securely. Ensure proper alignment.
- Leave an Opening:
- Finish joining most of the stingray but leave a small opening for stuffing.
Part 5: Stuffing the Stingray
- Add Stuffing:
- Carefully stuff the stingray with fiberfill or yarn scraps. Flatten the stuffing slightly to keep the stingray plush without overstuffing.
- Finish Closing:
- Crochet the final stitches to close the opening.
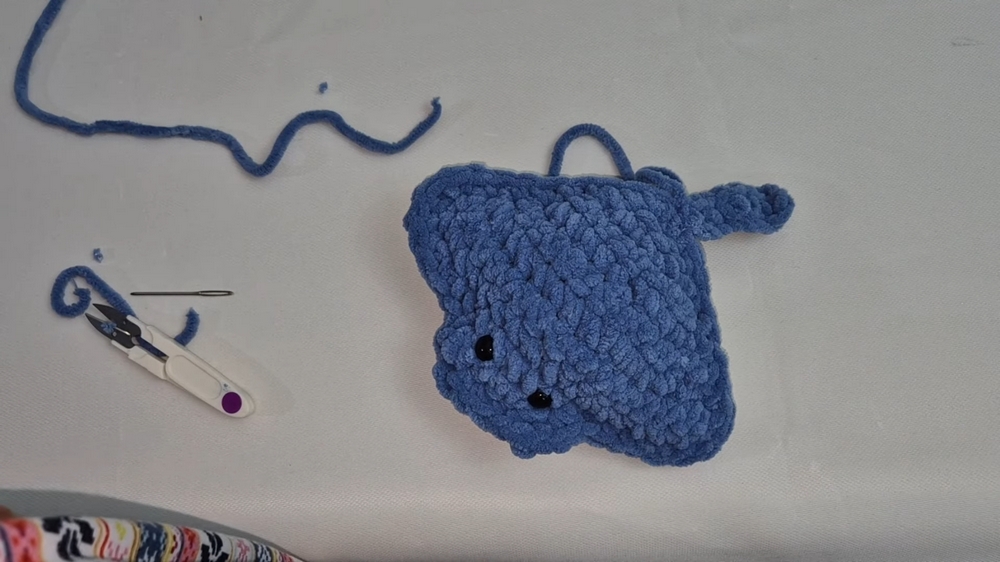
Part 6: Adding the Stingray Tail
- Create the Tail:
- Attach yarn to the back edge of the stingray and chain 8 stitches.
- Skip the first chain and single crochet into each subsequent chain (total: 7 stitches) until you reach the body.
- Secure the Tail:
- Attach the tail to the body with a slip stitch.
- Weave Ends:
- Tuck yarn ends into their respective colors (blue into blue, white into white) to keep a clean finish.
Tutor’s Suggestions
- Use Stitch Markers: Working with bulky yarn can make stitches harder to see. Mark rows and key stitches for easy tracking.
- Be Precise with Safety Eyes: Pre-mark positioning and ensure the eyes are symmetrical before attaching permanently.
- Stuff Moderately: Avoid overstuffing the stingray; keep it flat and soft for a plushy look.
Uses of the Crochet Stingray
- Room Decor: Use as an adorable handmade decoration for bedrooms or nurseries.
- Gift Item: Makes a perfect homemade gift for loved ones or kids.
- Market-Friendly Item: Quick to make, ideal for selling at craft fairs or online crochet shops.
Tip
If you prefer a smaller stingray, opt for thinner yarn and adjust the number of rows accordingly. Conversely, use thicker yarn for a larger and more plush stingray.
Conclusion
This low-sew crochet stingray is a delightful and beginner-friendly project. The pattern involves basic techniques but offers a charming and polished result a soft, squishy stingray perfect for gifts, decor, or fairs. With minimal sewing and customizable colors, it’s an easy project sure to bring joy to anyone who makes or receives it.


Leave a Reply